CFOCer VESC V6 BLDC Motor Controller Setup Guide
Introduction
The VESC Project, started in 2017, provides open-source hardware and software for sensored brushless DC motor control.
I needed several VESC version 6 brushless motor controllers for a project. After looking at all the different options available, I decided to build the Cheap FOCer 2, with a few tweaks for manufacturability. I went for the highest quality components I could source, including Infineon MOSFETs and Rubycon capacitors. I also ordered some extras, which can be purchased on the Vertile store.
If you would like to support my work:
Assembled, flashed, and tested CFOCer BLDC Motor Control Boards can be purchased on my online store: https://store.vertile.com/product/cfocer
Add the case as an option when purchasing the CFOCer for a discount, or purchase it separately: https://store.vertile.com/product/cfocer-case
Alternatively, control boards and cases are available on my Tindie store: https://www.tindie.com/stores/vertile/
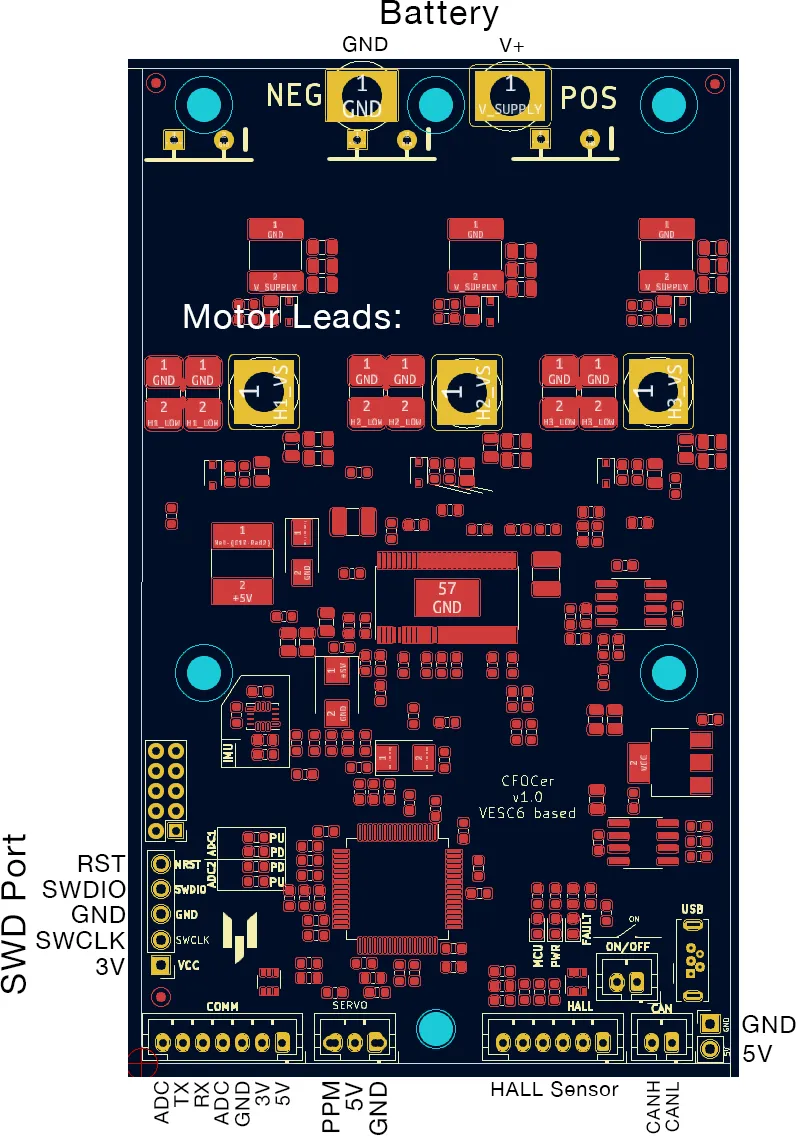
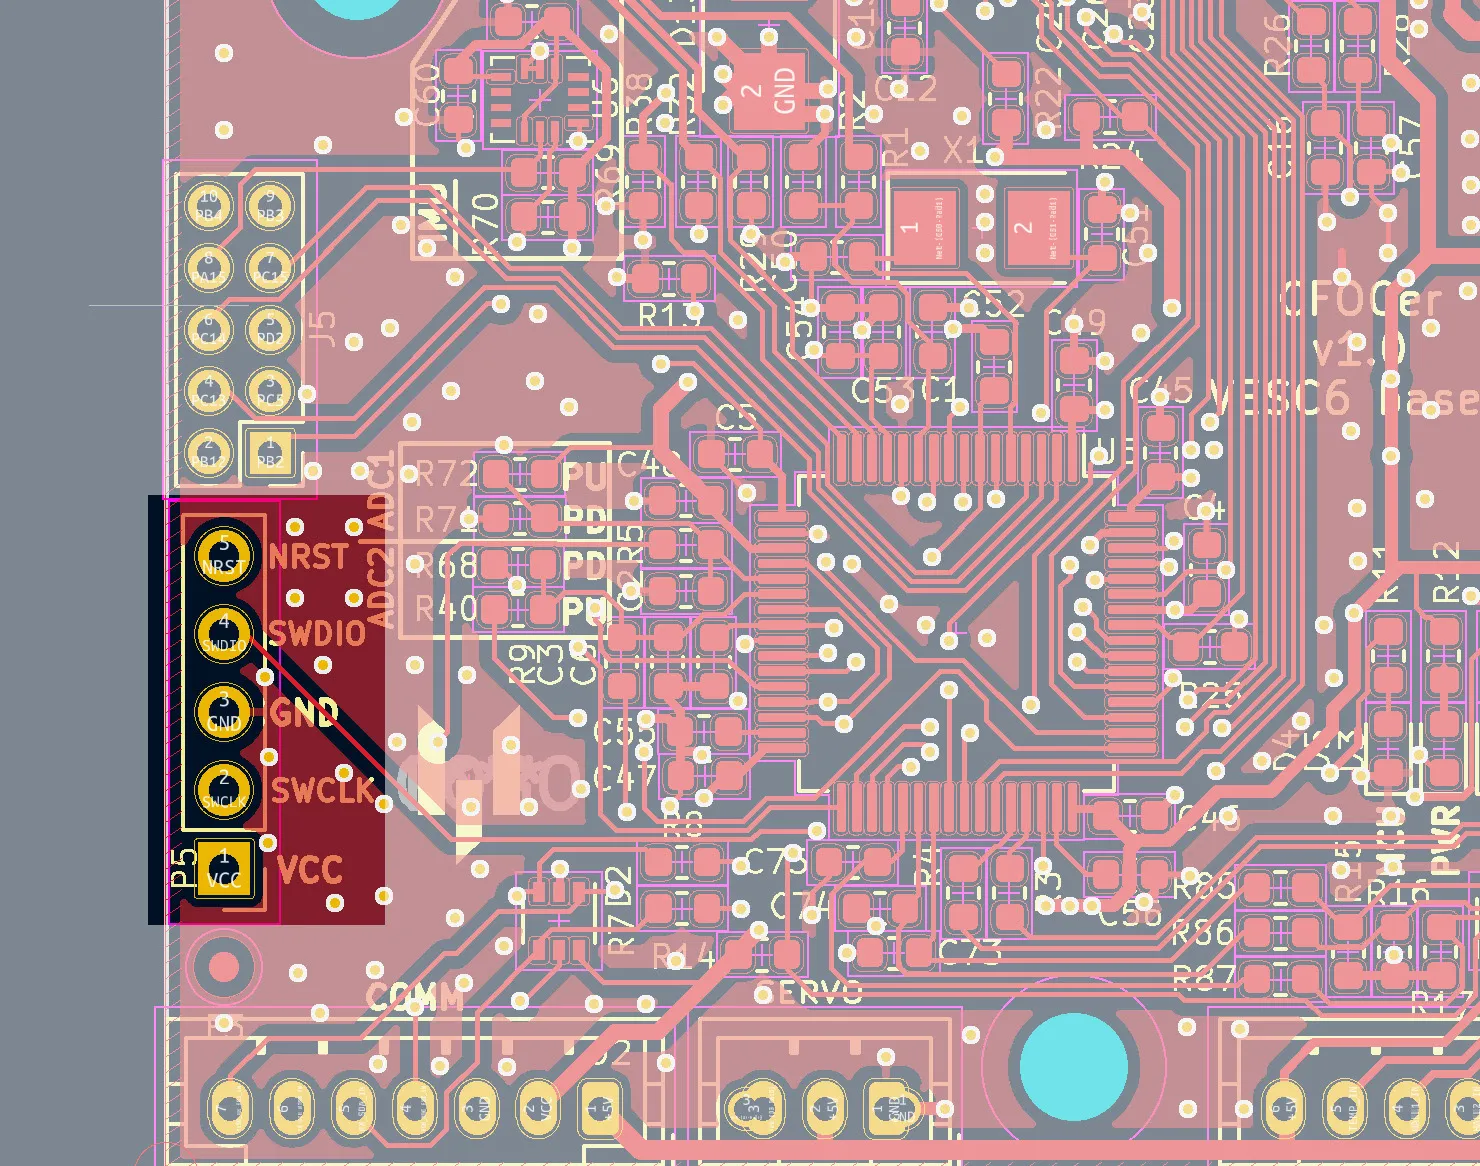
Pinout
This is the pinout for the Vertile CFOCer VESC v6.
Hardware Assembly
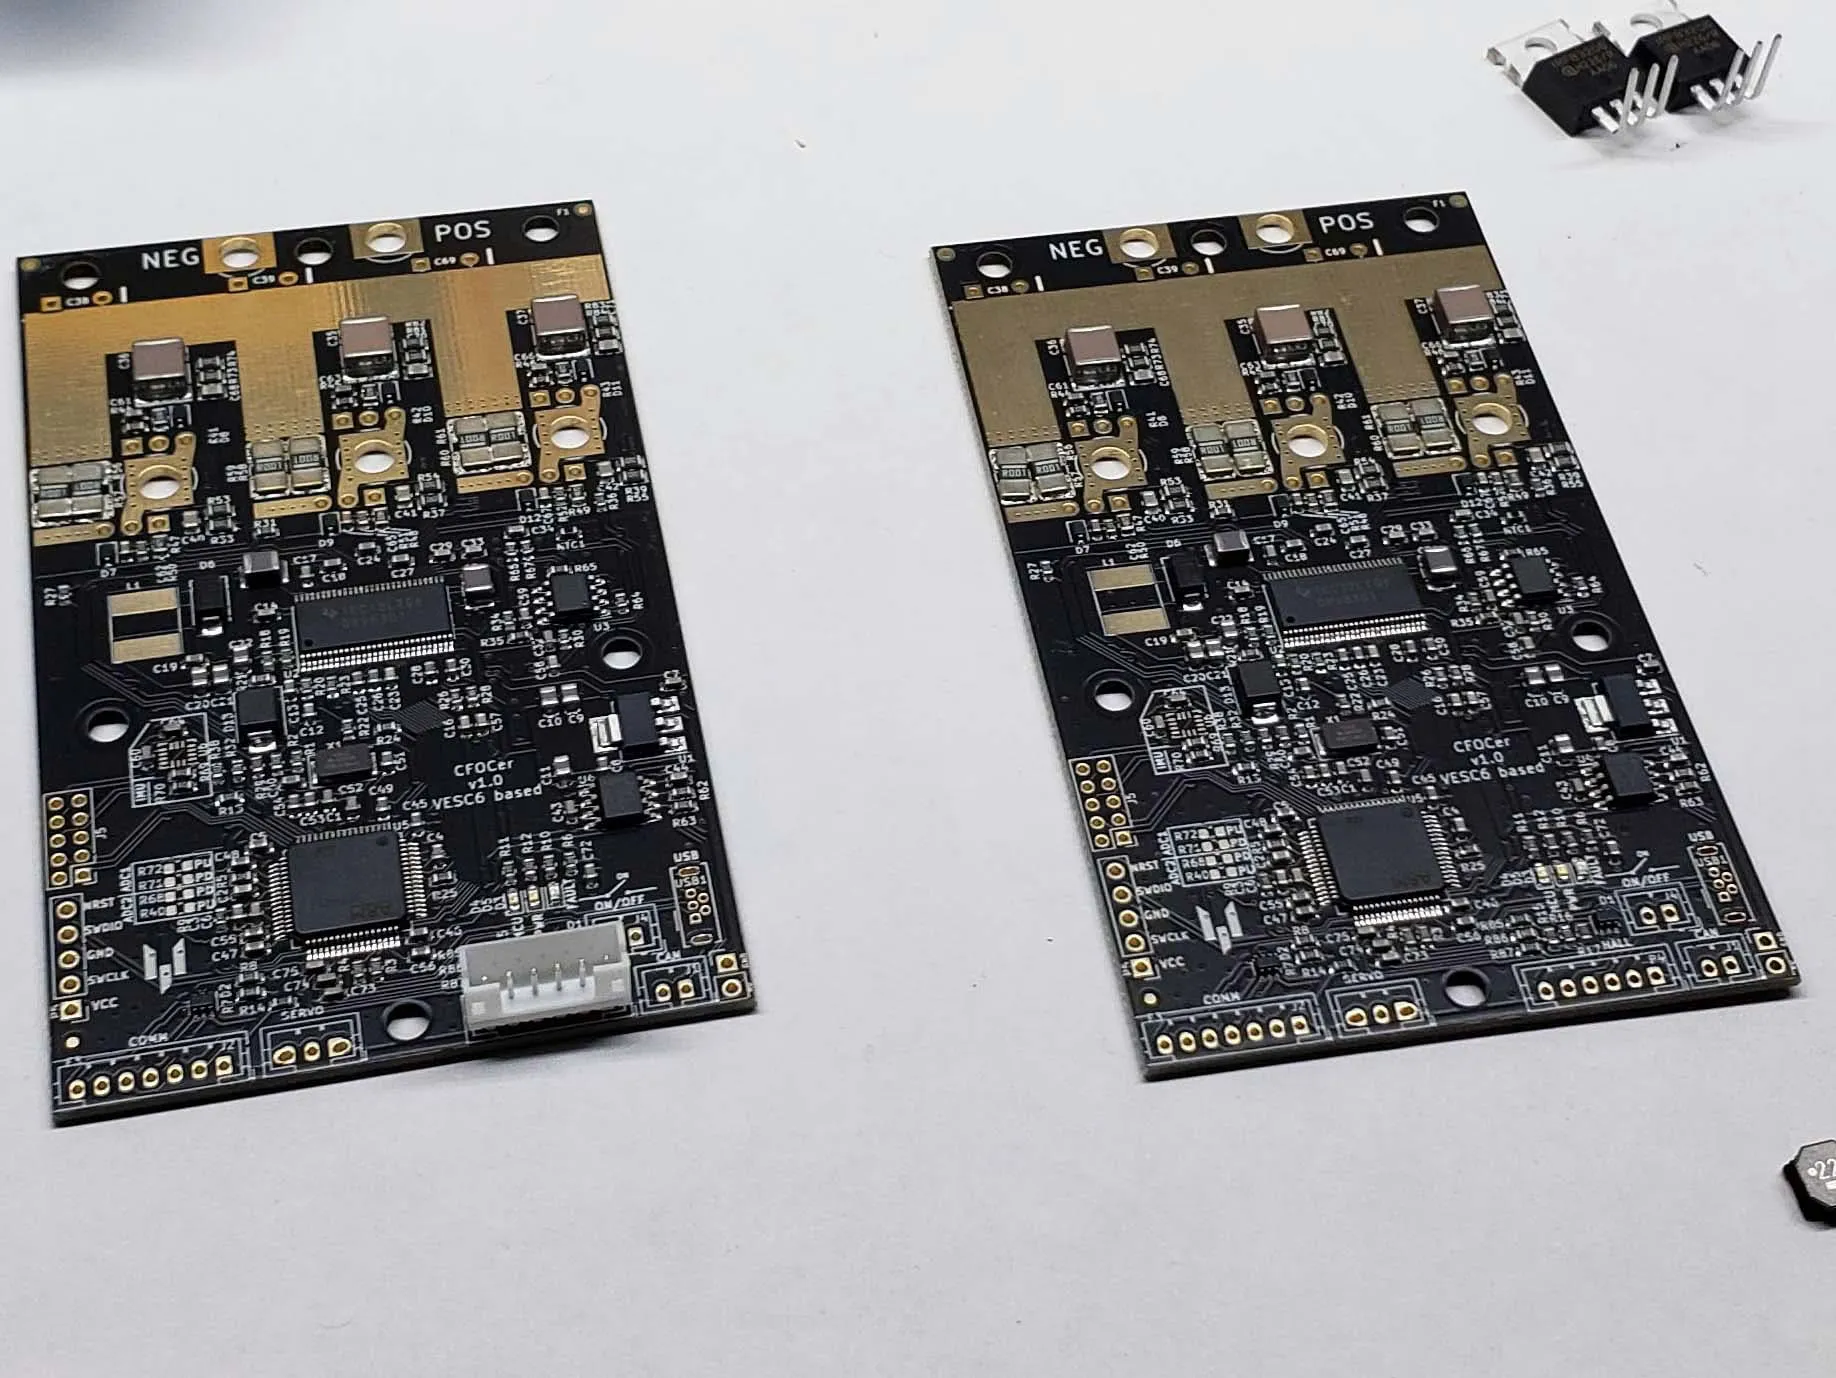
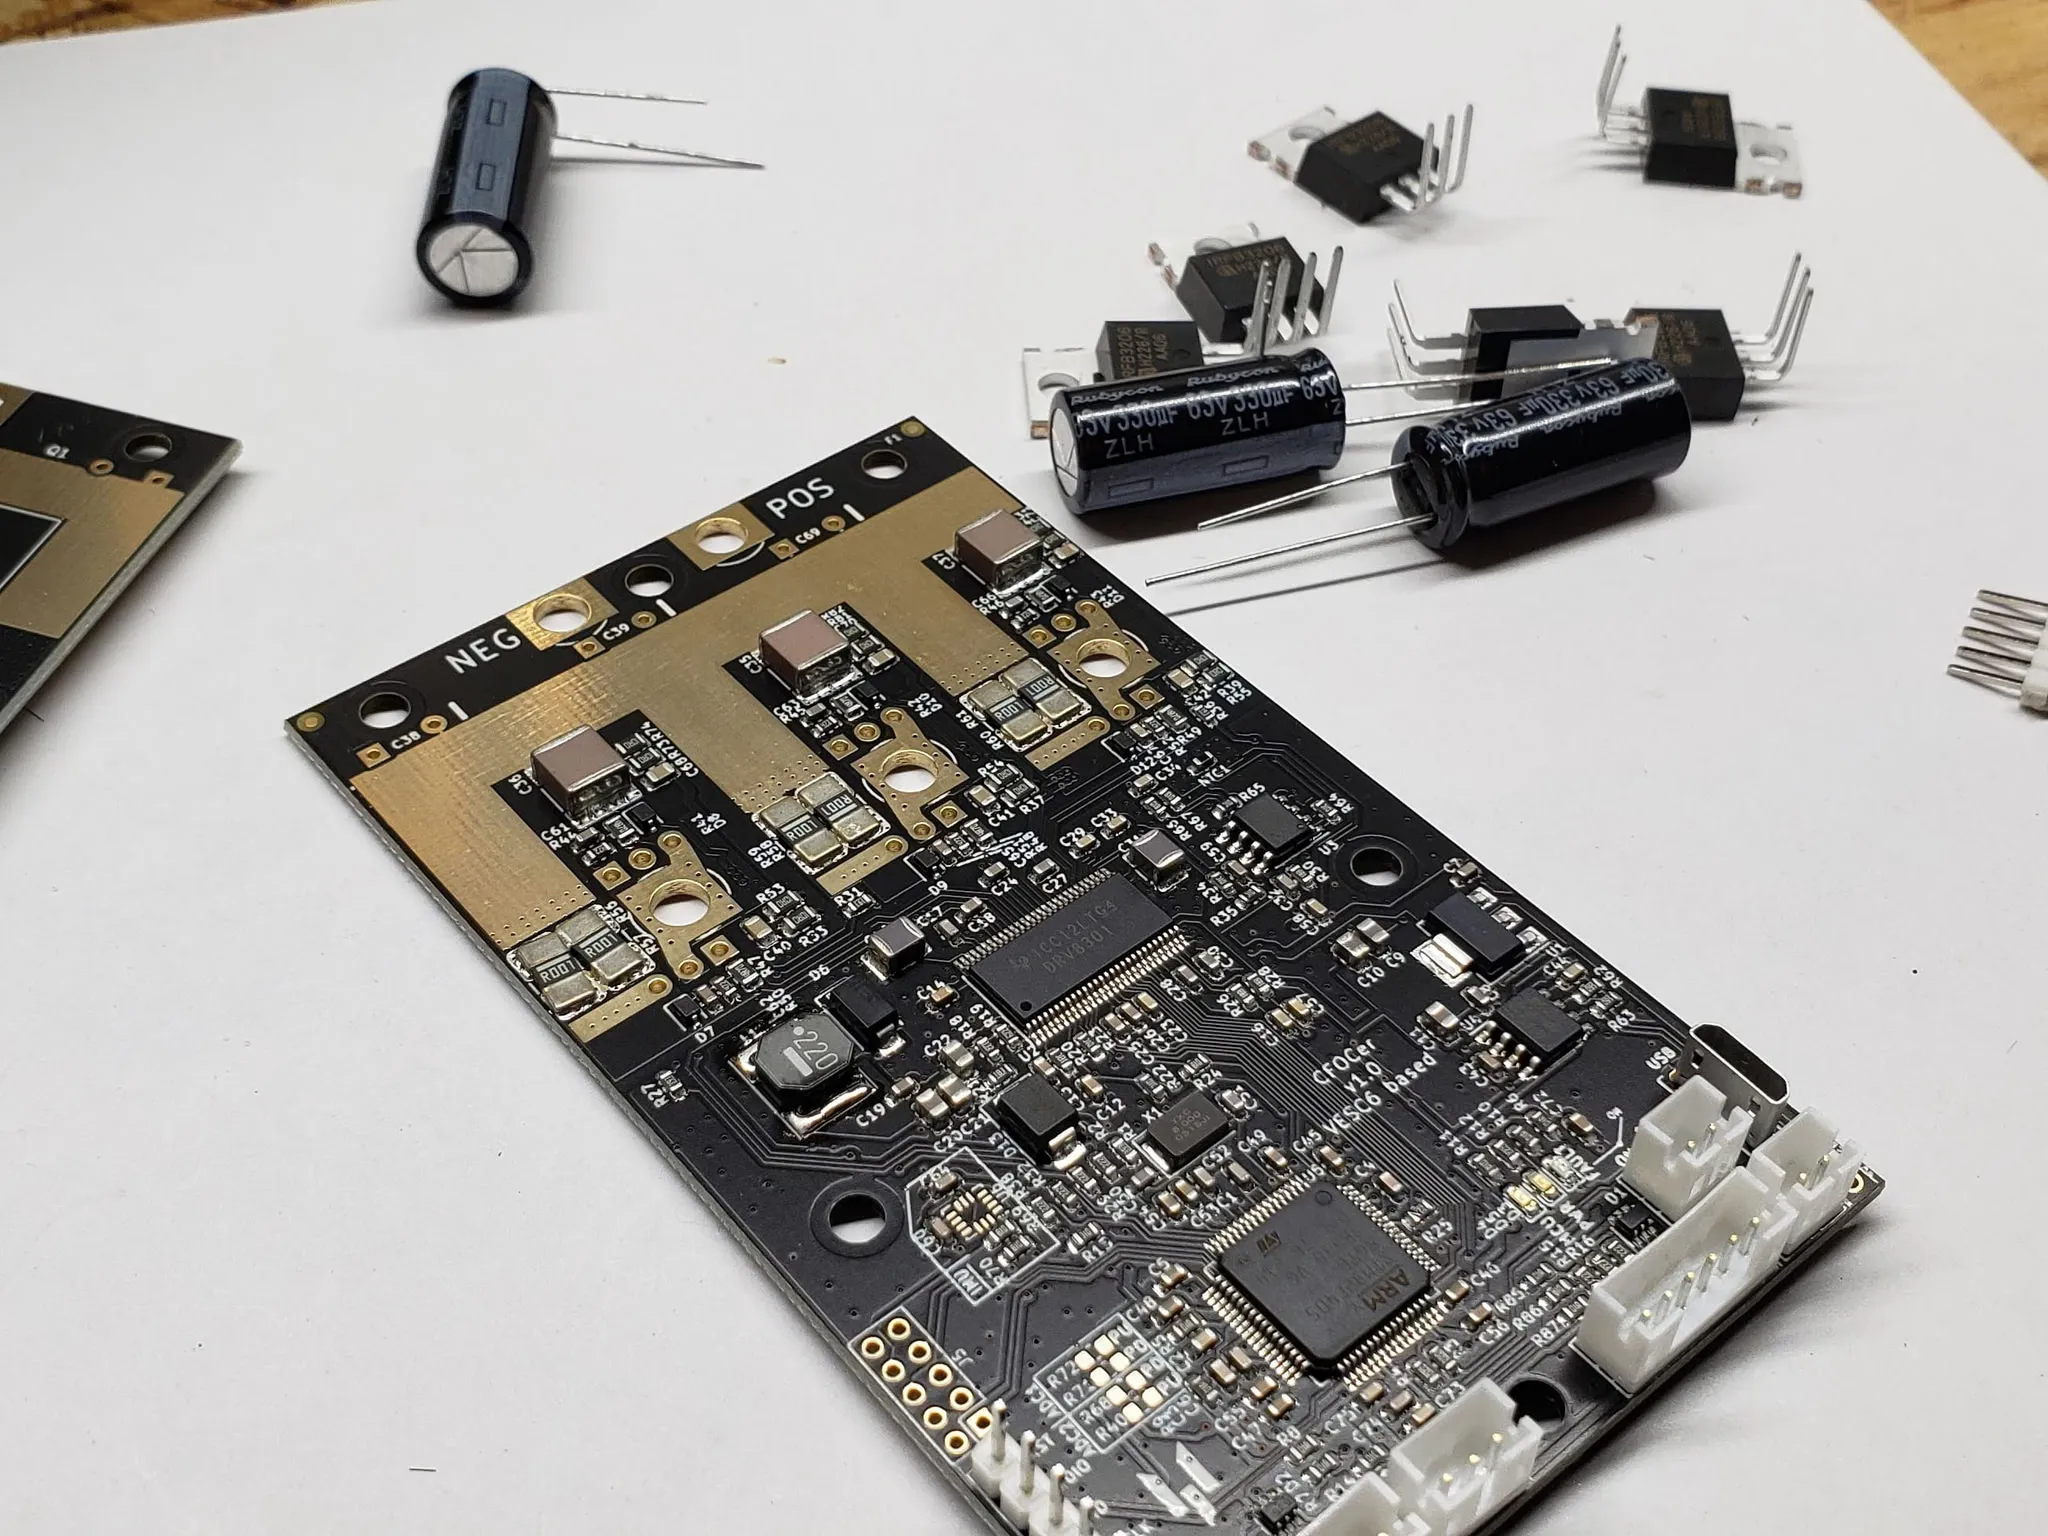
I ordered the PCBs with most of the SMD components already mounted. I only had to hand-solder the SMD inductors. I also soldered the 2mm JST plugs, Infineon MOSFETs, and Rubycon capacitors.
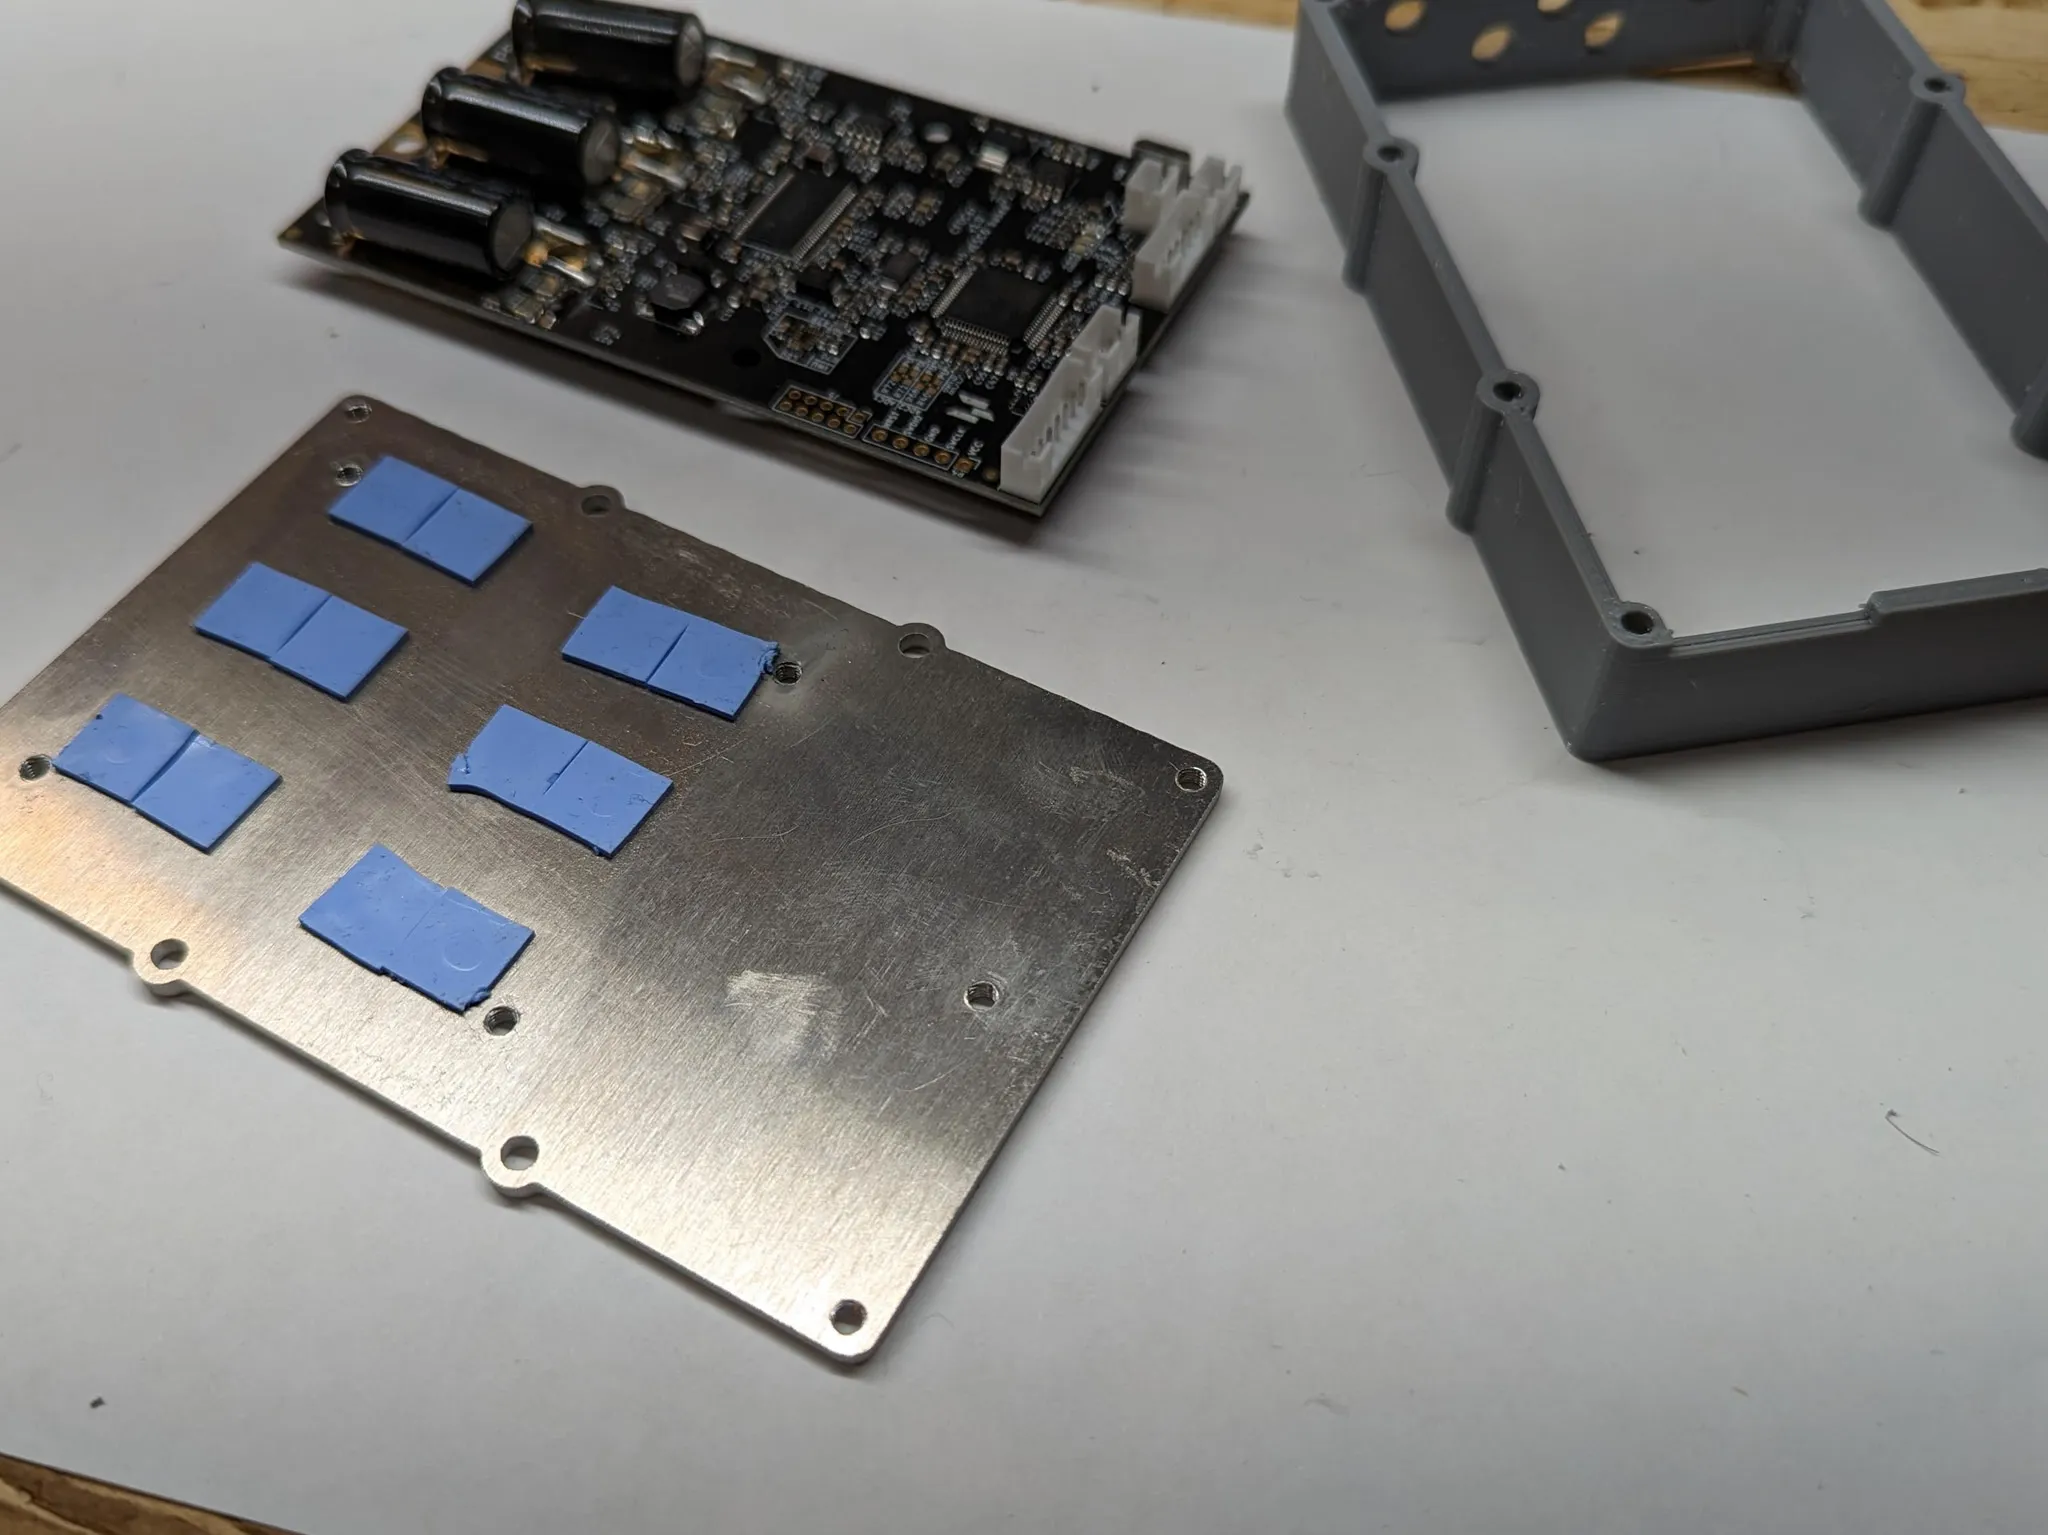
I built my own case, which is a combination of a CNC-milled aluminum heatsink and a 3D-printed shell.


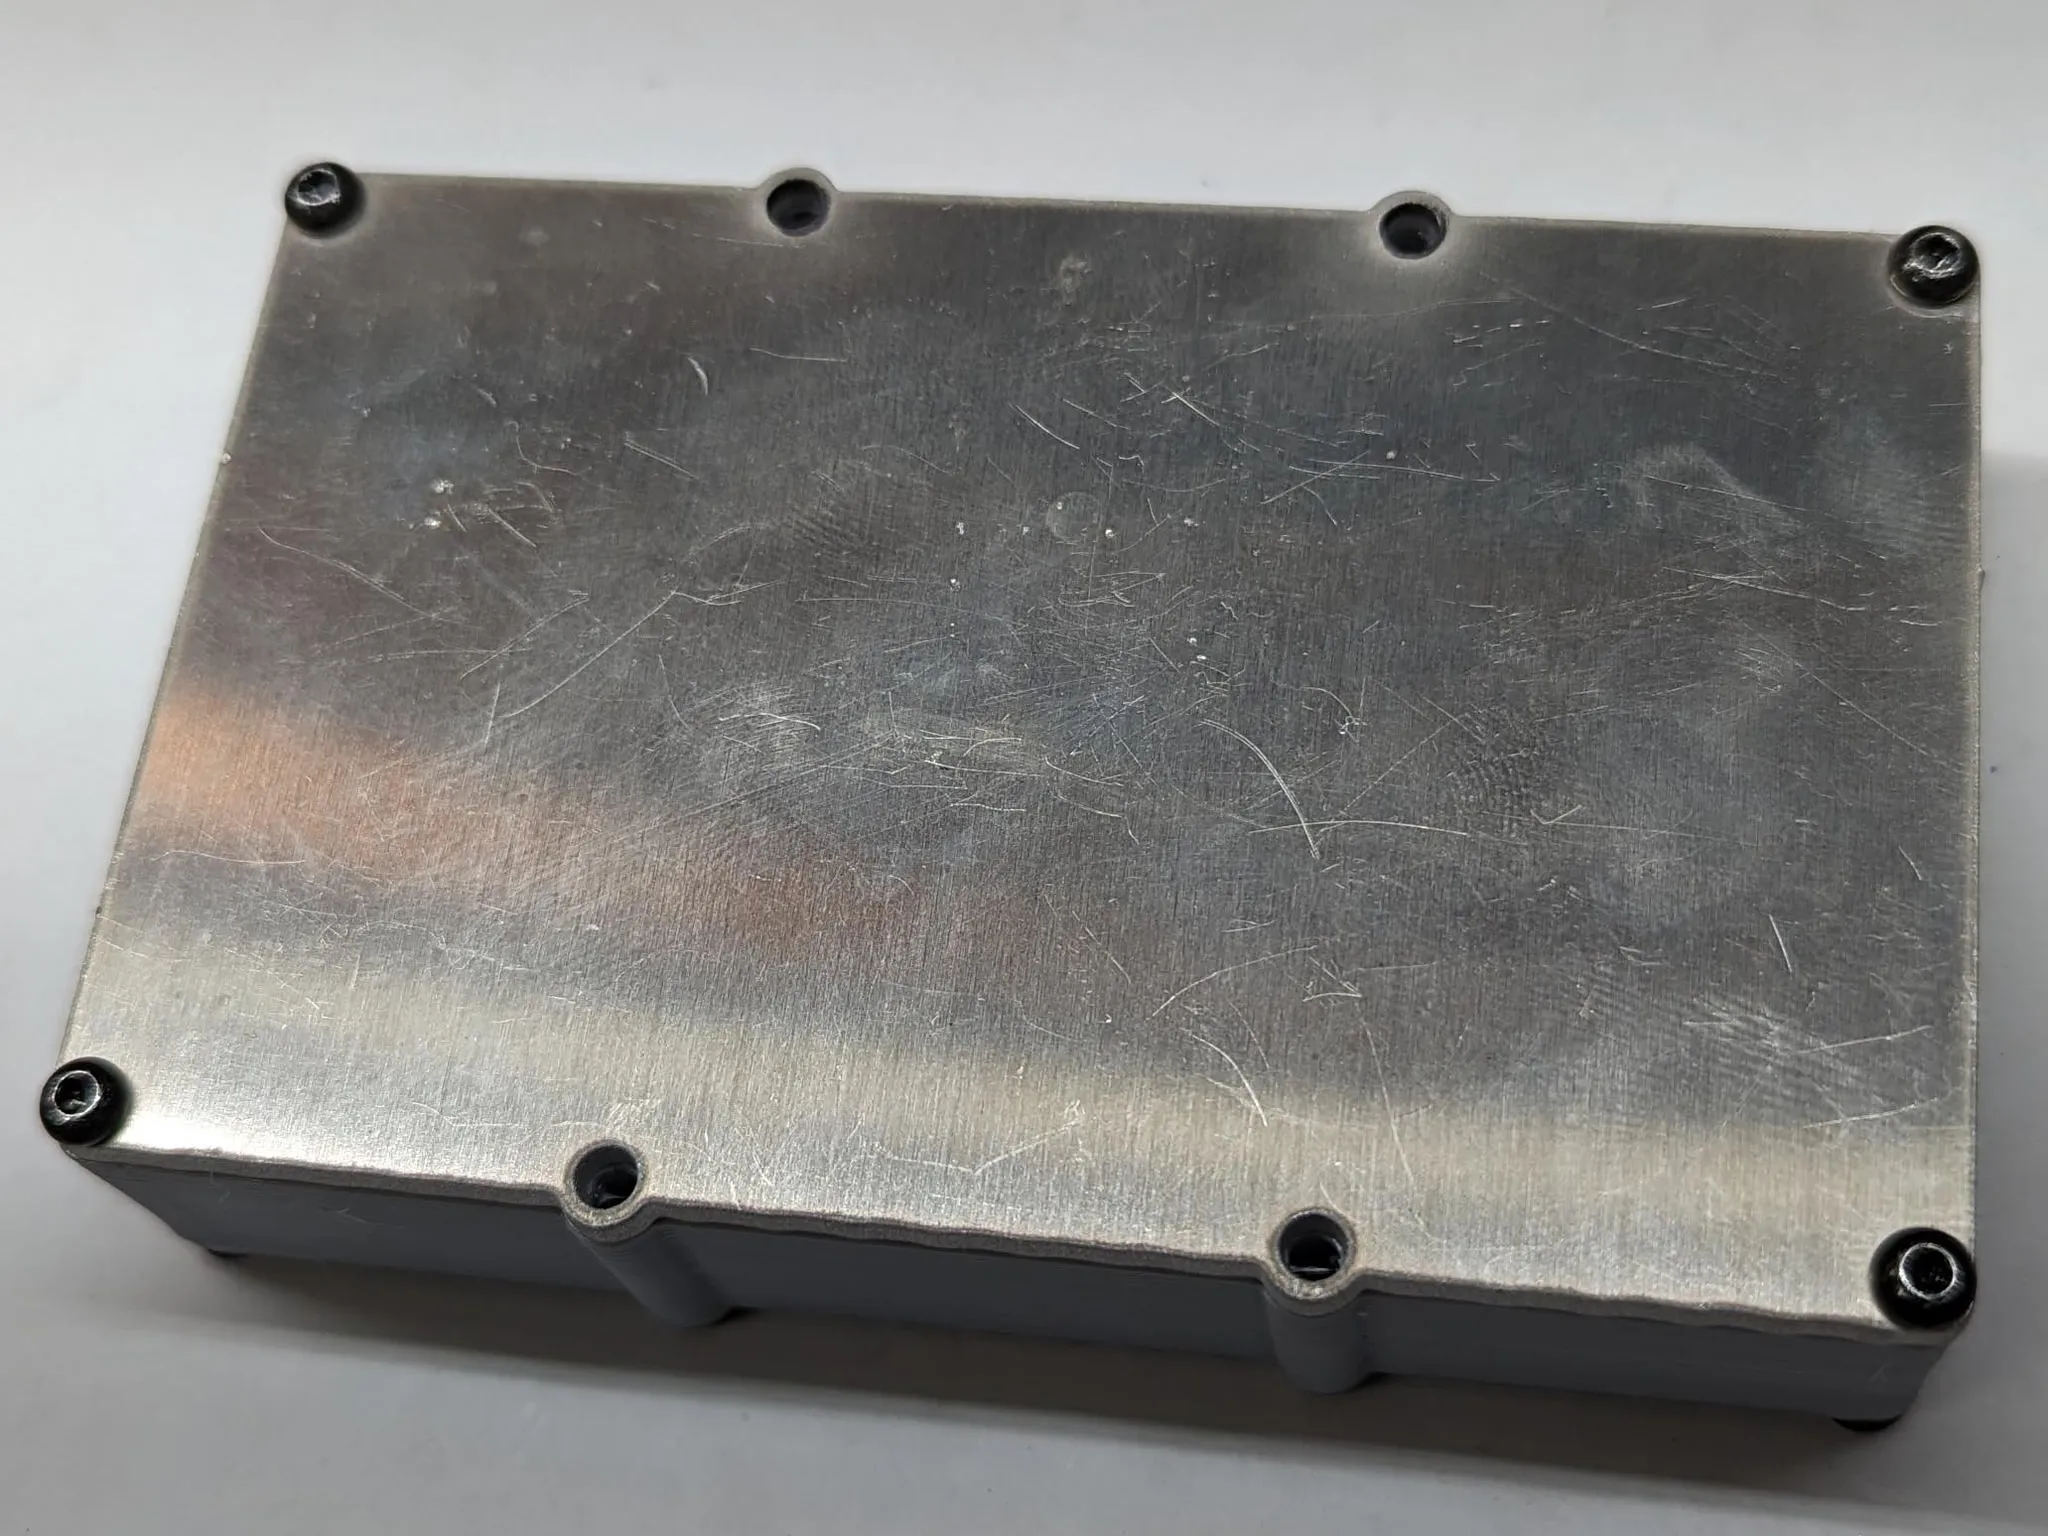
I used silicone heat pads to electrically isolate the MOSFETs from the heatsink. In the future, I may try to anodize the aluminum heatsinks.
Case Design
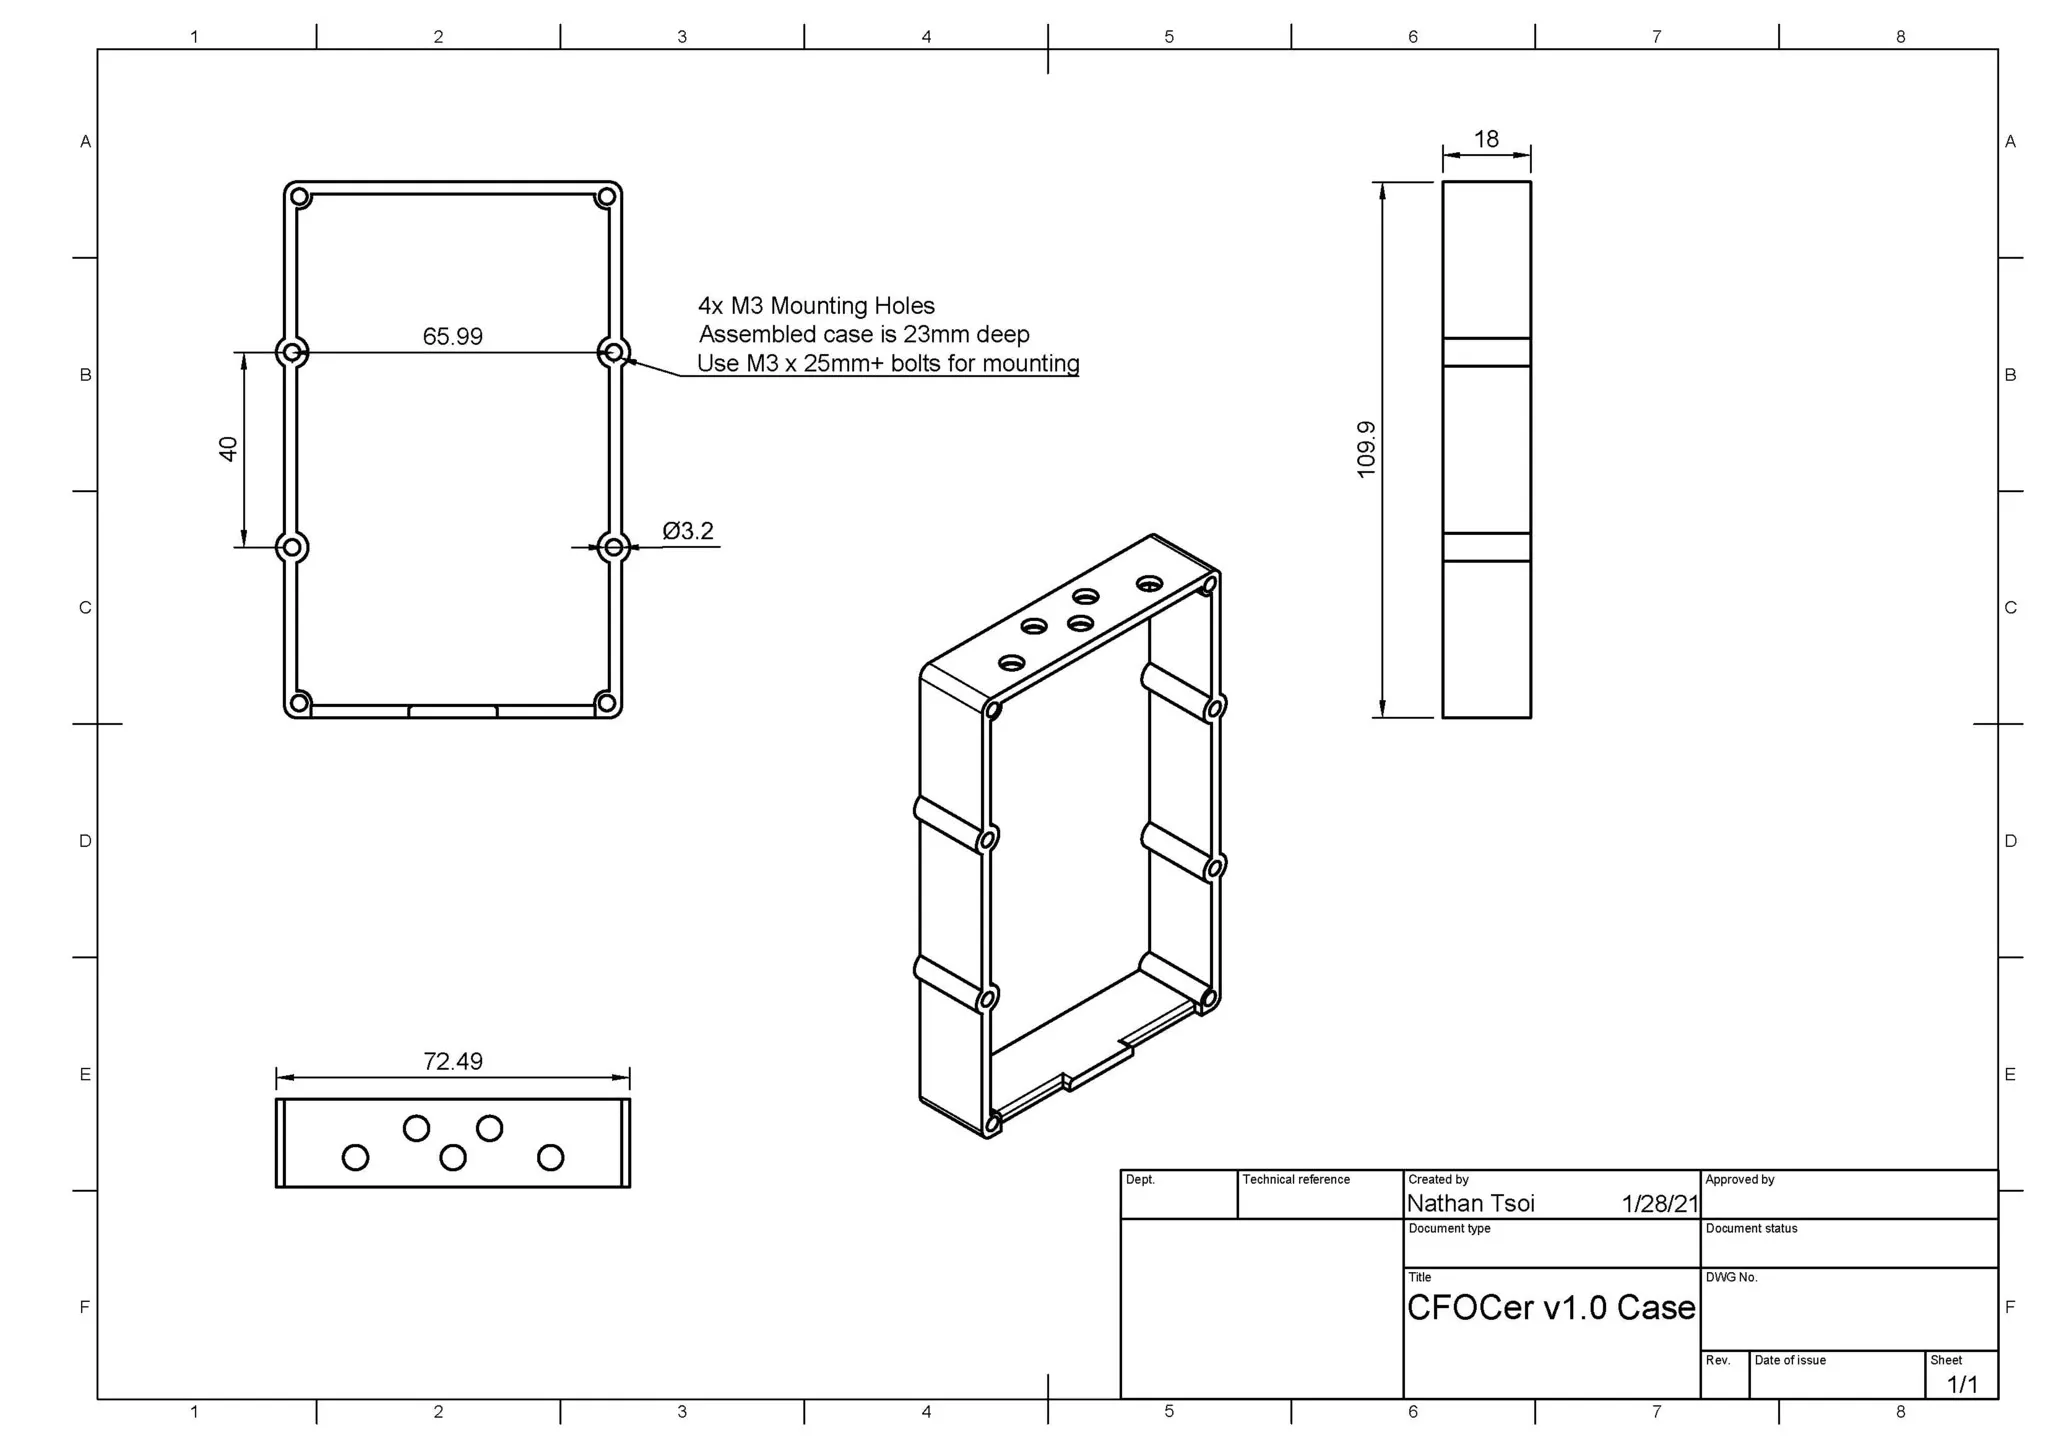
I designed an aluminum and 3D-printed case that is easily assembled with M3 bolts. It also has a through-hole mounting pattern to make mounting the case easy. See the following drawing for details on the mounting pattern. The assembled width of the case is 23mm, so you’ll want to use M3 bolts longer than 23mm for mounting it to another surface.
Case design files are available on Thingiverse under the Creative Commons Attribution-NonCommercial-ShareAlike license if you have access to a CNC and a 3D printer and would like to make your own.
Case Hardware
You’ll need a few things to assemble the case, and optionally mount the case on another surface:
- 1mm Silicone heat pad for electrical isolation
- 5mm Nylon spacer
- 5x M3x8mm bolts to mount the PCB to the case
- 8x M3x6mm bolts for case assembly
- (Optional) 4x M3x25mm+ bolts for mounting
Software Setup
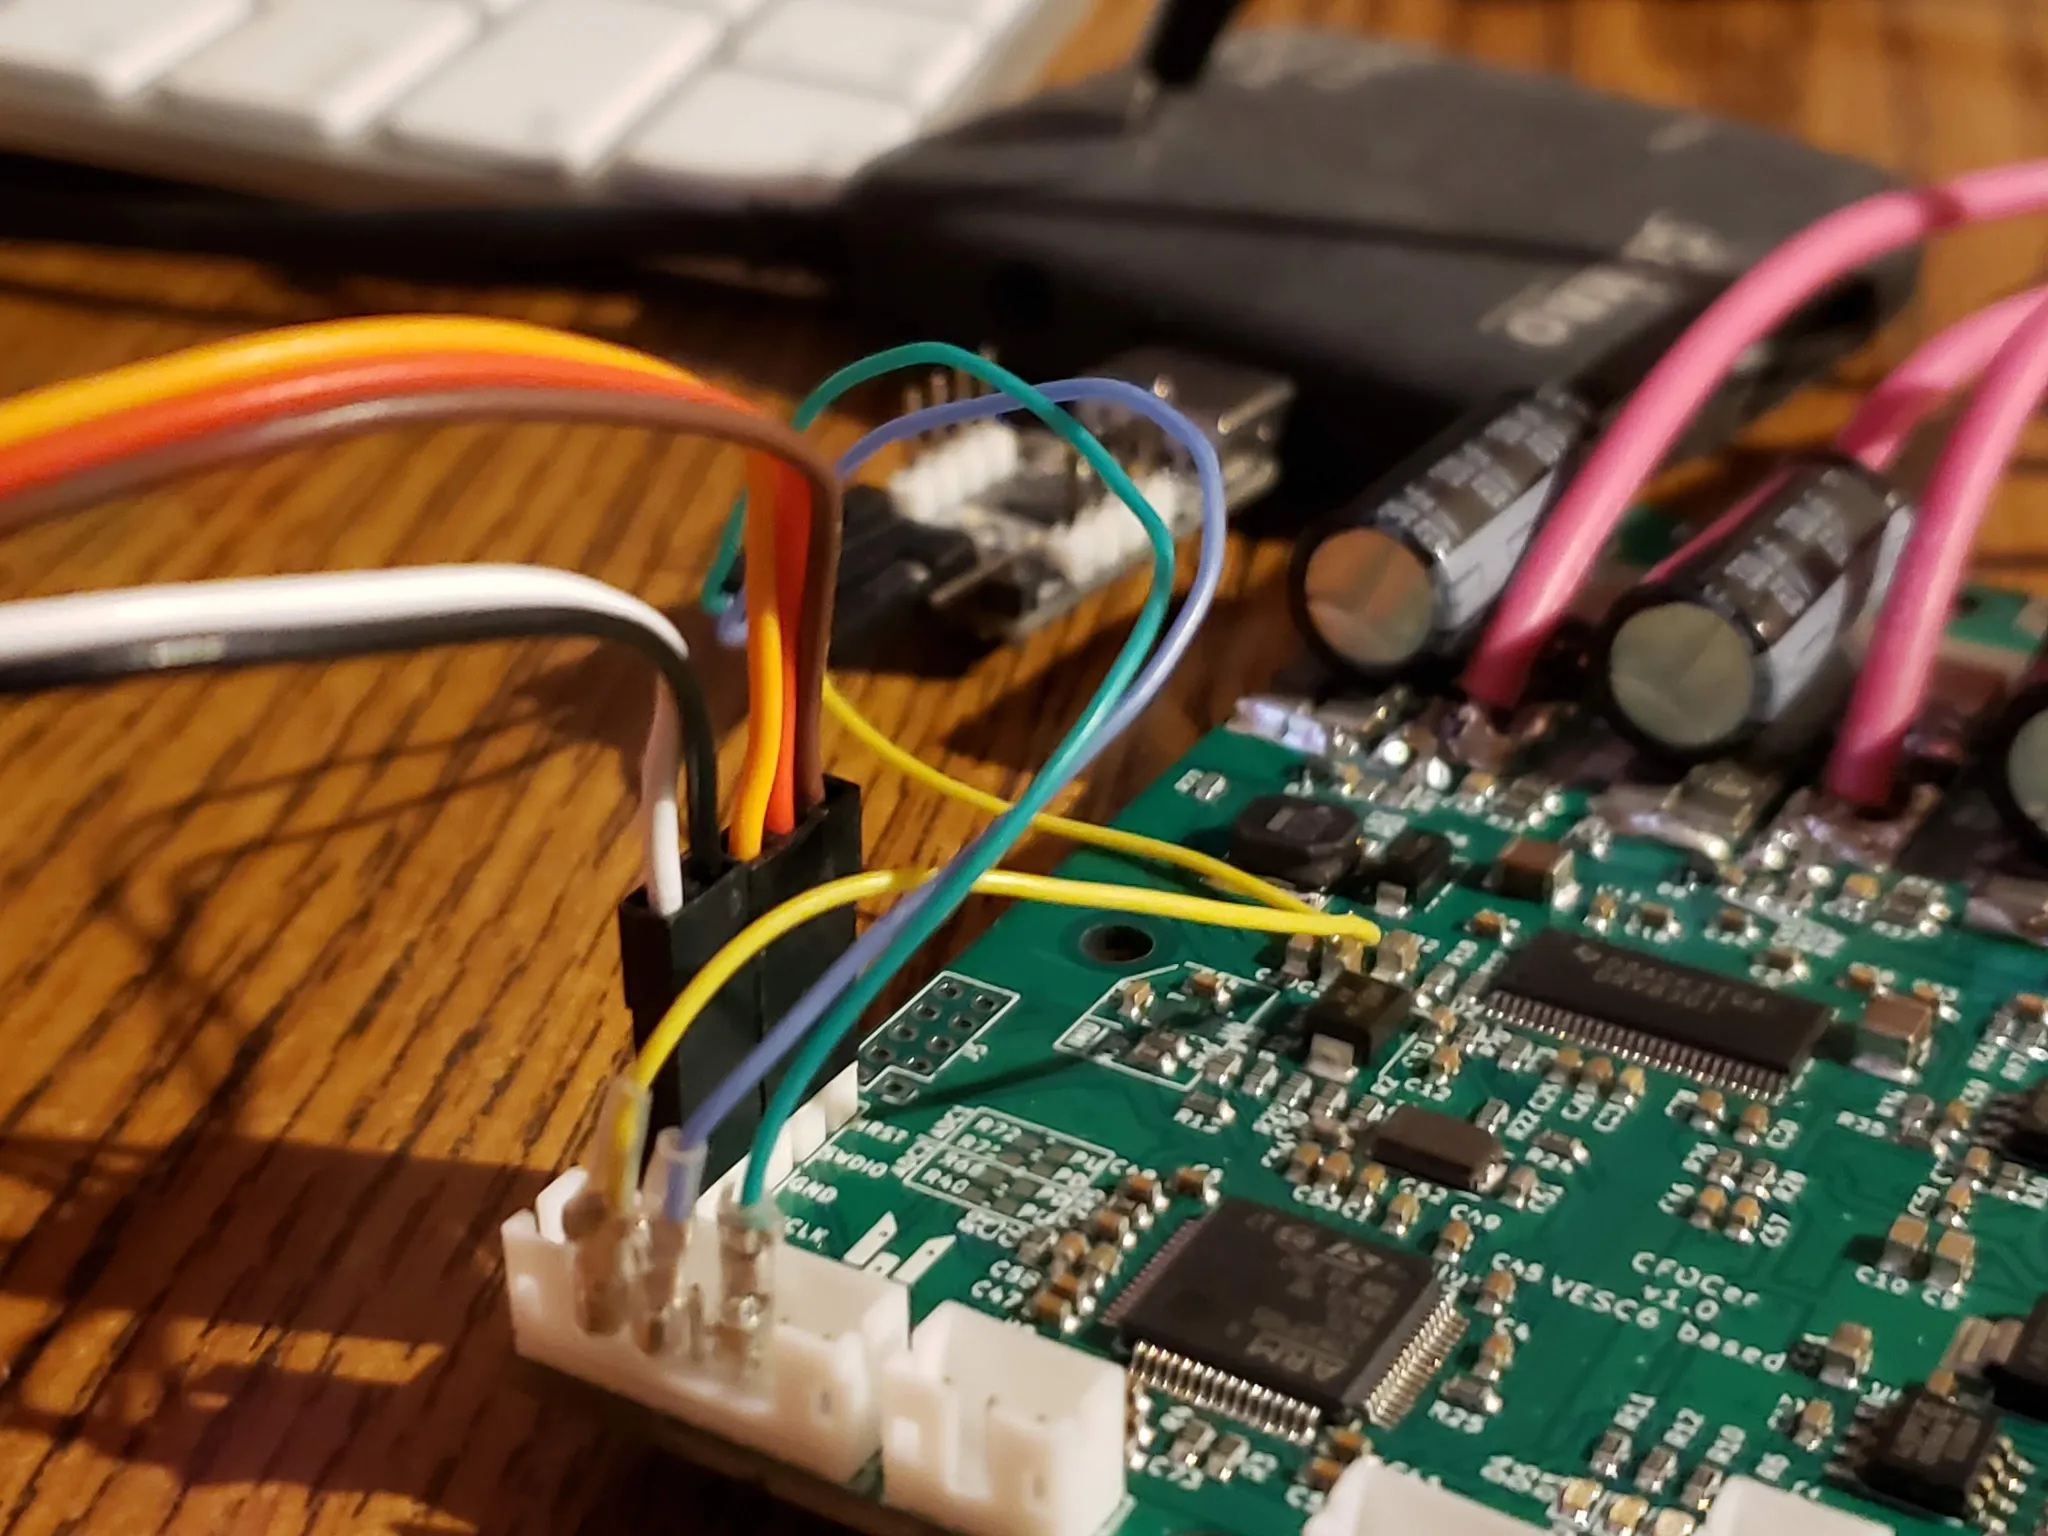
Once the new hardware is assembled, I flash each board with the initial firmware, which can be compiled from this branch: /downloads/https-github-com-nathantsoi-bl. The following steps describe the initial flashing process. The same process can also be used to re-flash an existing CFOCer to reset it to the initial state. For this first flash, you’ll need an ST-Link adapter.
Initial Flashing
Clone the repo and check out the branch like so:
git clone https://github.com/nathantsoi/bldc
cd bldc
git checkout cfocer-black-2022-09-23
Install the compiler and toolchain:
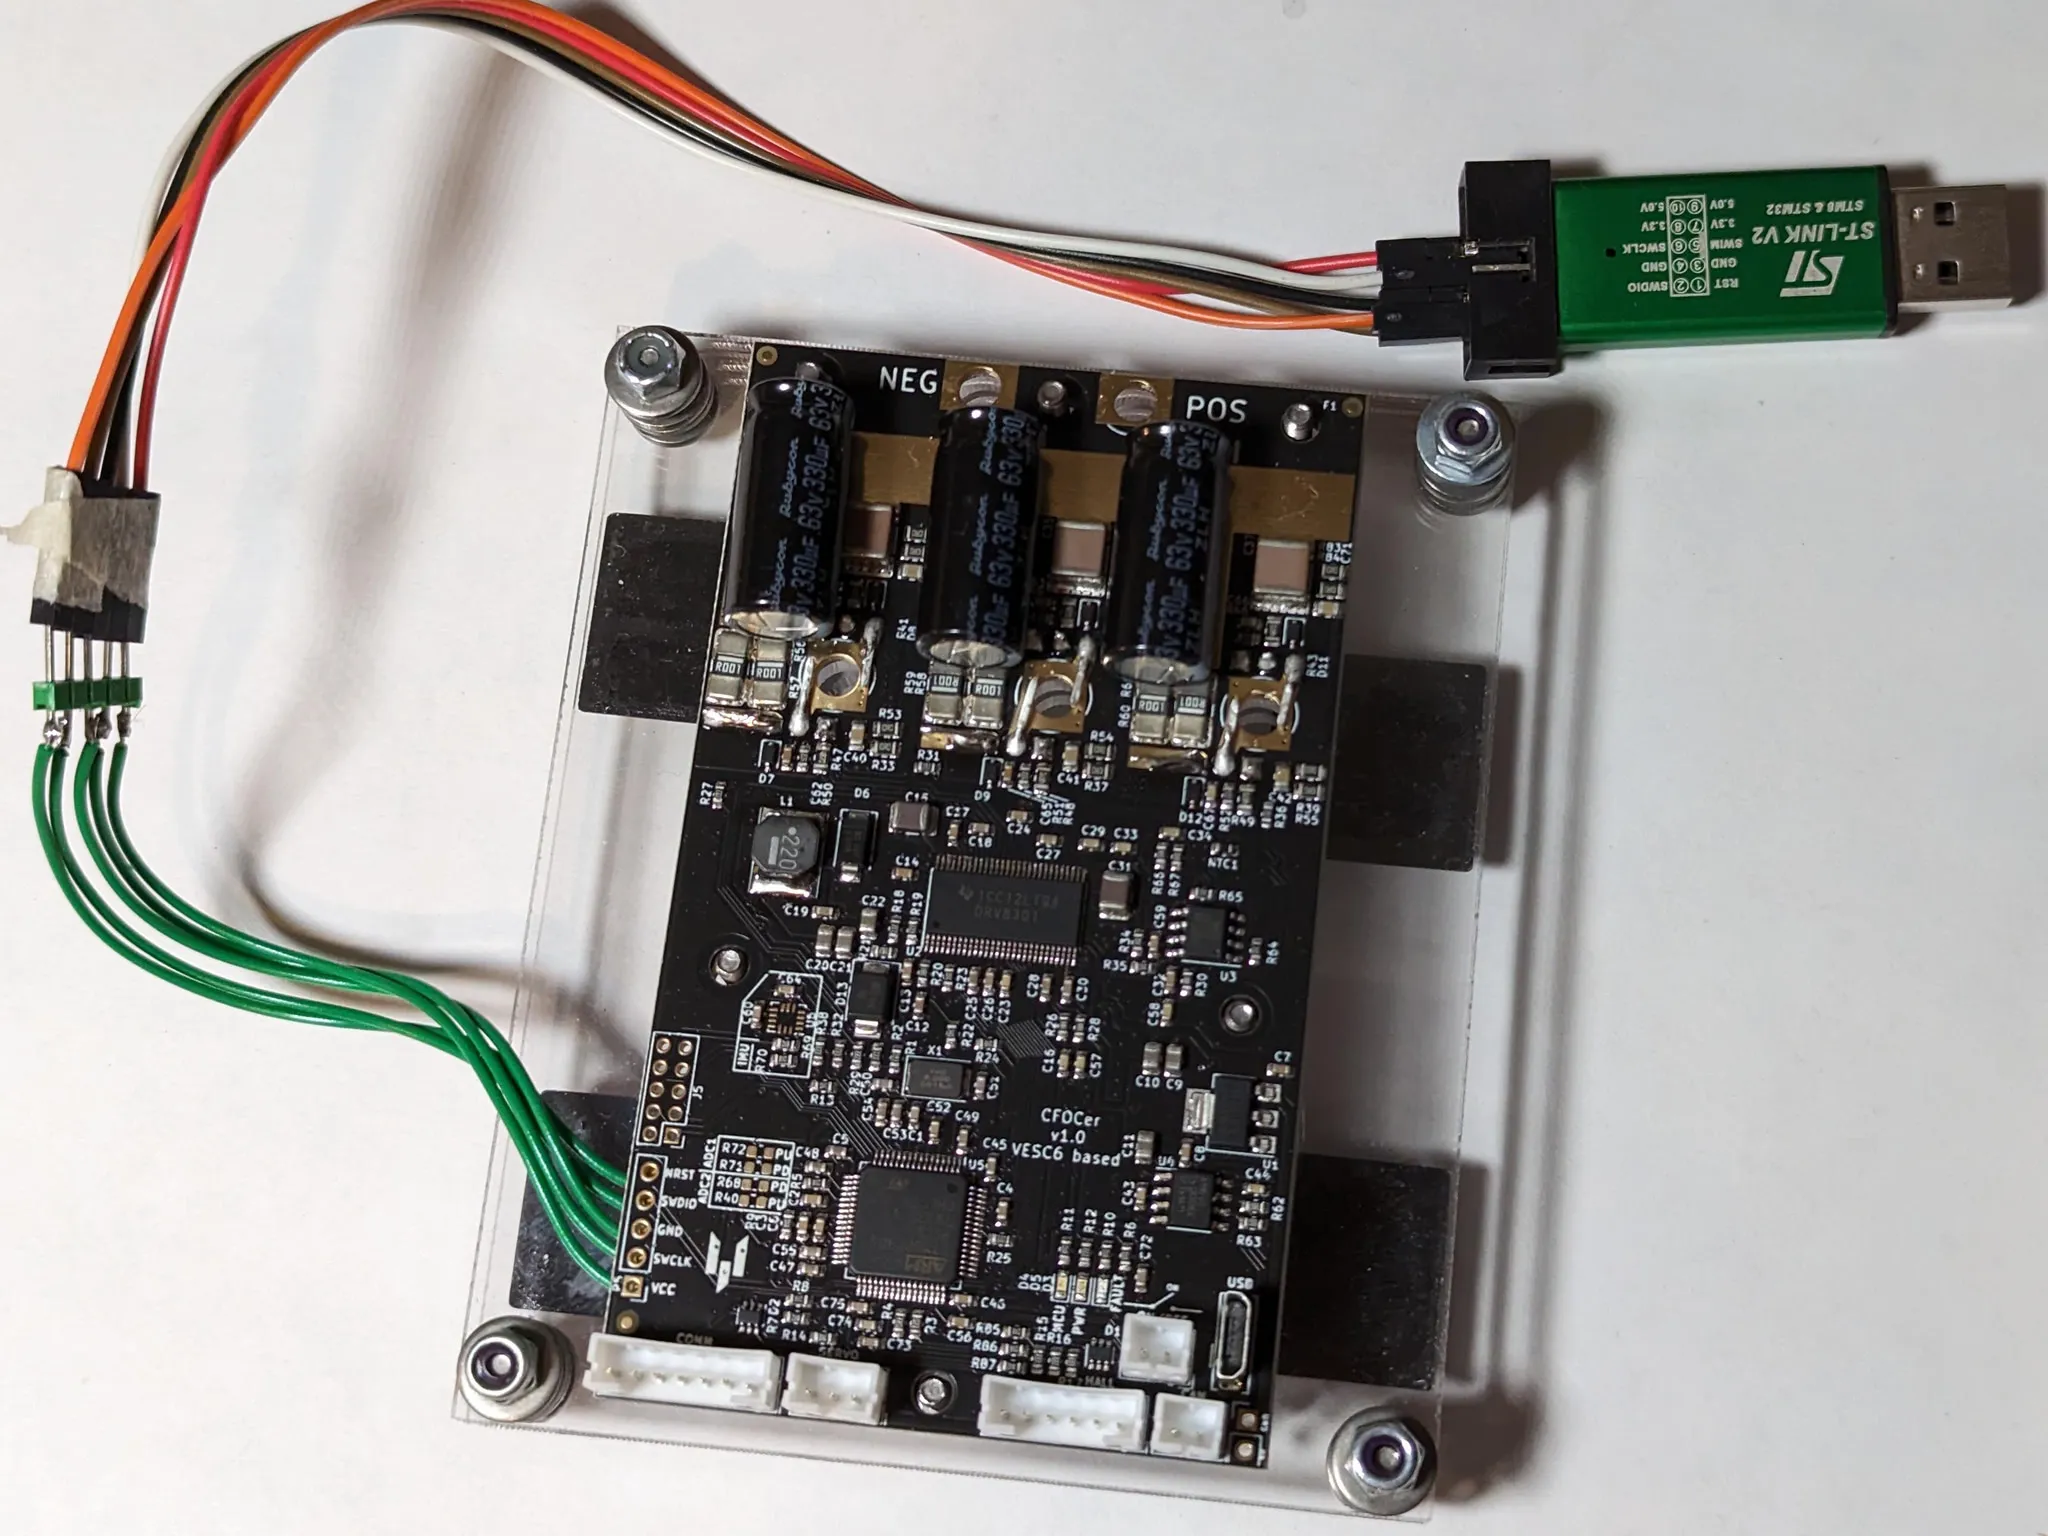
make arm_sdk_installPlug in your ST-Link, and the blue light will come on to indicate the board is powered:
Flash the board by running the following command. You’ll see the board’s LEDs flash after the process is complete:
make Cheap_FOCer_2_flashWhen making a large volume of boards, it’s typical to create an assembly jig so the board can be flashed without soldering the SWD pins. I laser-cut a jig and installed some pogo pins to make this simple tool:
Once the lights flash, you can unplug the board. The next step is to configure the board using the VESC Tool.
VESC Tool Configuration
Note: Download the pre-compiled VESC Tool from vesc-project.com. To access the download, create an account and “purchase” the “VESC Tool Free” version. No payment information is required; simply click next and you will be able to download the software. You can, of course, also make a donation to the project by selecting a different version. However, all versions have the exact same functionality as the free version—only the logo in the app is different.
Watch this quick configuration guide to get started, or follow the steps below:
Now you’re ready to connect the speed controller to your computer with a micro USB cable.
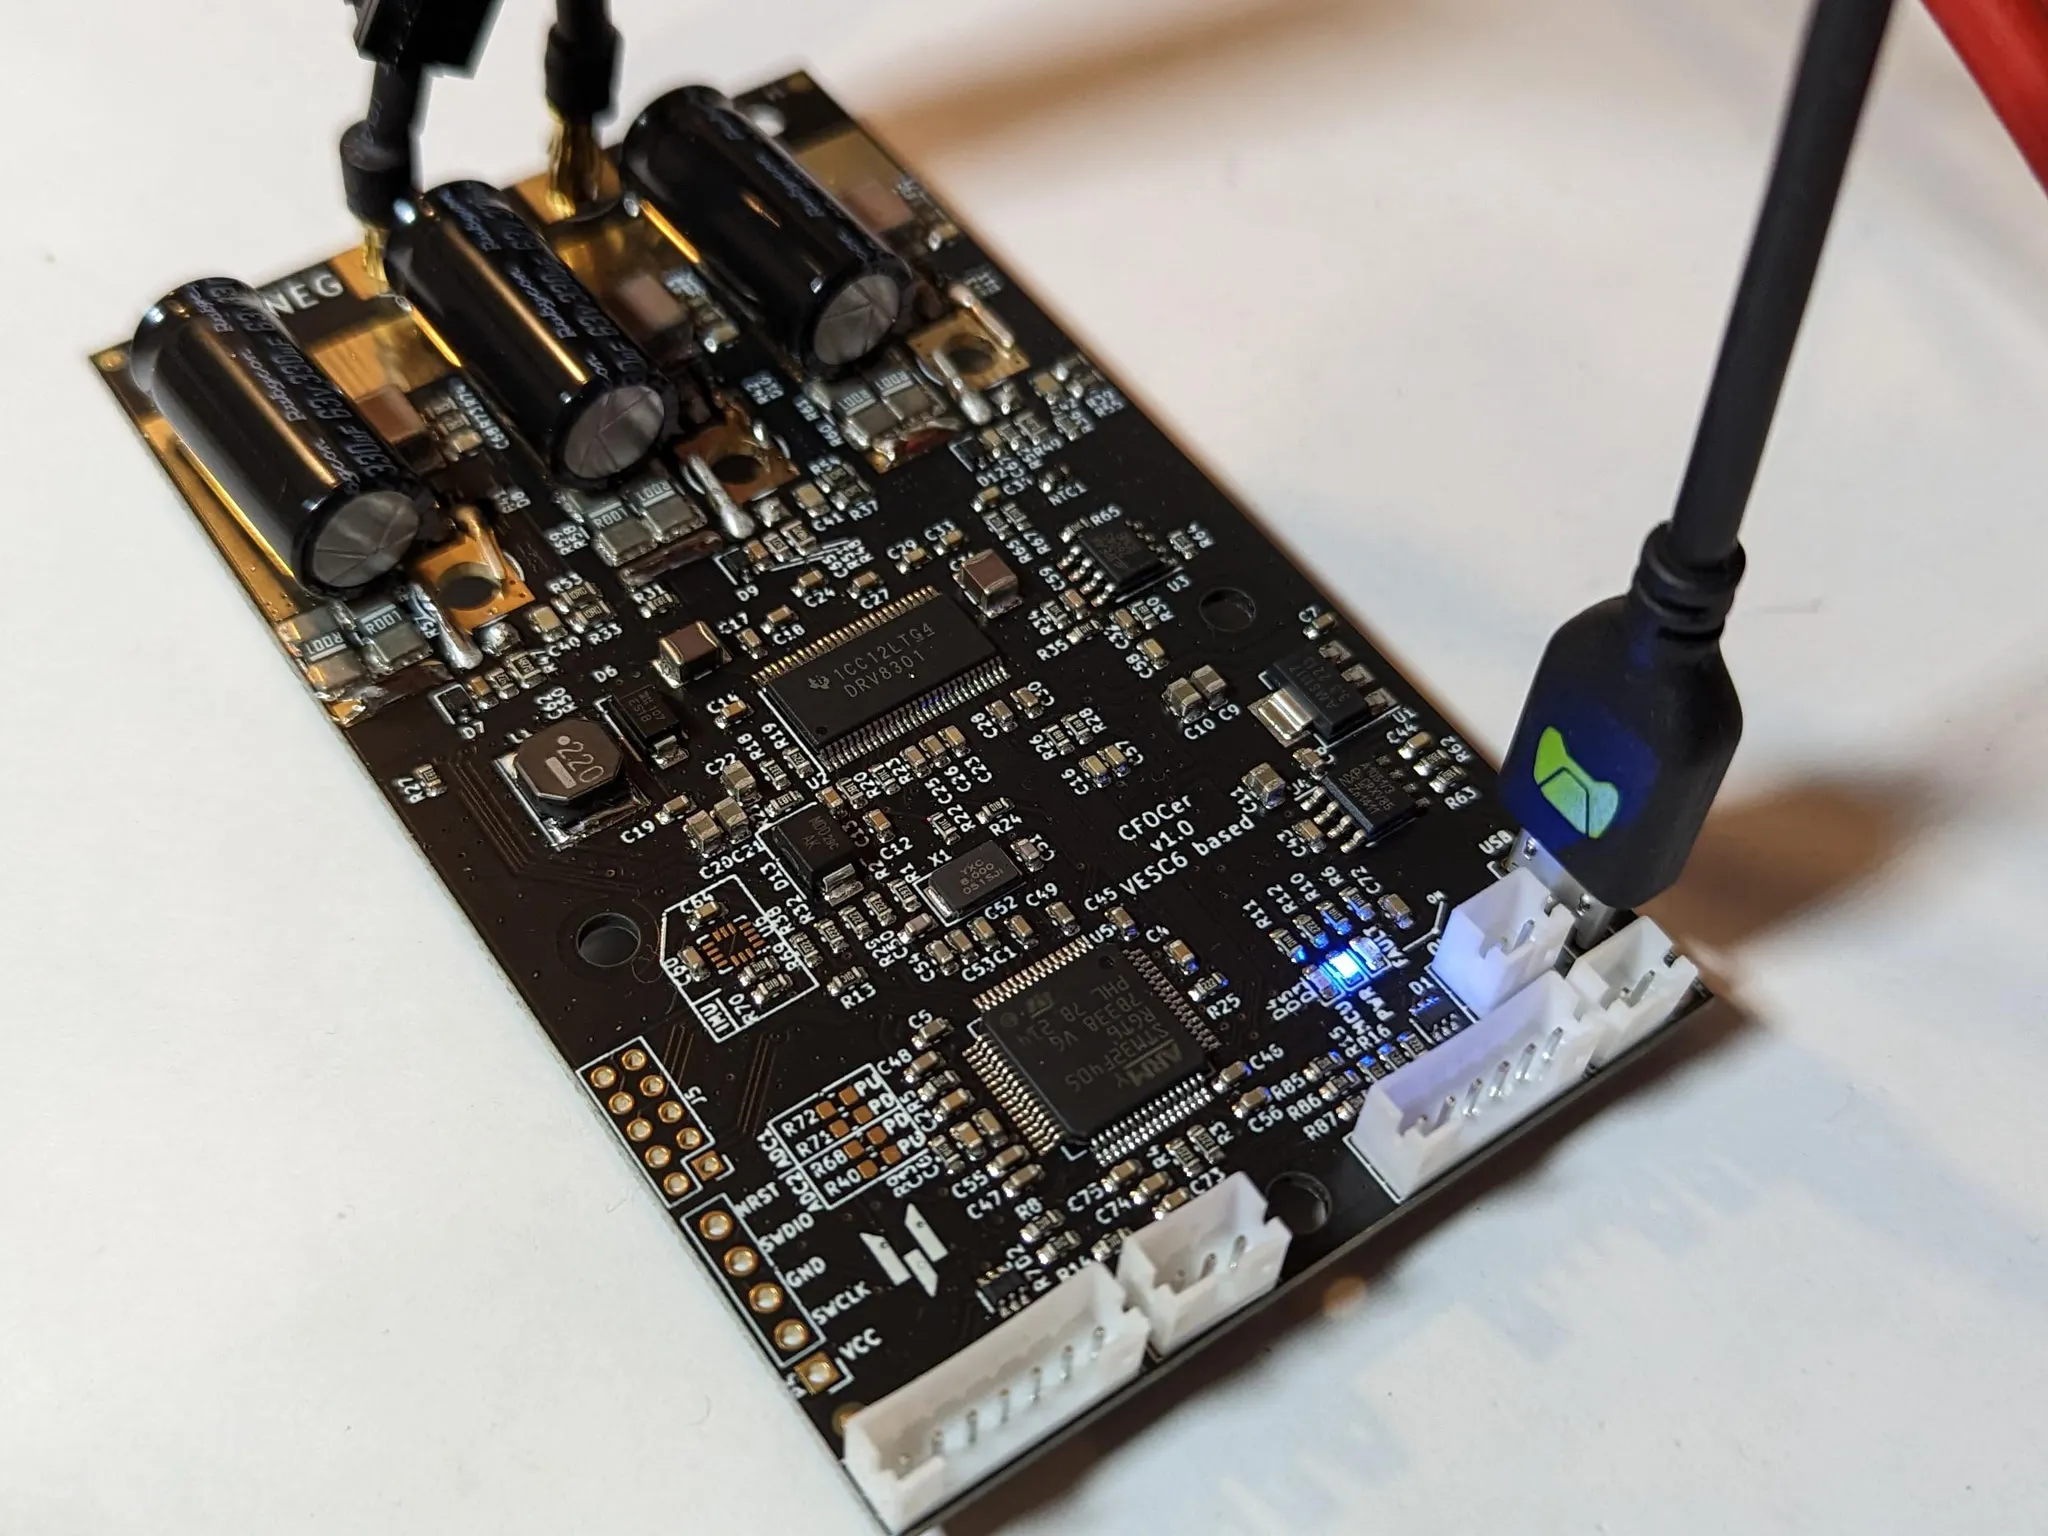
You’ll need to power the controller by connecting a supply of at least 10V to the main power leads. 4mm banana plugs work great for testing:

I also wired up a 6384 size 120KV 4.6KH BLDC Outrunner Brushless Motor with a Hall Sensor for testing, again using 4mm banana plugs:

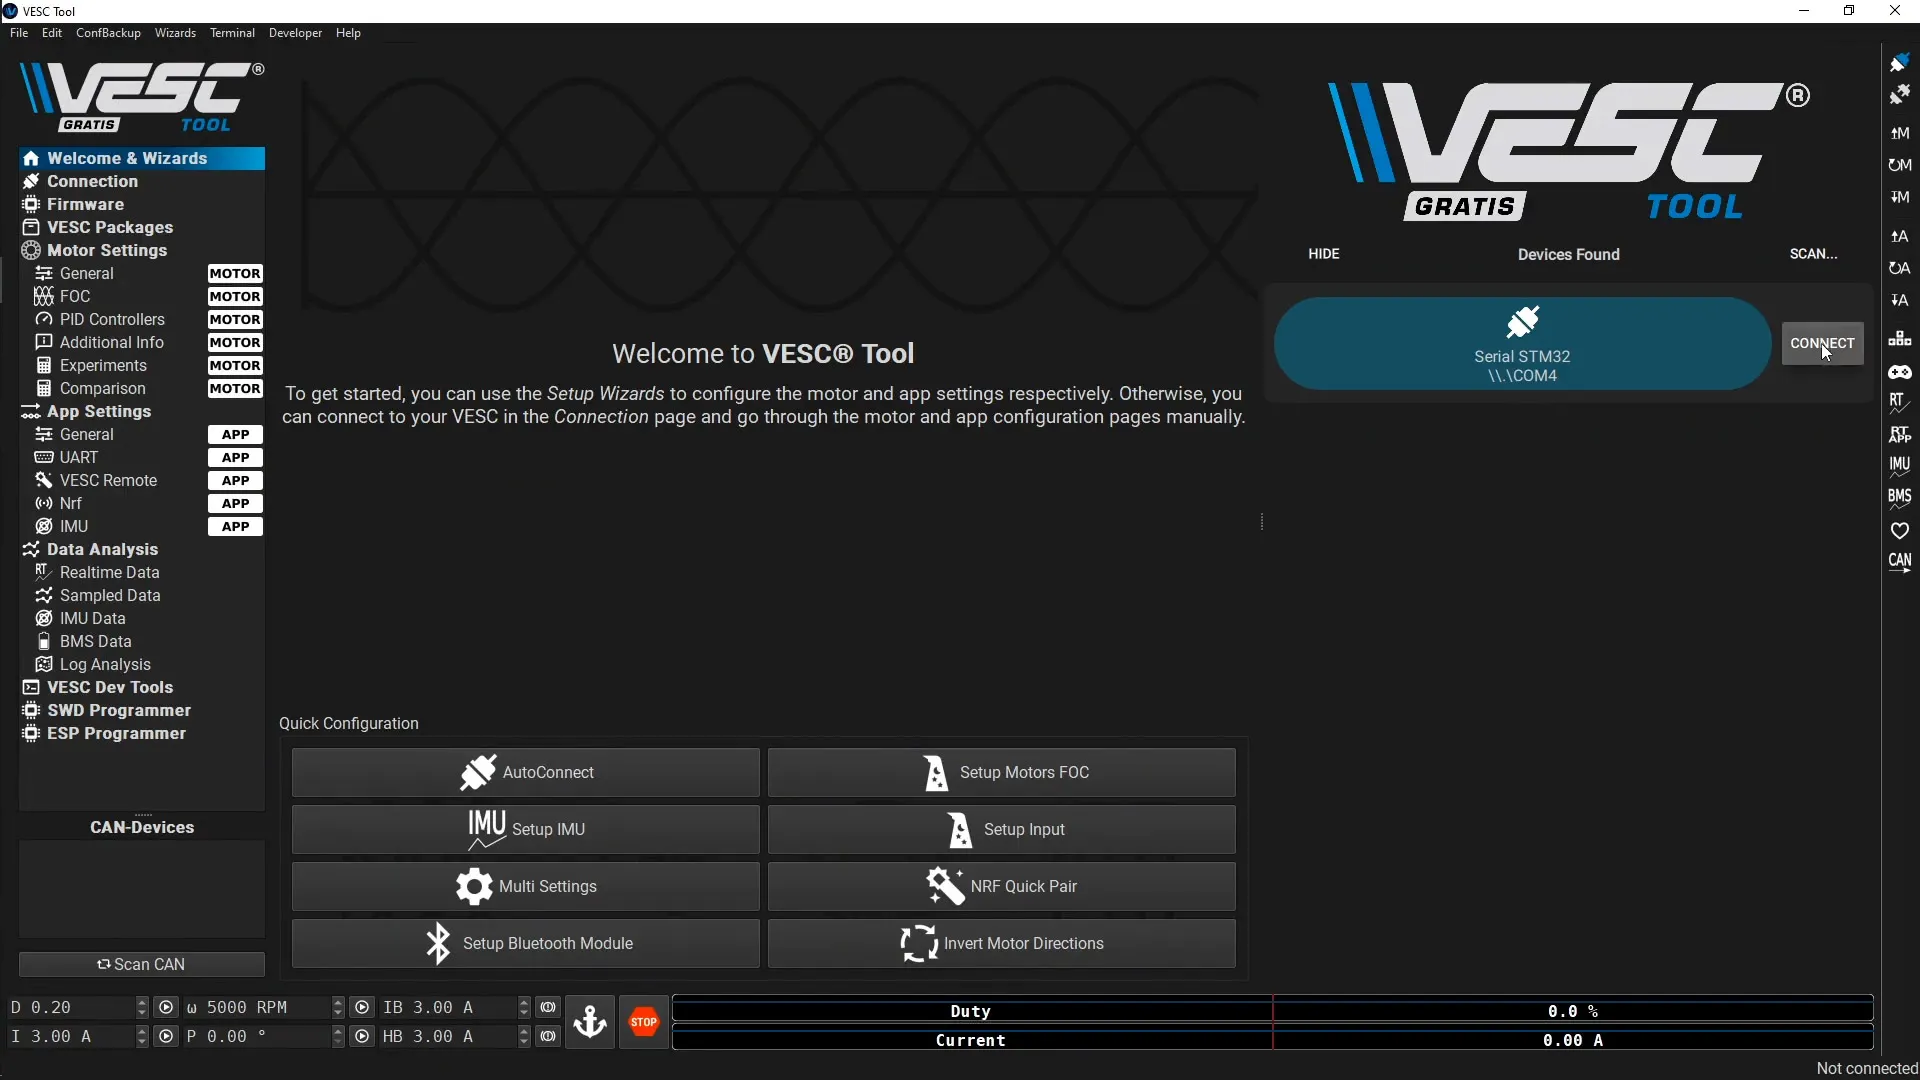
Once everything is plugged in, connect the VESC Tool to the controller by clicking the connect button:
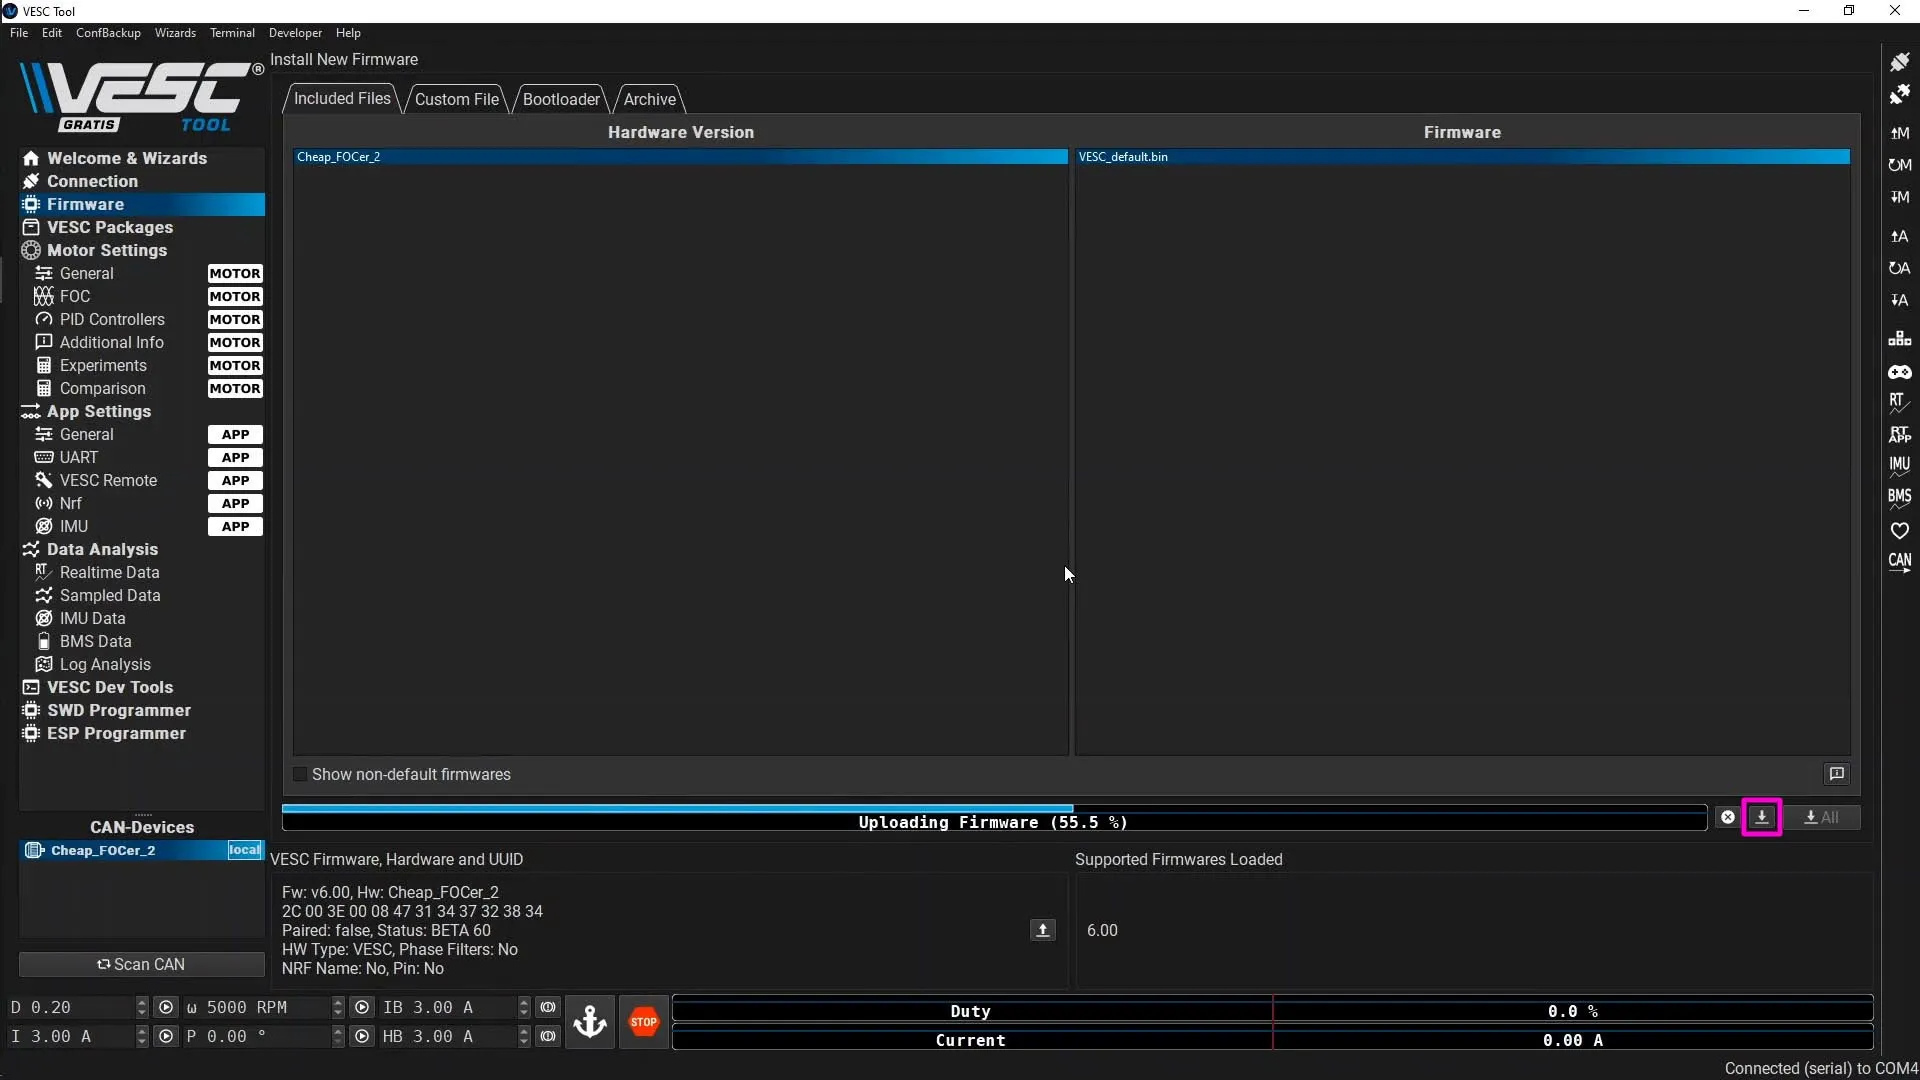
Flashing the Latest Firmware
When you connect, if you get an error like the following, you’ll need to flash the latest firmware:
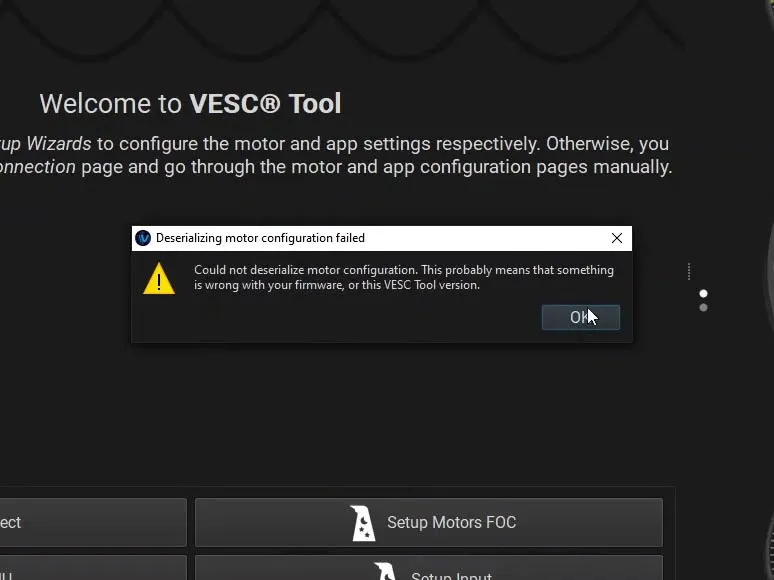
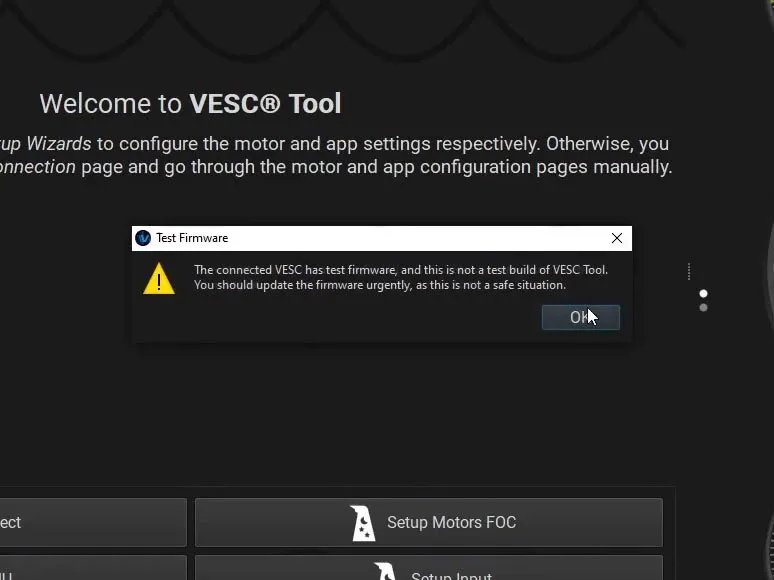
To flash the firmware, connect to the board and click the little down arrow button to flash the latest firmware:
Next, we’ll walk through both the motor configuration and the input configuration.
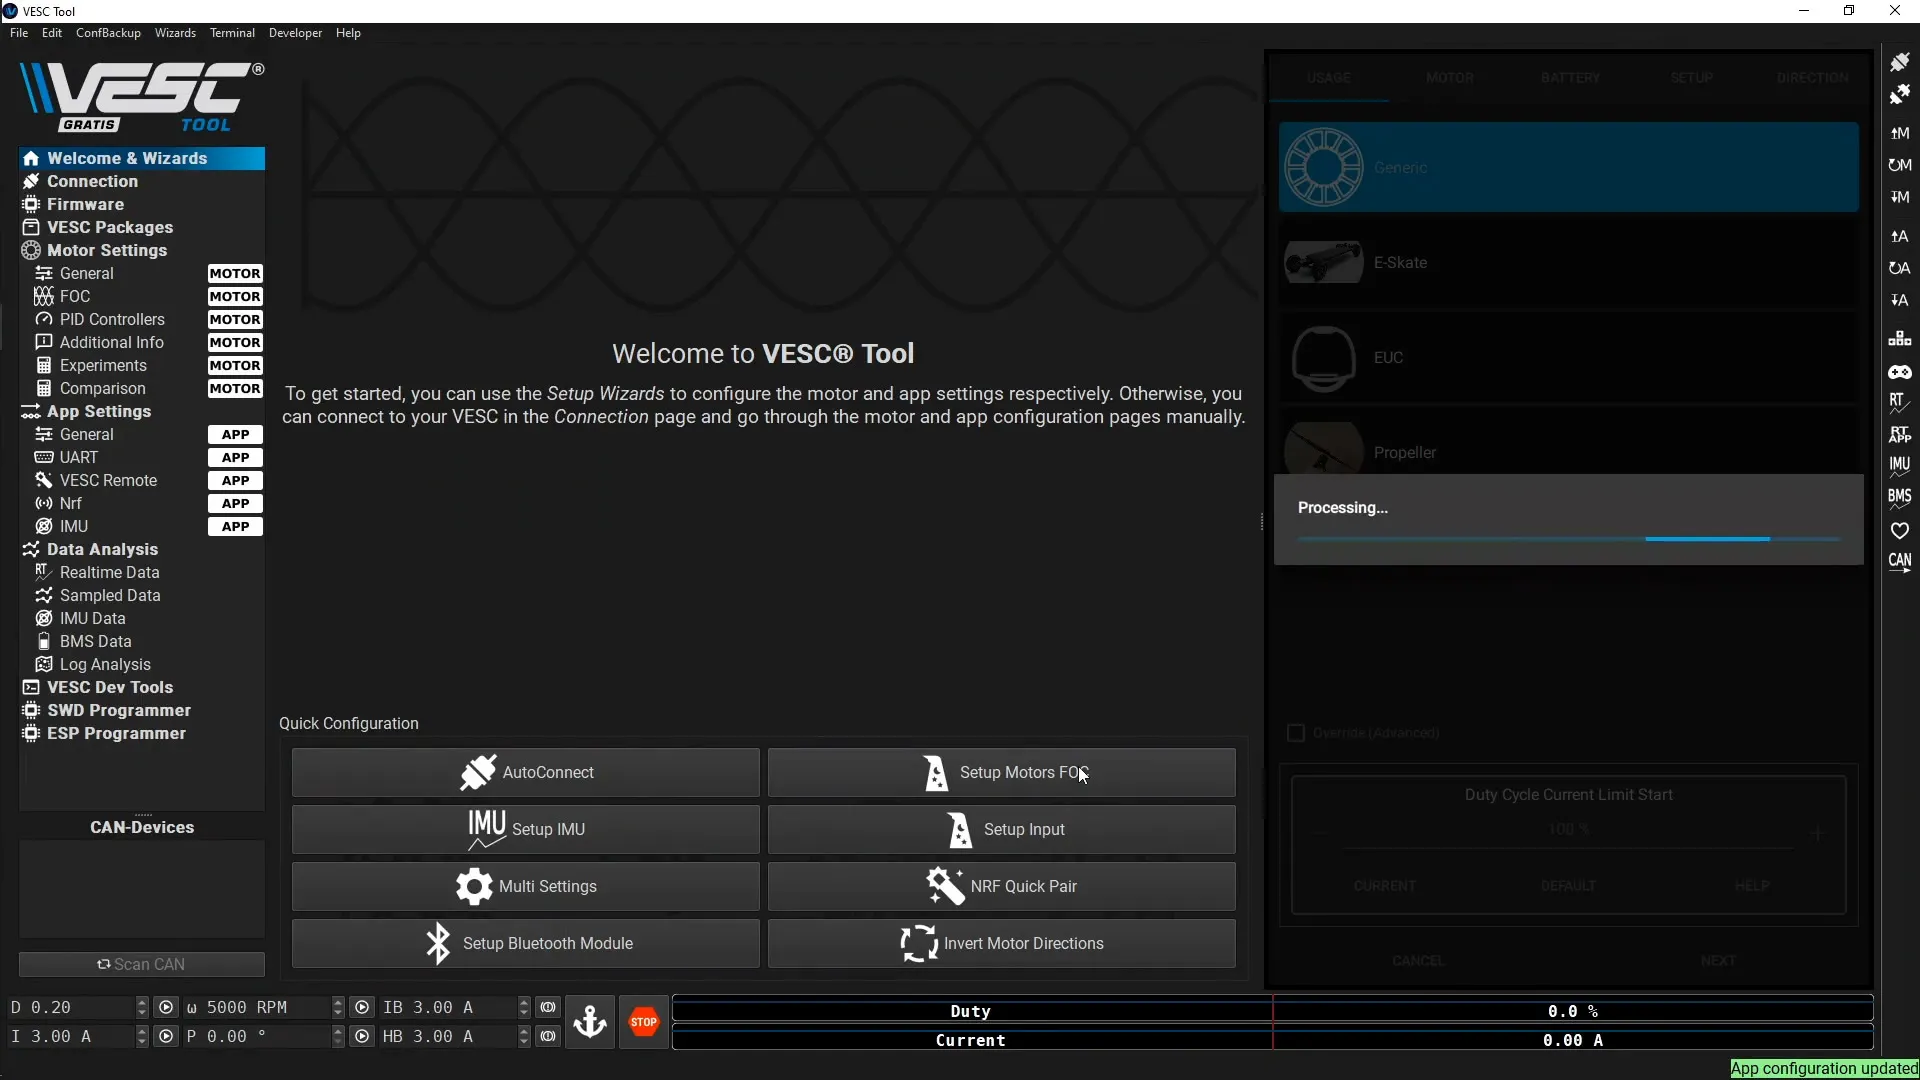
Motor Setup
With the motor connected, click the “Setup Motors FOC” button. Pick the usage type. I’ll test with Generic. Continue by clicking “Next” at the bottom right:
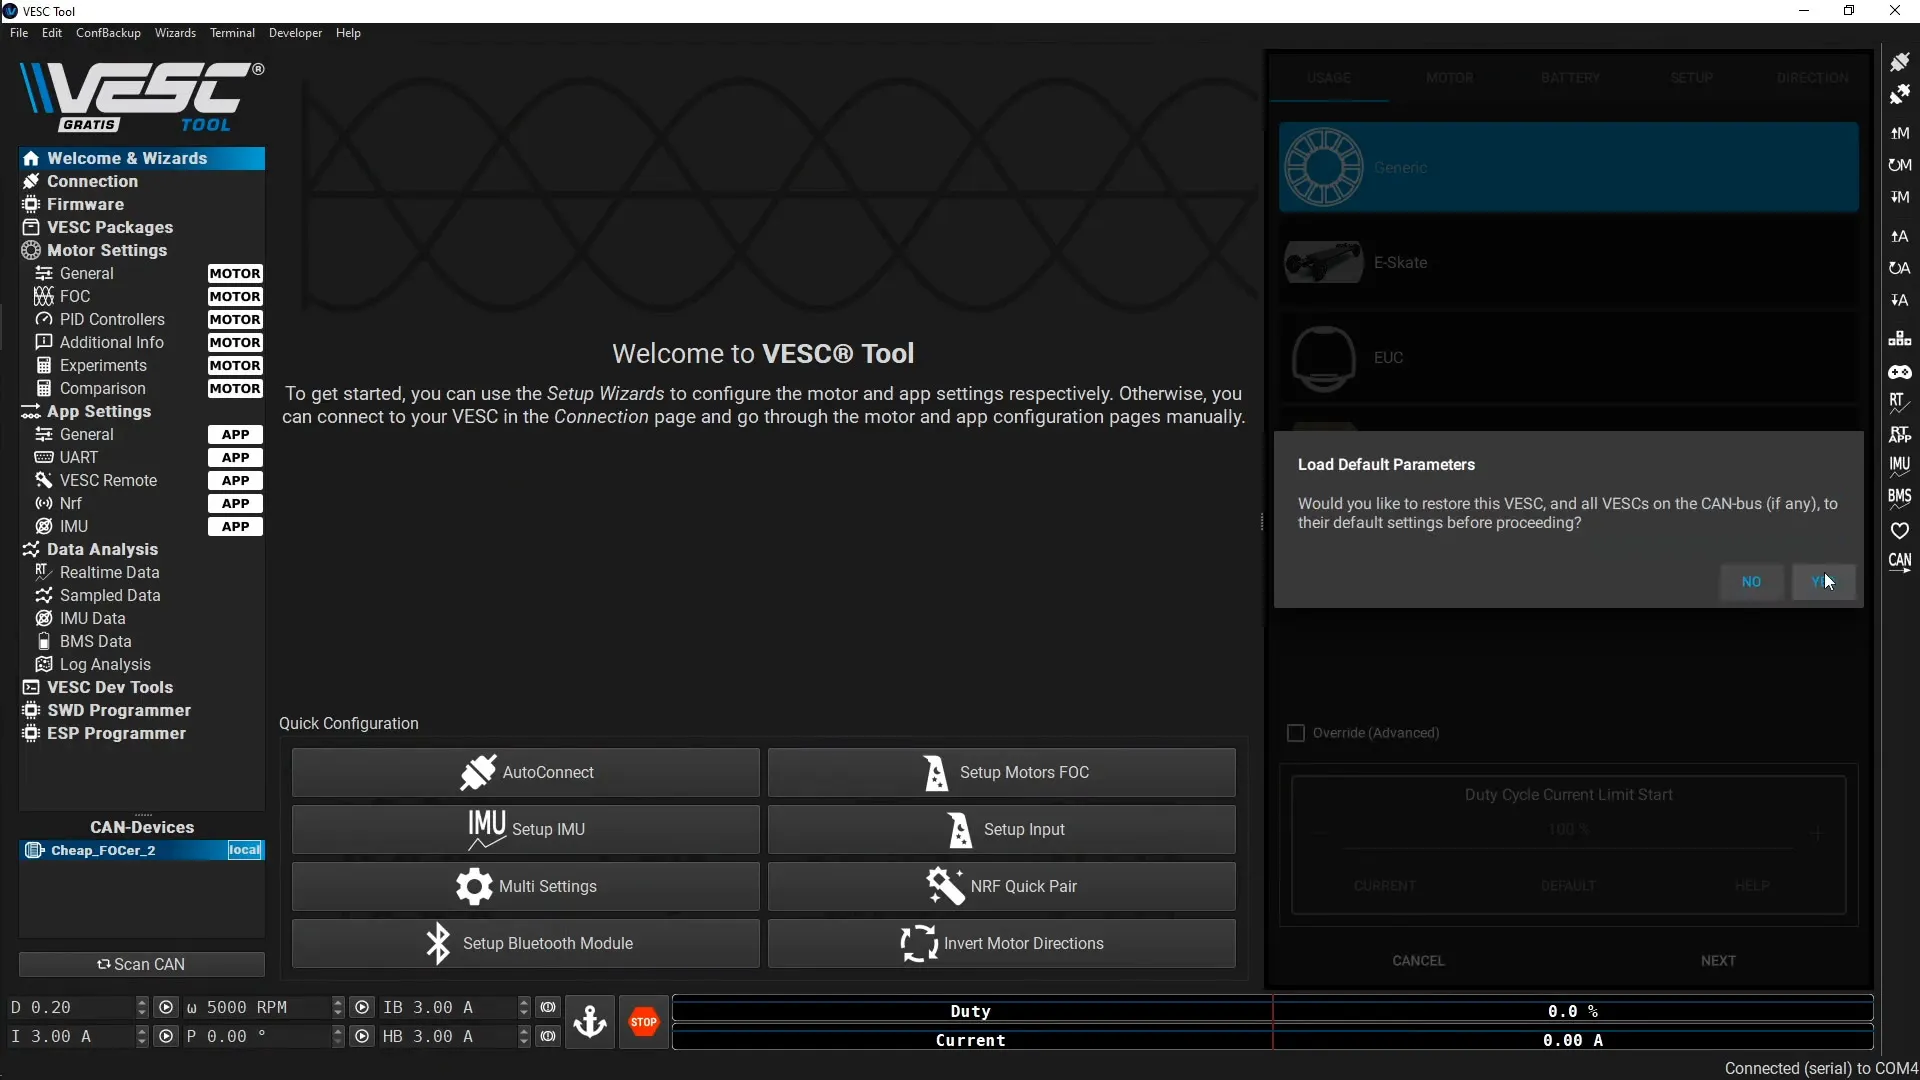
When prompted, load the default parameters to reset the settings on the board:
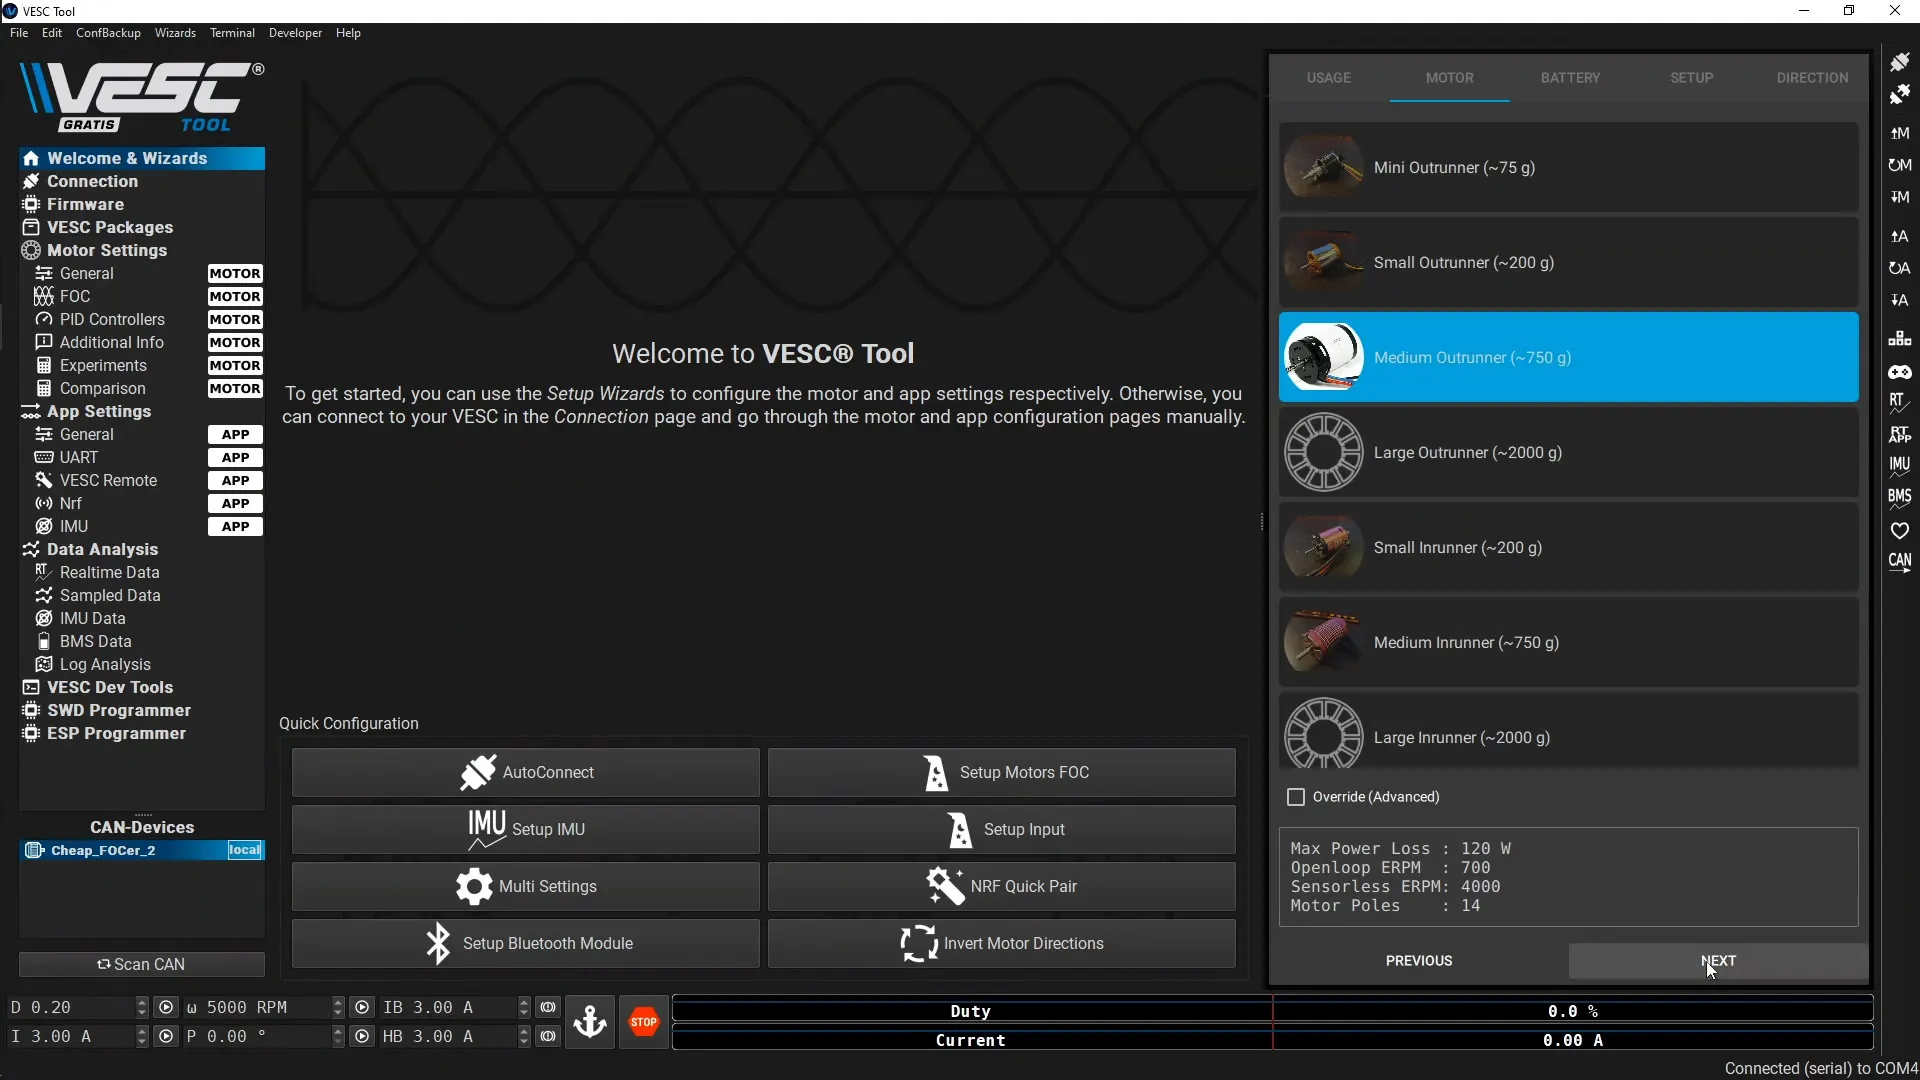
Choose the motor size and click “Next”:
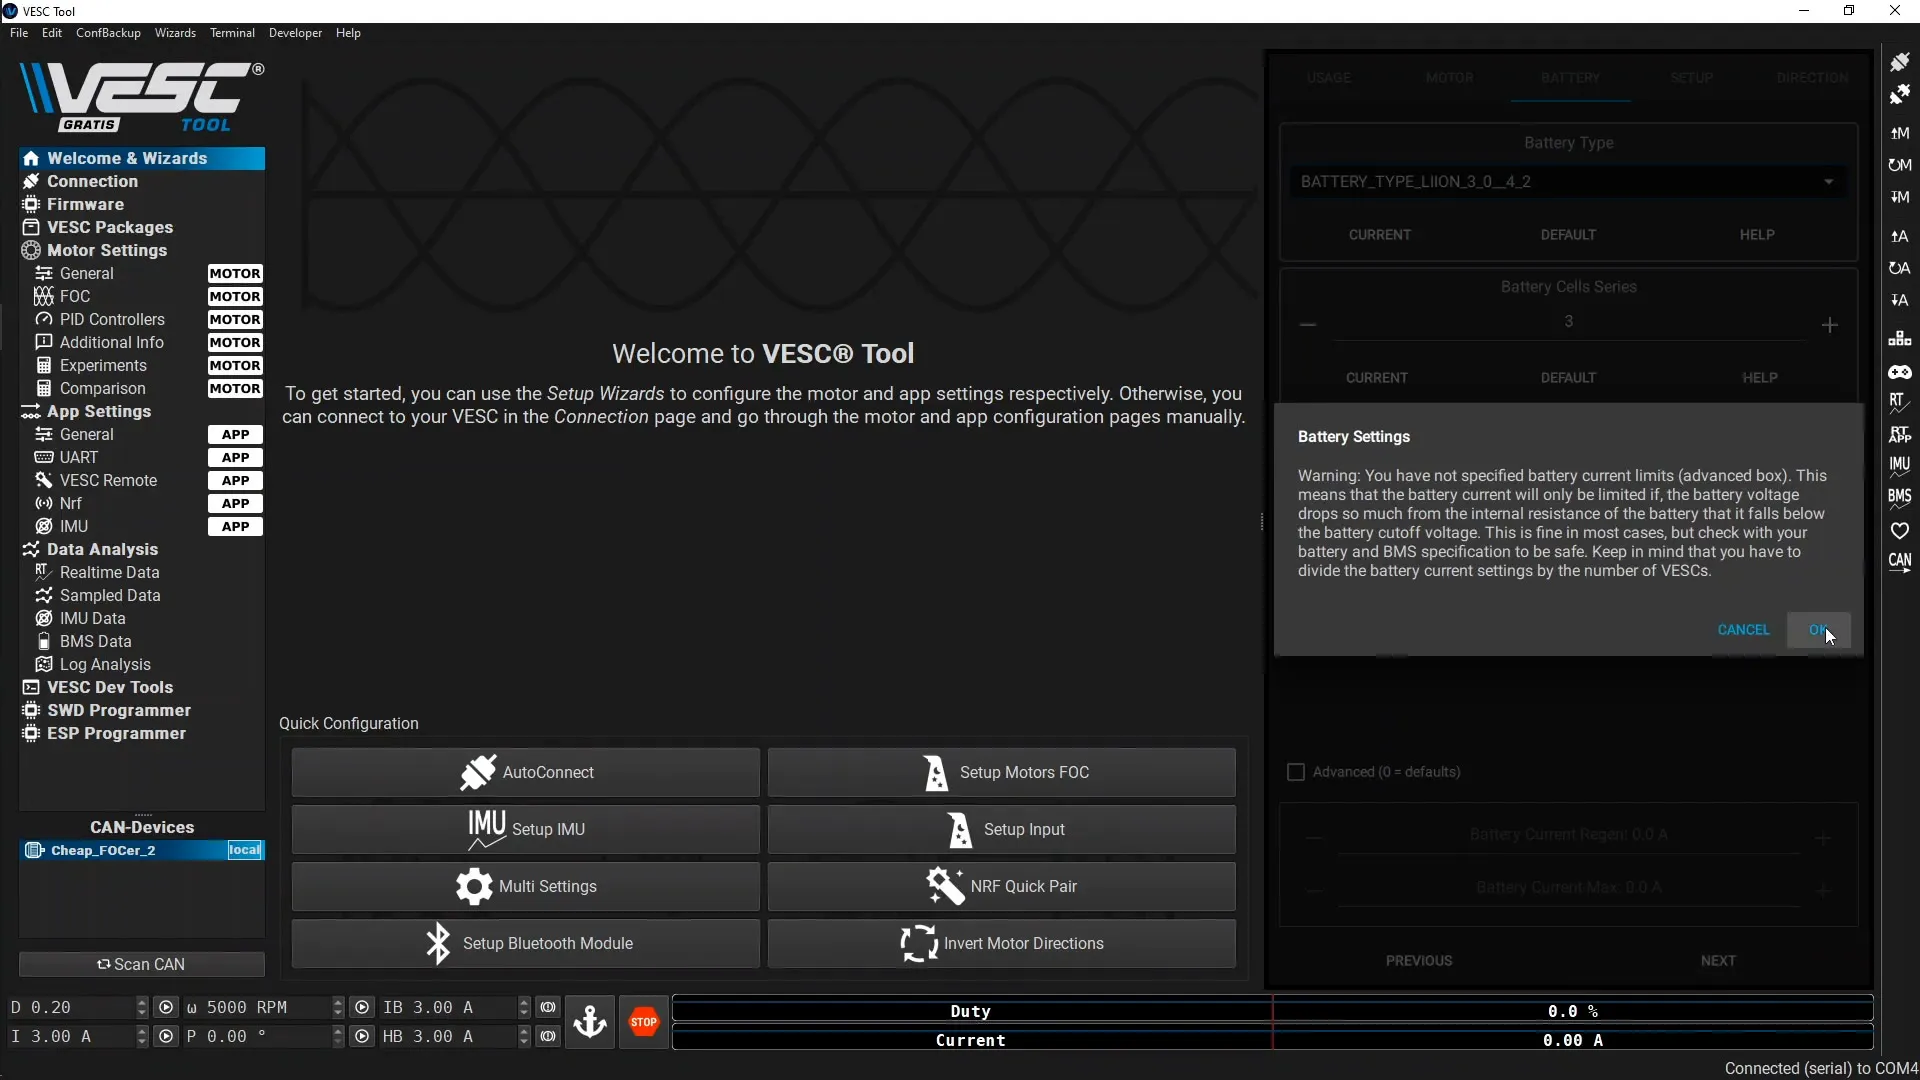
Accept the battery settings and click “Next”:
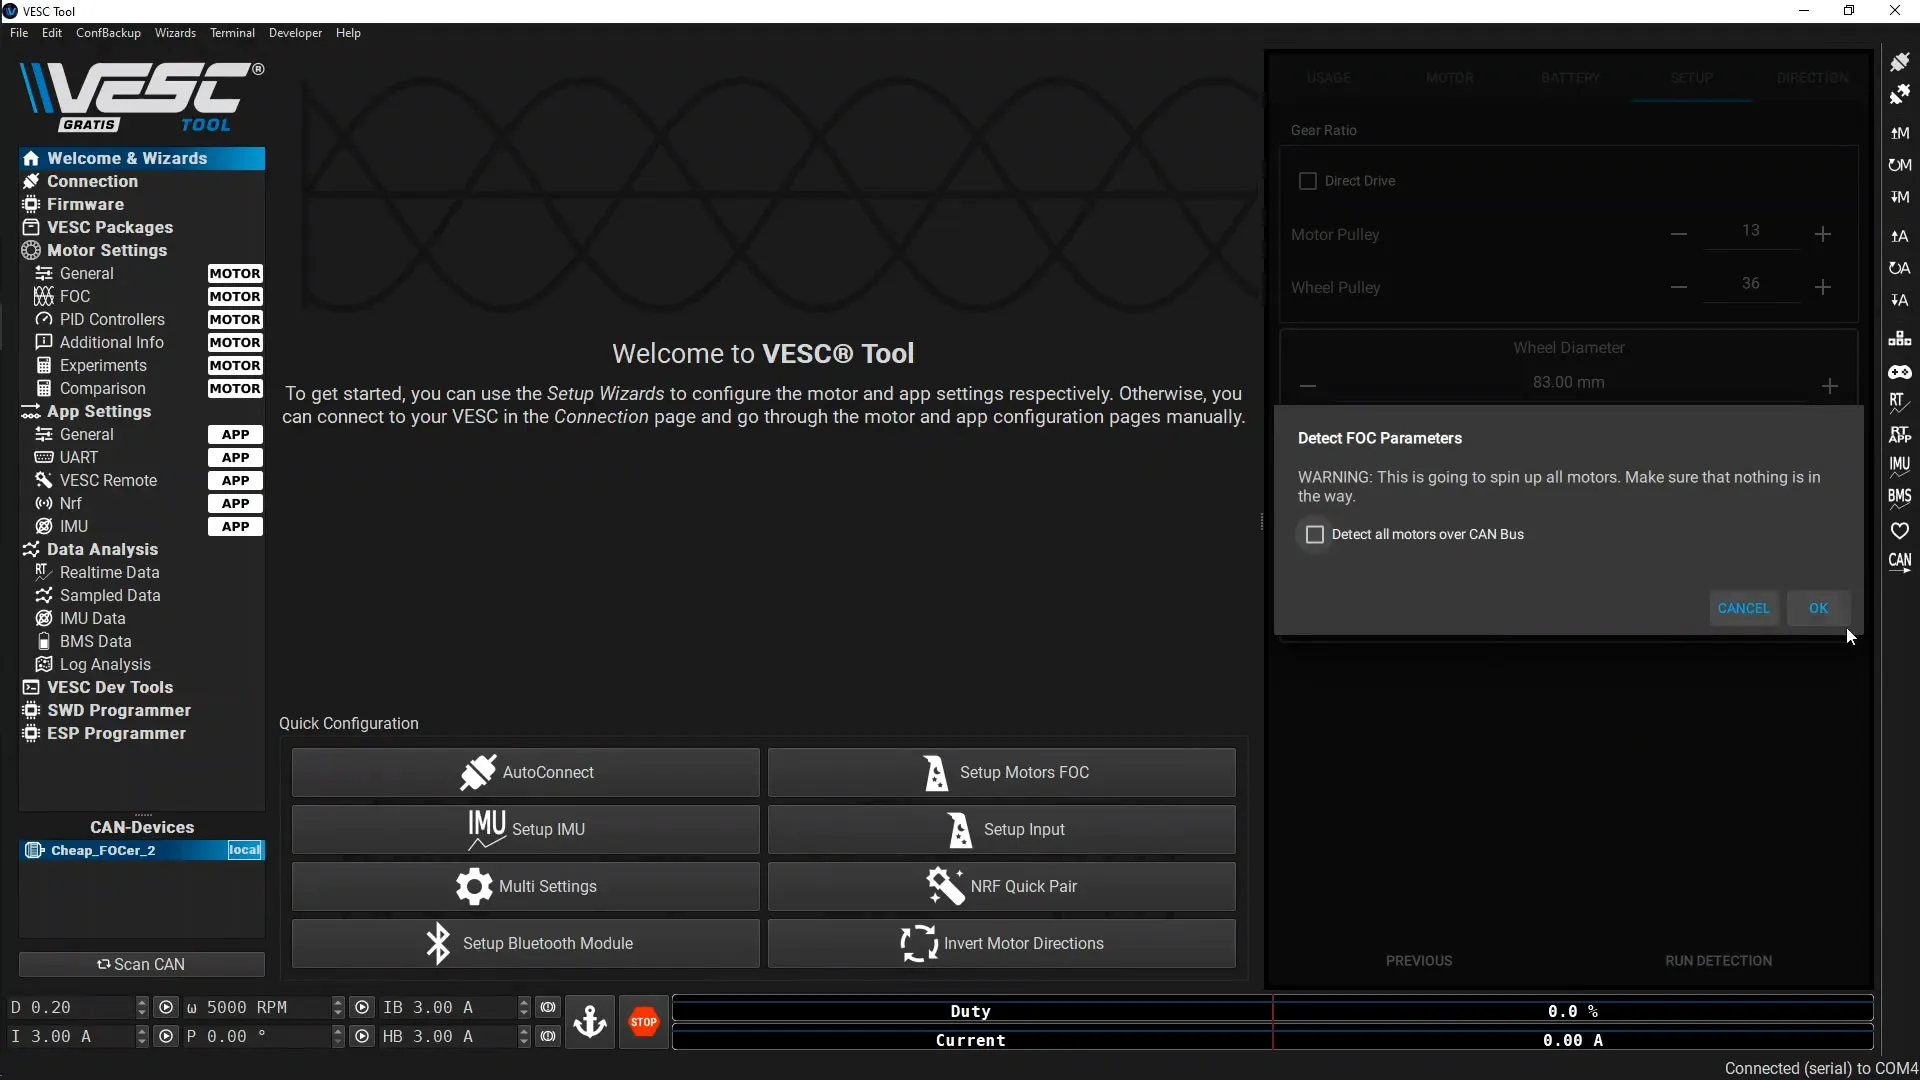
Click “Run Detection” on the Setup page. Note that the motor will spin up while it runs the detection.
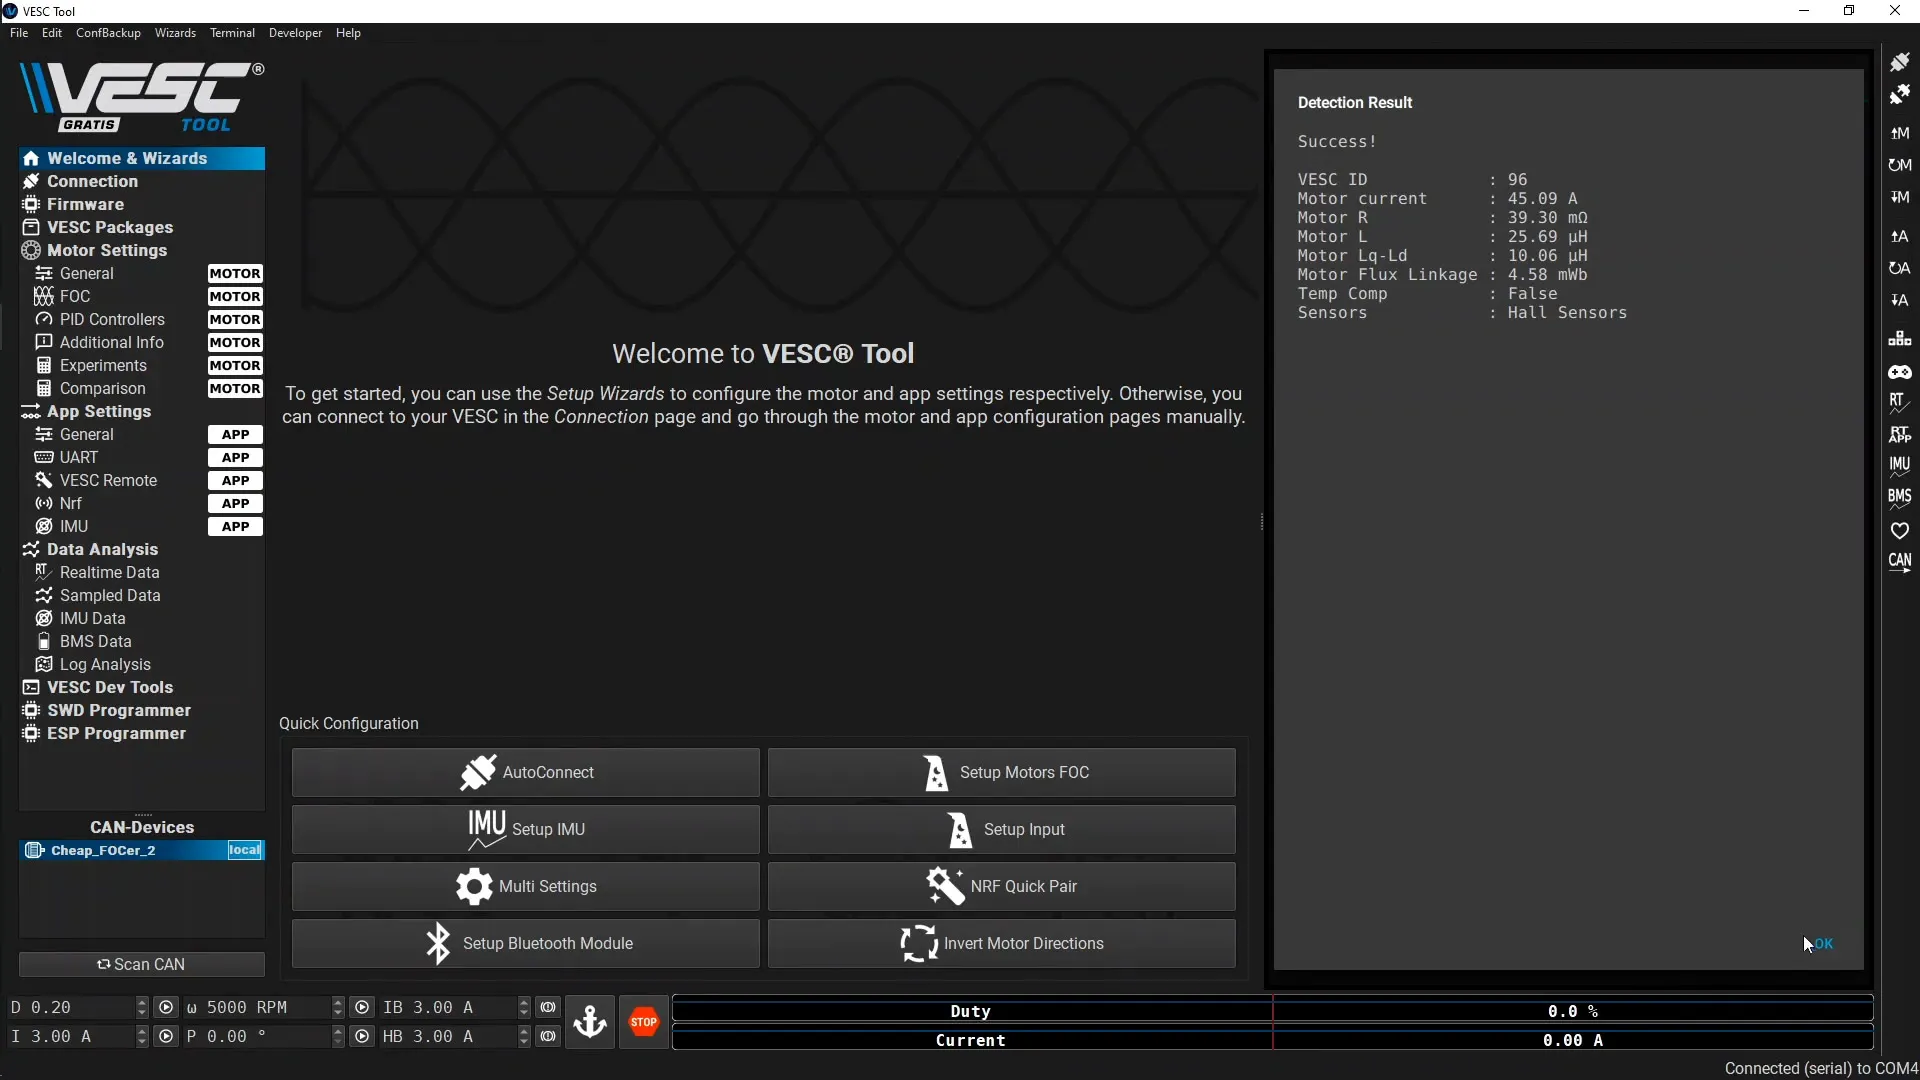
Accept the detection results and click “OK”:
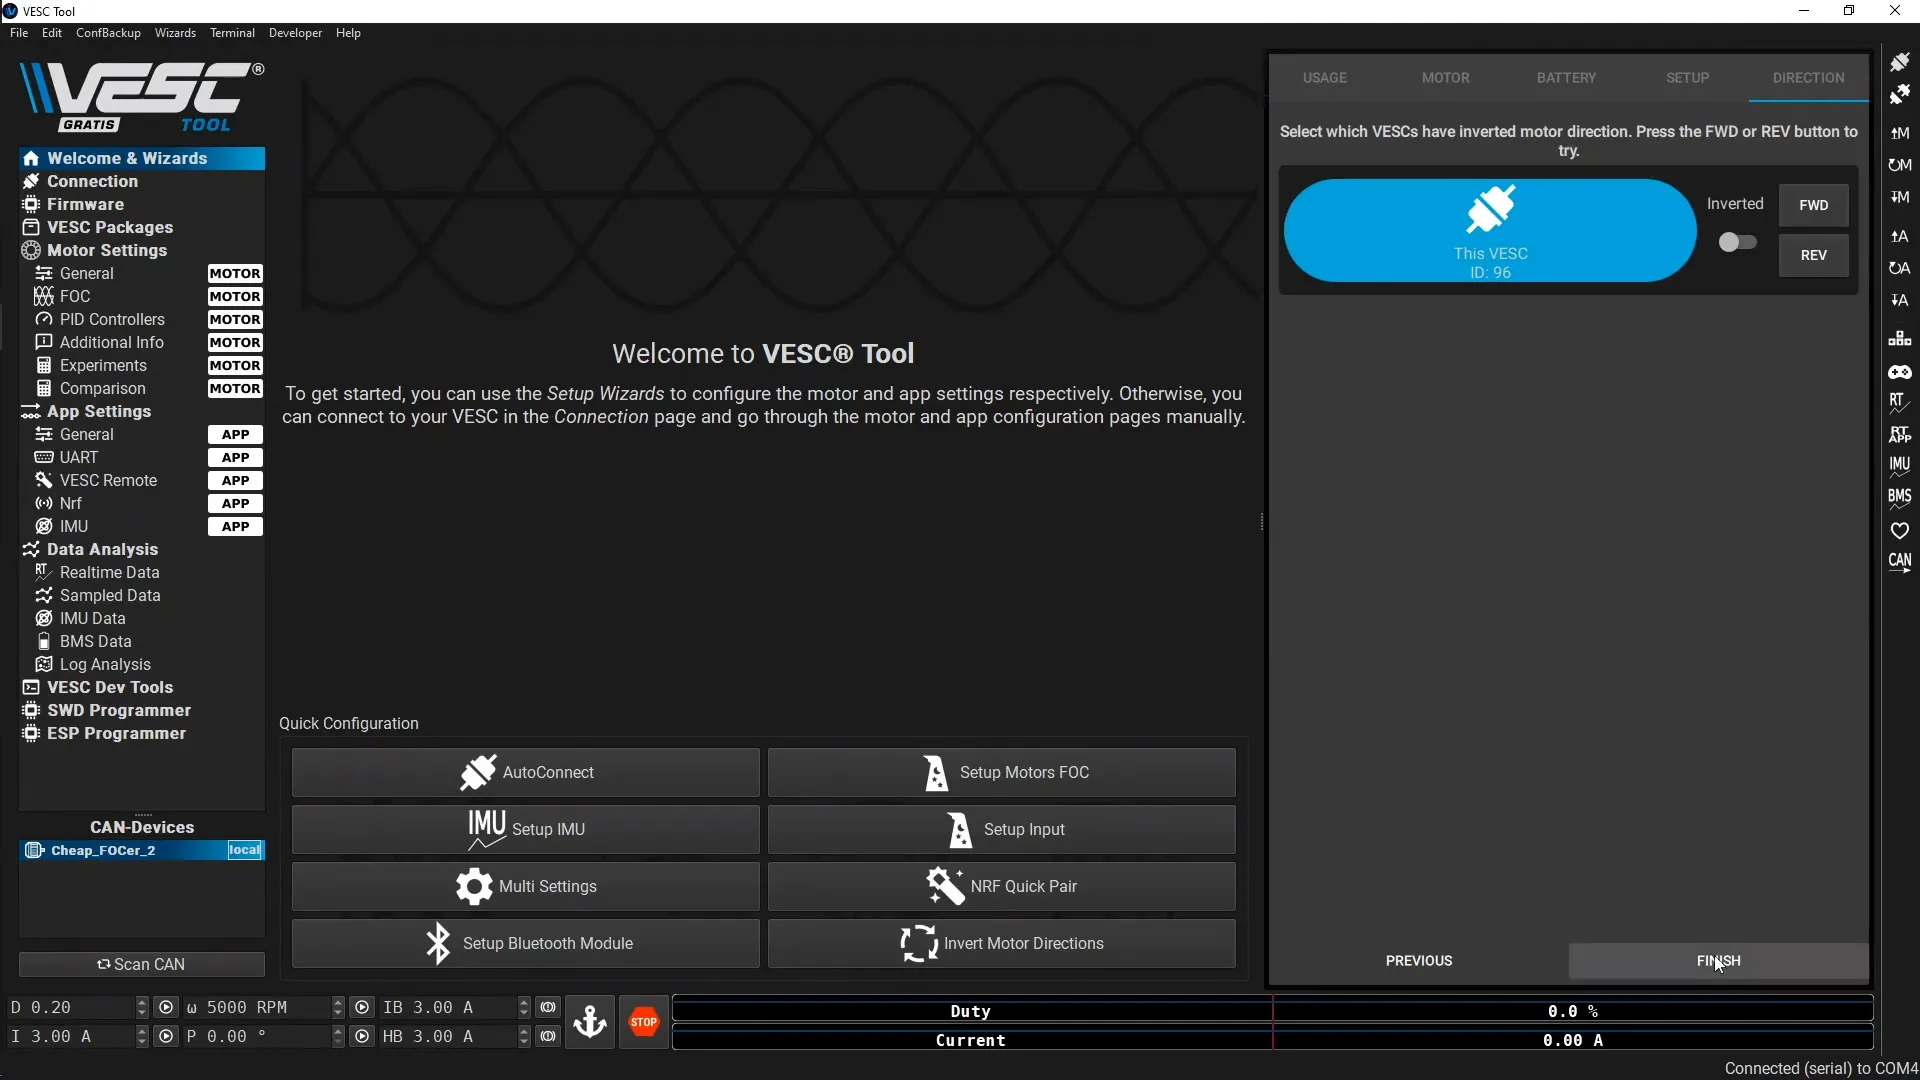
Finally, test that the motor is set up correctly and running in the right direction using the FWD and REV buttons:
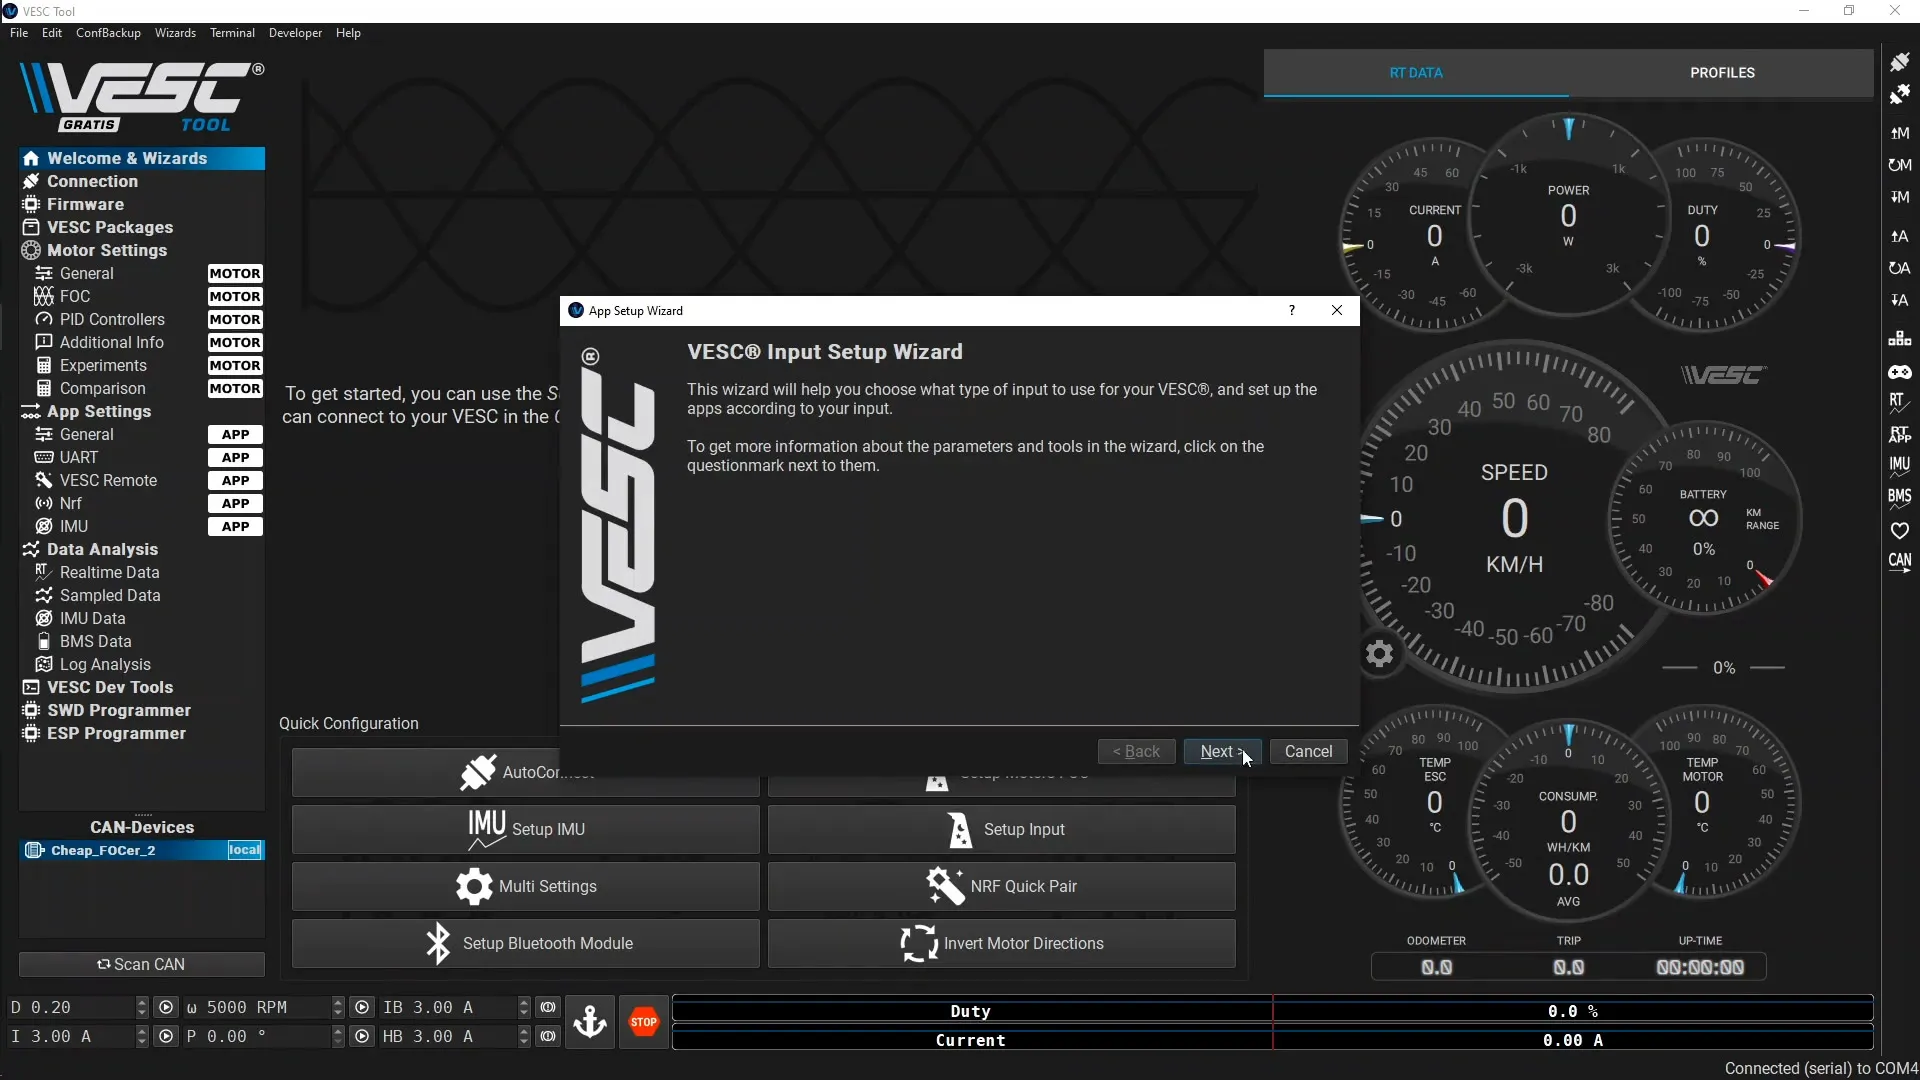
Input Setup
Click the “Setup Input” button and hit “Next”:
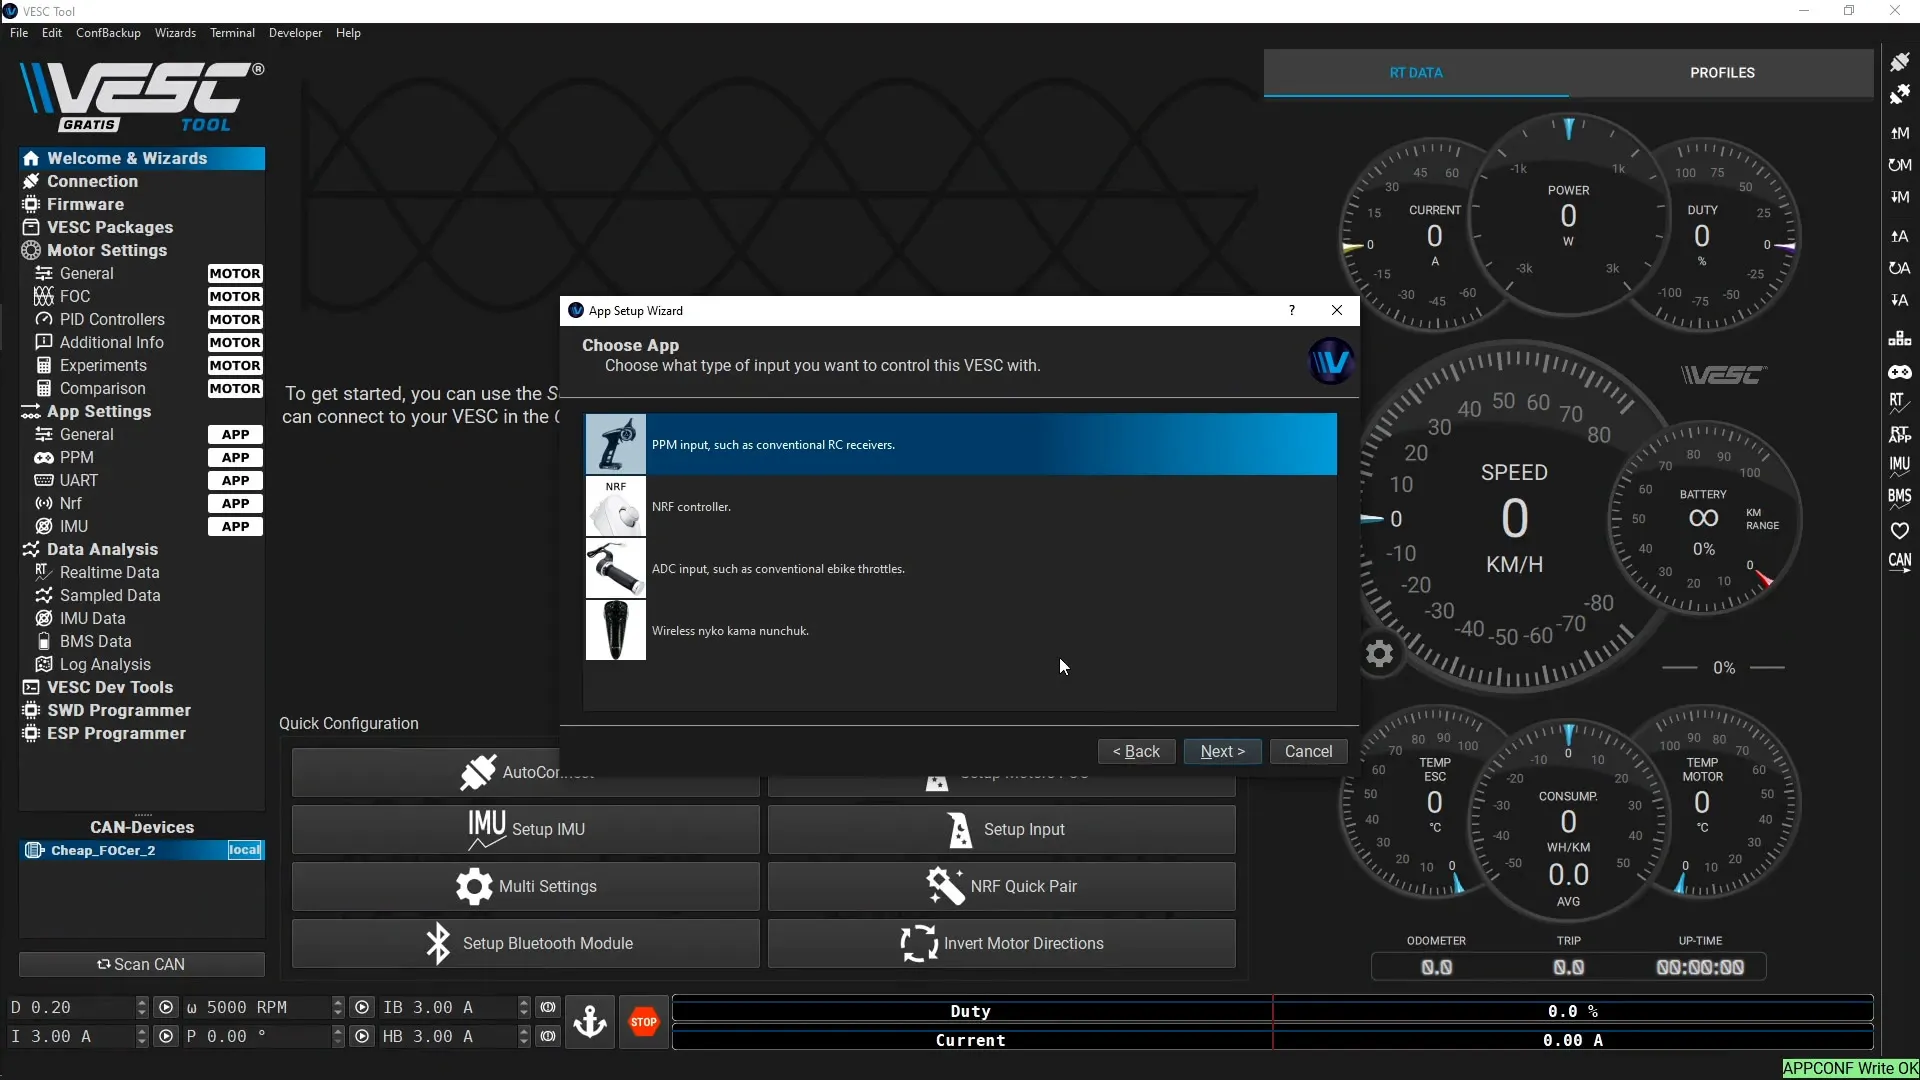
I’m using a PPM RC servo tester, so I’ll use the PPM option. Click “Next”:
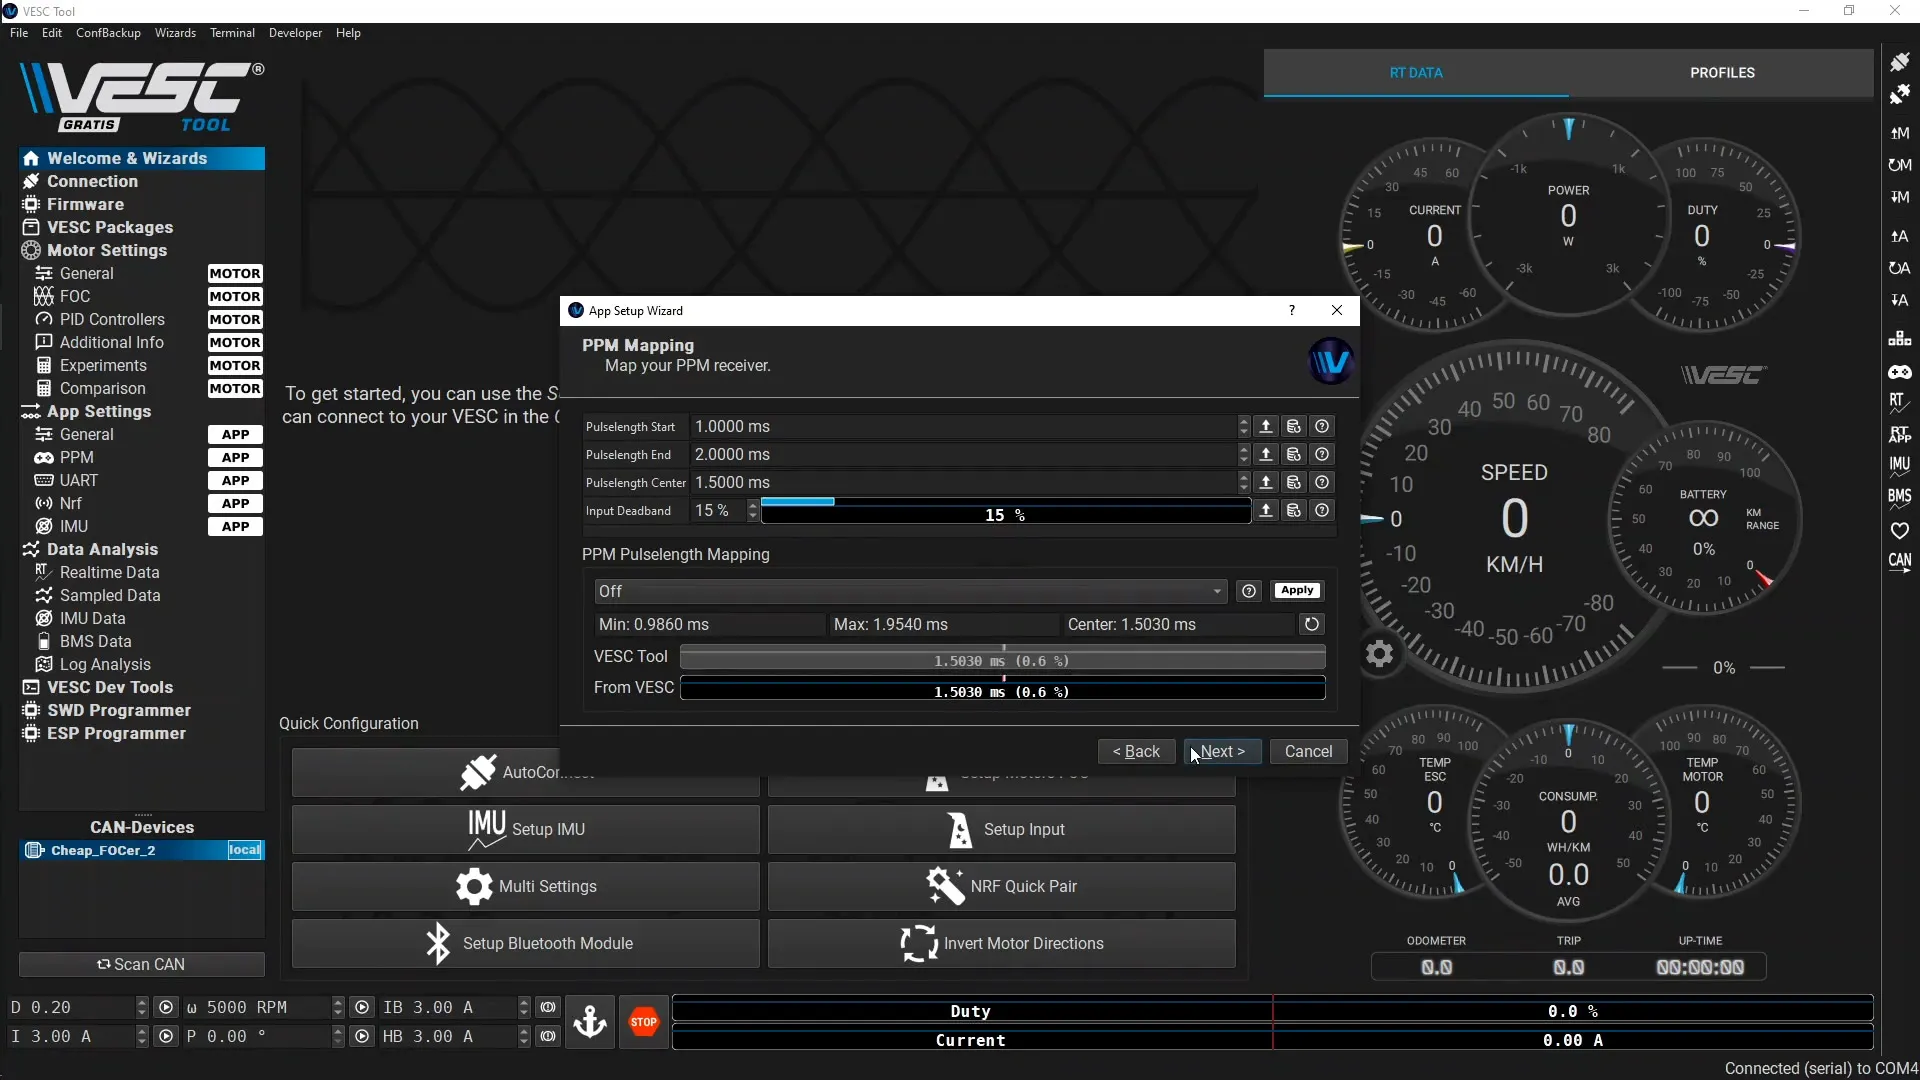
While on the PPM Mapping page, move the PPM throttle on the RC servo tester to the minimum and maximum positions. Move it back to the middle position and click “Next”:
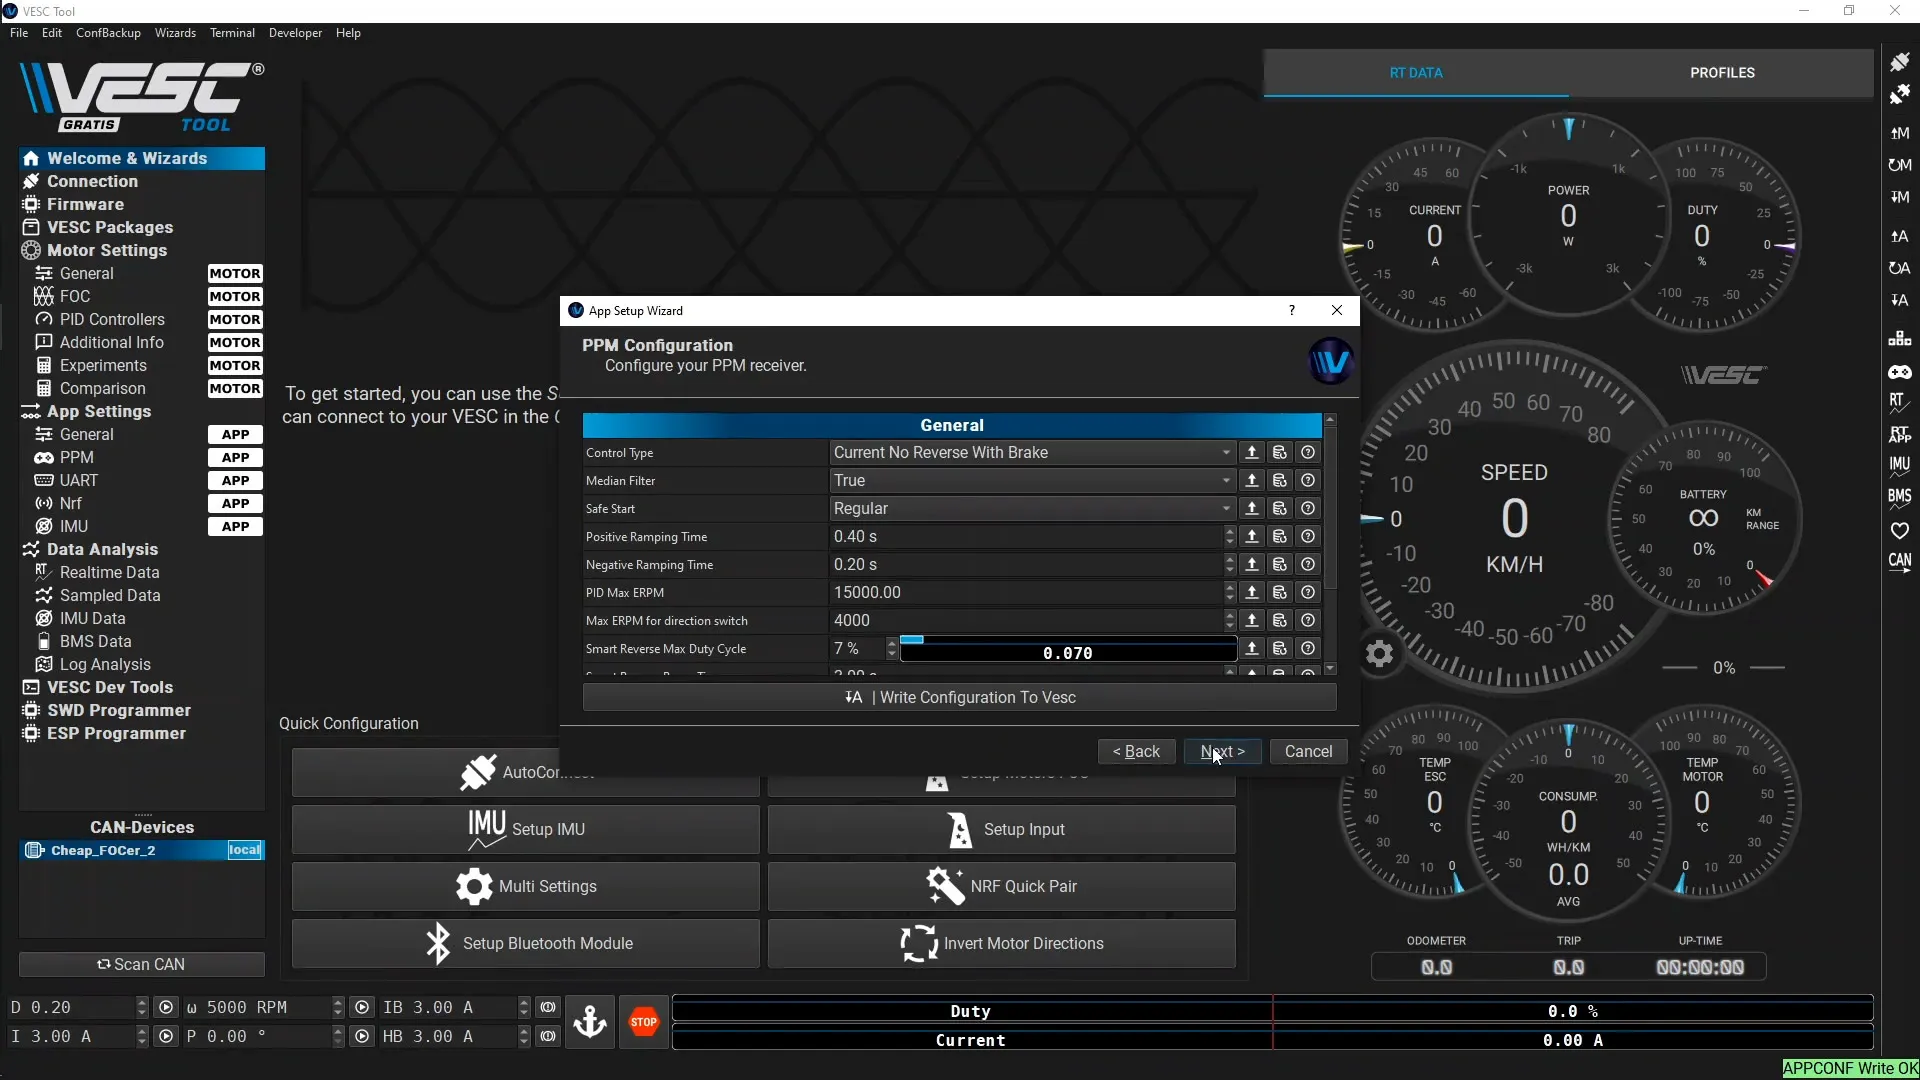
On the PPM Configuration page, under the “Control Type”, you can select the various types of motor control. I’m leaving it at the default, “Current No Reverse With Brake.” Click “Next”:
Click “Finish” and you’re done with the configuration.
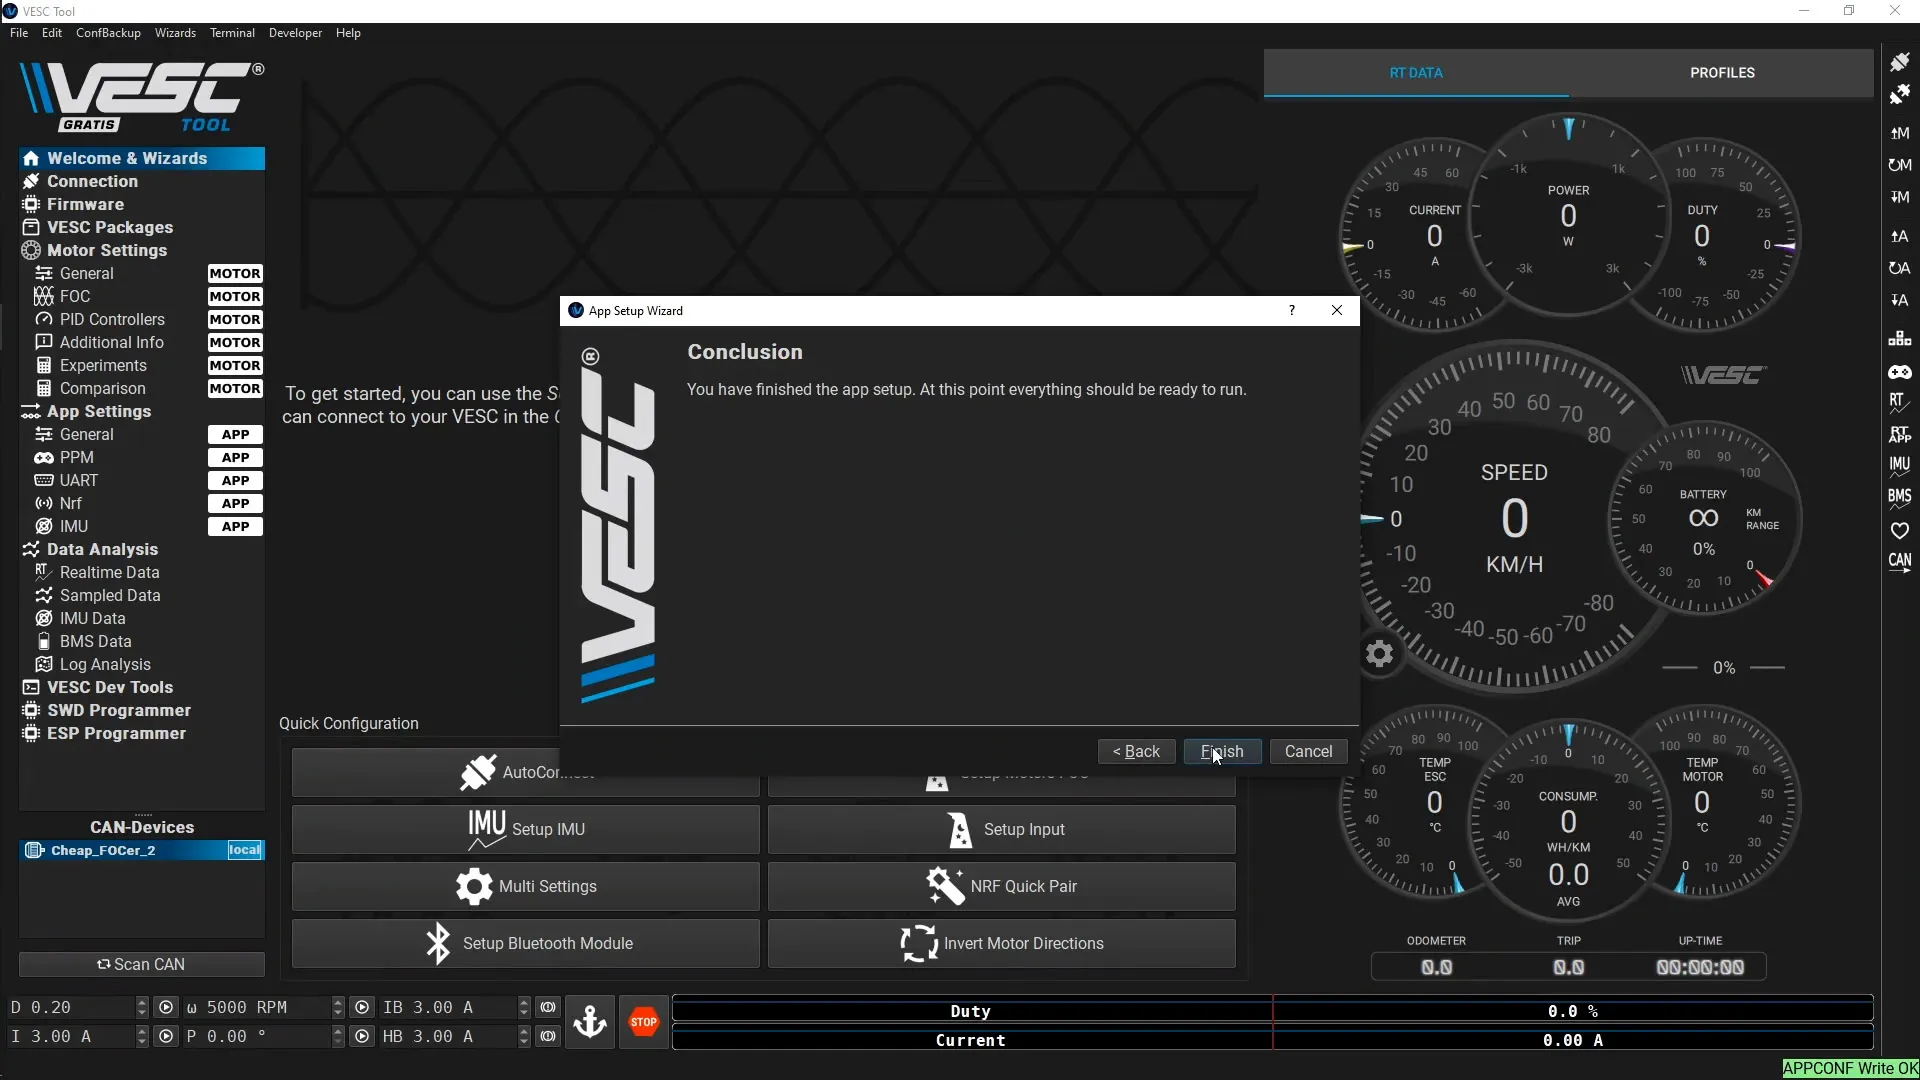
You can now test the motor by moving the throttle on the RC servo tester.
Advanced
In this section, I detail how to debug the firmware with Eclipse and build the configuration tool from source.
Firmware Debugging
If you’re not so lucky to have the above just work, you can set up a debugging environment:
- Download and install the latest version of Eclipse Embedded.
Note: After downloading on macOS, run the following to remove the quarantine attribute:
xattr -d com.apple.quarantine ~/Downloads/eclipse-embedcdt-*-macosx.cocoa.x86_64.tar.gzUnzip:
tar xzf eclipse-embedcdt-2020-09-R-macosx.cocoa.x86_64.tar.gzMove the application into your Applications folder:
mv eclipse.app /Applications/- Navigate to
Import projects->C/C++->Existing Code as a Makefile Project. - Create a new Debug configuration:
- Pick OpenOCD Debugging.
- Specify your debug configuration with full paths to the binaries.
A UART is available on the COMM port (J2). Pins 1 (GND), 5 (RX), and 6 (TX) should be used.
Building the Configuration Tool
You can also build your own copy of the configuration tool from source instead of downloading it from vesc-project.com.
Dependencies
Install qt5:
brew install qtBuilding
The normal build script is ./build_macos, but this wasn’t working for me, so I just ran the following commands from the script:
export PATH=$(brew info qt|grep Cellar|awk '{print $1}')/bin:$PATH
rm -rf build/macos/*
qmake -config release "CONFIG += release_macos build_original"
make clean
make -j8
open build/macos
Drag esc_tool_3.00.app into your Applications folder.
References
Check out the Cheaper FOCer 2 post on the esk8 forum for more info on the hardware.