
Nathan Tsoi
I am a full-stack robotics researcher specializing in human-robot interaction. My research explores learning-based systems that enable robots to not only complete tasks reliably, but to actively model and positively shape dynamic human-robot interactions by incorporating human expectations and perceptions of robot behaviors such as trust, comfort, and satisfaction.
I am currently a Postdoctoral Fellow with Texas Robotics at the University of Texas at Austin, advised by Joydeep Biswas and Peter Stone. I received my PhD in Computer Science from Yale University, advised by Marynel Vázquez. Before my PhD, I designed and trained neural networks at the Stanford AI Lab and built investment sourcing and ranking algorithms at Sequoia Capital.
News
Recent Research
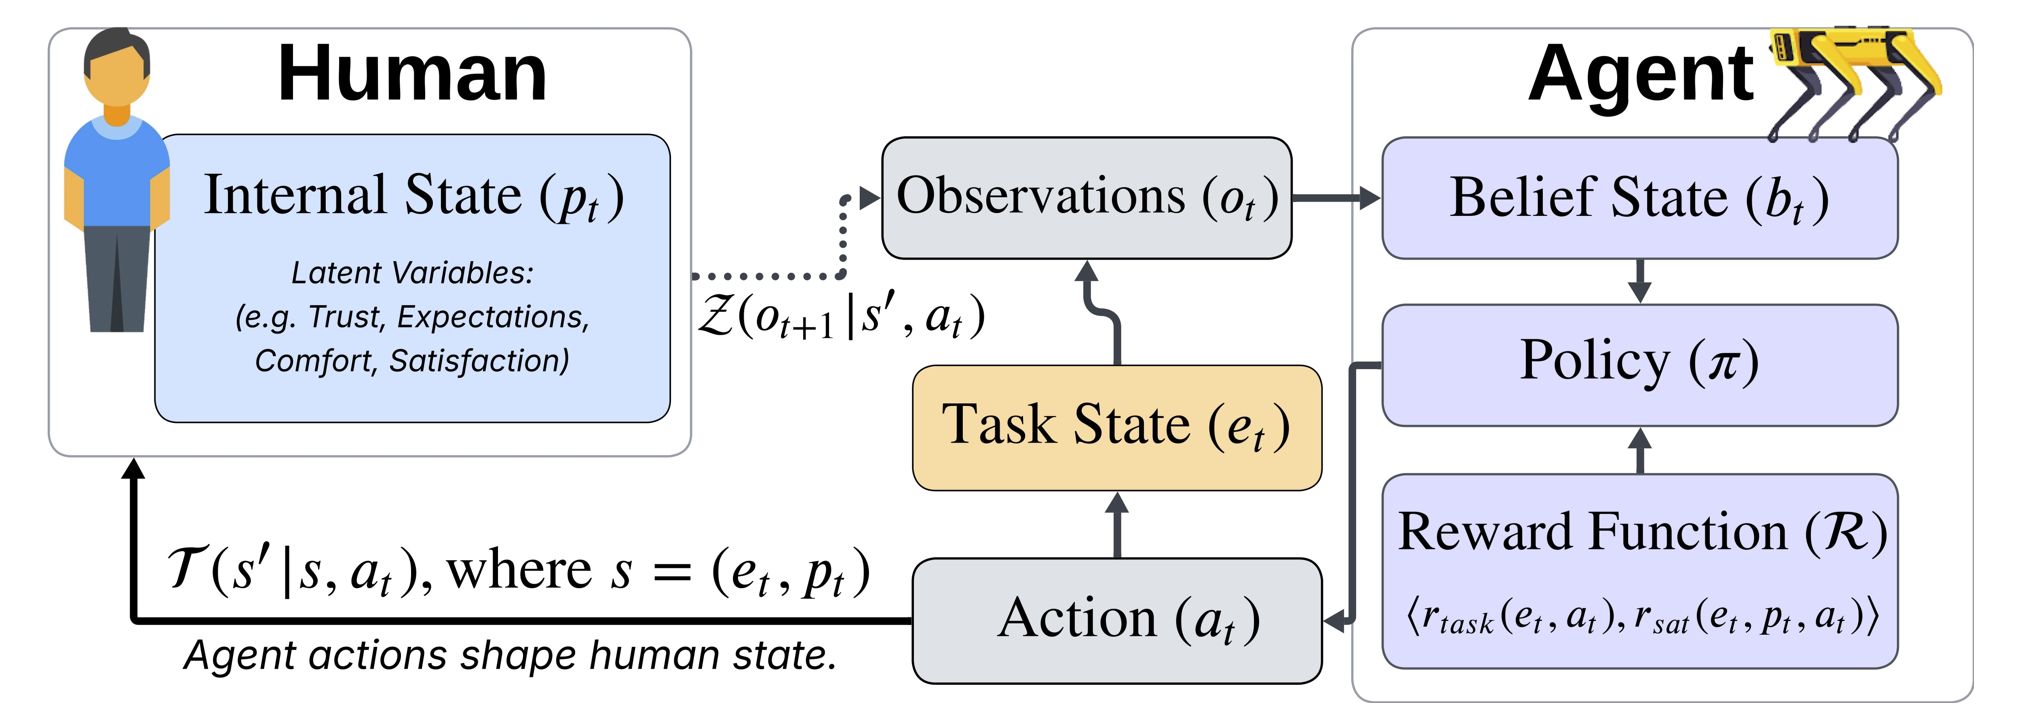
Coadaptive Value Alignment
Nathan Tsoi, Eric Hsiung, Masayuki Yamazaki, Swarat Chaudhuri, Peter Stone, and Joydeep Biswas
Proceedings of the 25th International Conference on Autonomous Agents and Multiagent Systems (AAMAS) Blue Sky Ideas Track
The integration of autonomous agents into human society is a grand challenge for AI. In order to achieve widespread acceptance, agents must conform to the values of people with whom they interact. Current approaches treat the value alignment problem ...
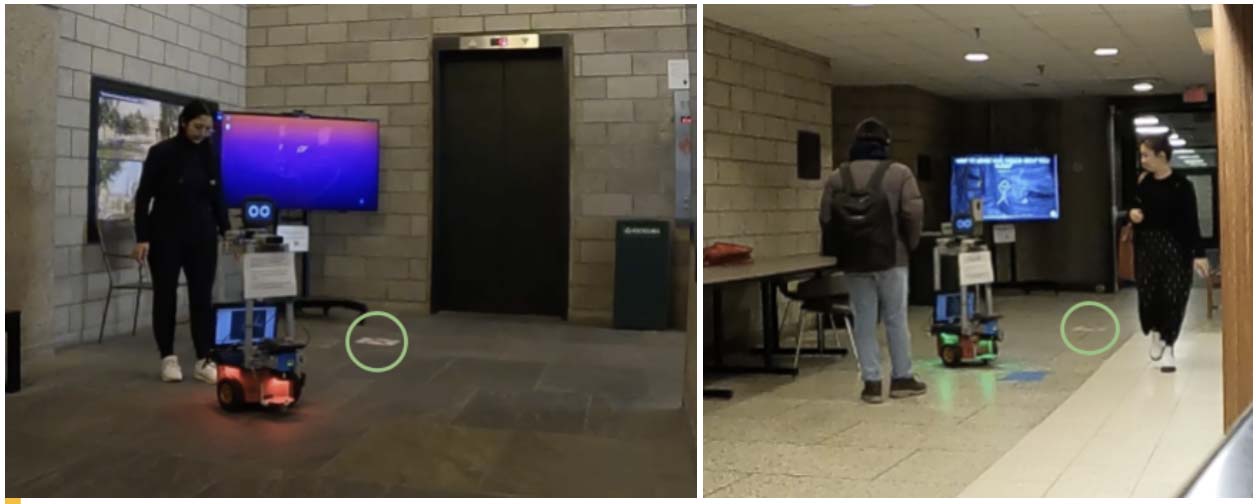
Predicting Human Perceptions of Robot Performance During Navigation Tasks
Qiping Zhang*, Nathan Tsoi*, Mofeed Nagib, Booyeon Choi, Jie Tan, Hao-Tien Lewis Chiang, Marynel Vázquez
ACM Transactions on Human-Robot Interaction (THRI)
Understanding human perceptions of robot performance is crucial for designing socially intelligent robots that can adapt to human expectations. Current approaches often rely on surveys, which can disrupt ongoing human-robot interactions. As an altern...
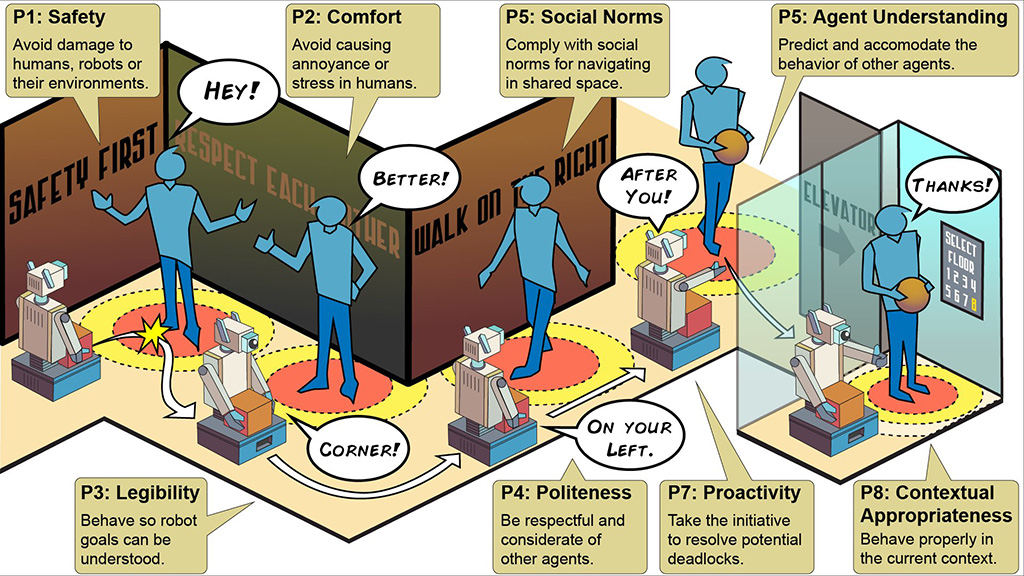
Principles and Guidelines for Evaluating Social Robot Navigation Algorithms
Anthony Francis, Claudia Pérez-D'Arpino, Chengshu Li, Fei Xia, Alexandre Alahi, Rachid Alami, Aniket Bera, Abhijat Biswas, Joydeep Biswas, Rohan Chandra, Hao-Tien Lewis Chiang, Michael Everett, Sehoon Ha, Justin Hart, Jonathan P. How, Haresh Karnan, Tsang-Wei Edward Lee, Luis J. Manso, Reuth Mirksy, Sören Pirk, Phani Teja Singamaneni, Peter Stone, Ada V. Taylor, Peter Trautman, Nathan Tsoi, Marynel Vázquez, Xuesu Xiao, Peng Xu, Naoki Yokoyama, Alexander Toshev, Roberto Martín-Martín
ACM Transactions on Human-Robot Interaction (THRI)
A major challenge to deploying robots widely is navigation in human-populated environments, commonly referred to as social robot navigation. While the field of social navigation has advanced tremendously in recent years, the fair evaluation of algori...