G0704 Ballscrew and Spindle Upgrades
This article is a follow-up to my article on the conversion of a G0704 mini mill to a CNC machine using LinuxCNC. To reduce the backlash on the machine, I have upgraded to ballscrews on all axes. To achieve faster spindle speeds and lower noise, I’ve upgraded the spindle to a pulley drive while keeping the quill functional.
My open-source designs for both upgrades are included below.
Ballscrew Upgrade
The
The game plan for my ballscrew upgrade was to swap out the leadscrews on all axes with C7 ballscrews, which I ordered straight from a manufacturer in China. You’ll need a 350mm, a 600mm, and an 800mm ballscrew. I used the DFU1605 (DFU is the double-nut version). I received the ballscrews with the ends machined in the standard way and then machined them myself, as shown here:
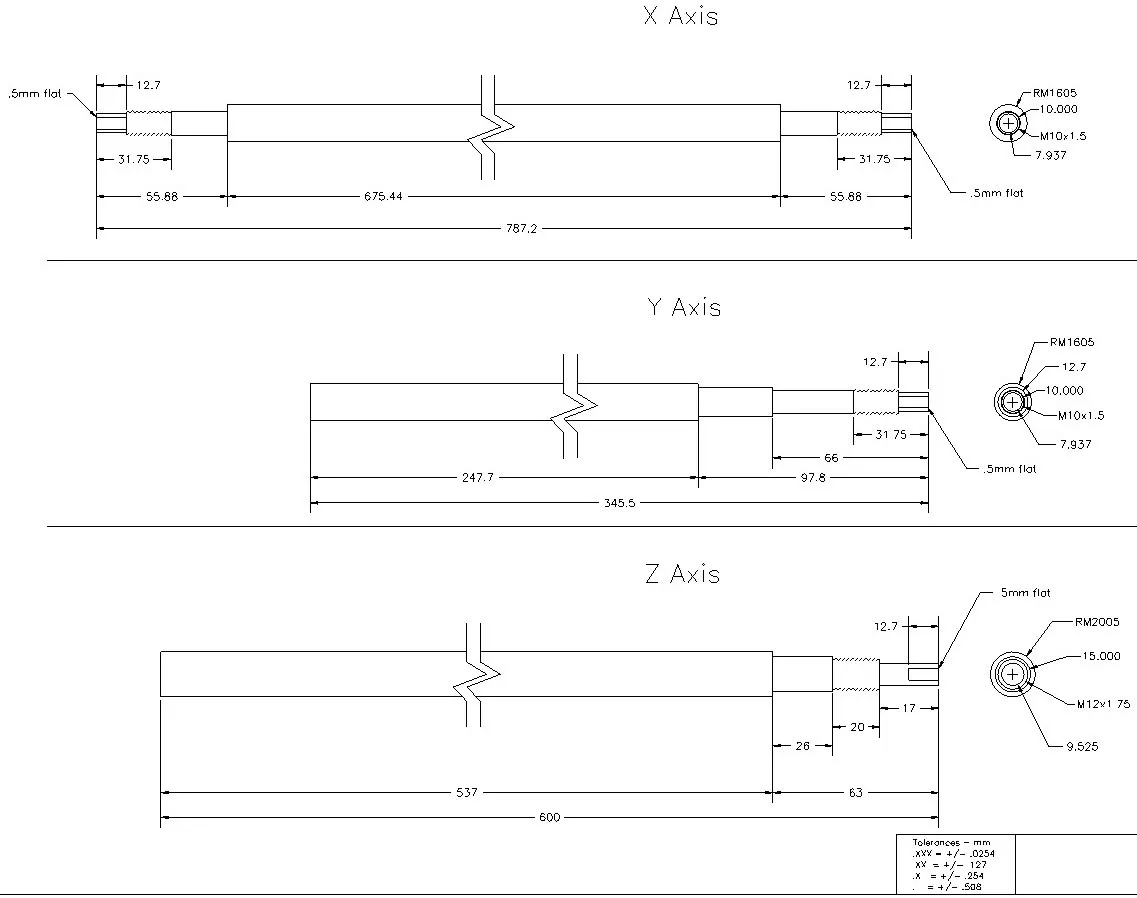
The conversion uses two NEMA 23 motors and one NEMA 34 motor. The drivers are the same DM556E Leadshine stepper motor drivers used in the
You’ll also need:
- 4x M12 retaining nuts
- 3x 7001 12x28x8mm P5 DB paired angular contact bearings
- 1x 6000 ZZ 10x26x8 bearing
I machined all the mounting parts for the upgrade kit on the mill, but they can easily be ordered from a company that cuts waterjet parts. I highly suggest you waterjet these parts and then machine the necessary countersunk holes and various features to spec.
CNC Conversion Design Files
The DXF files for waterjet cutting are available on Thingiverse.
The drawings for final machining are here: g0704-ballscrew-drawings.pdf.
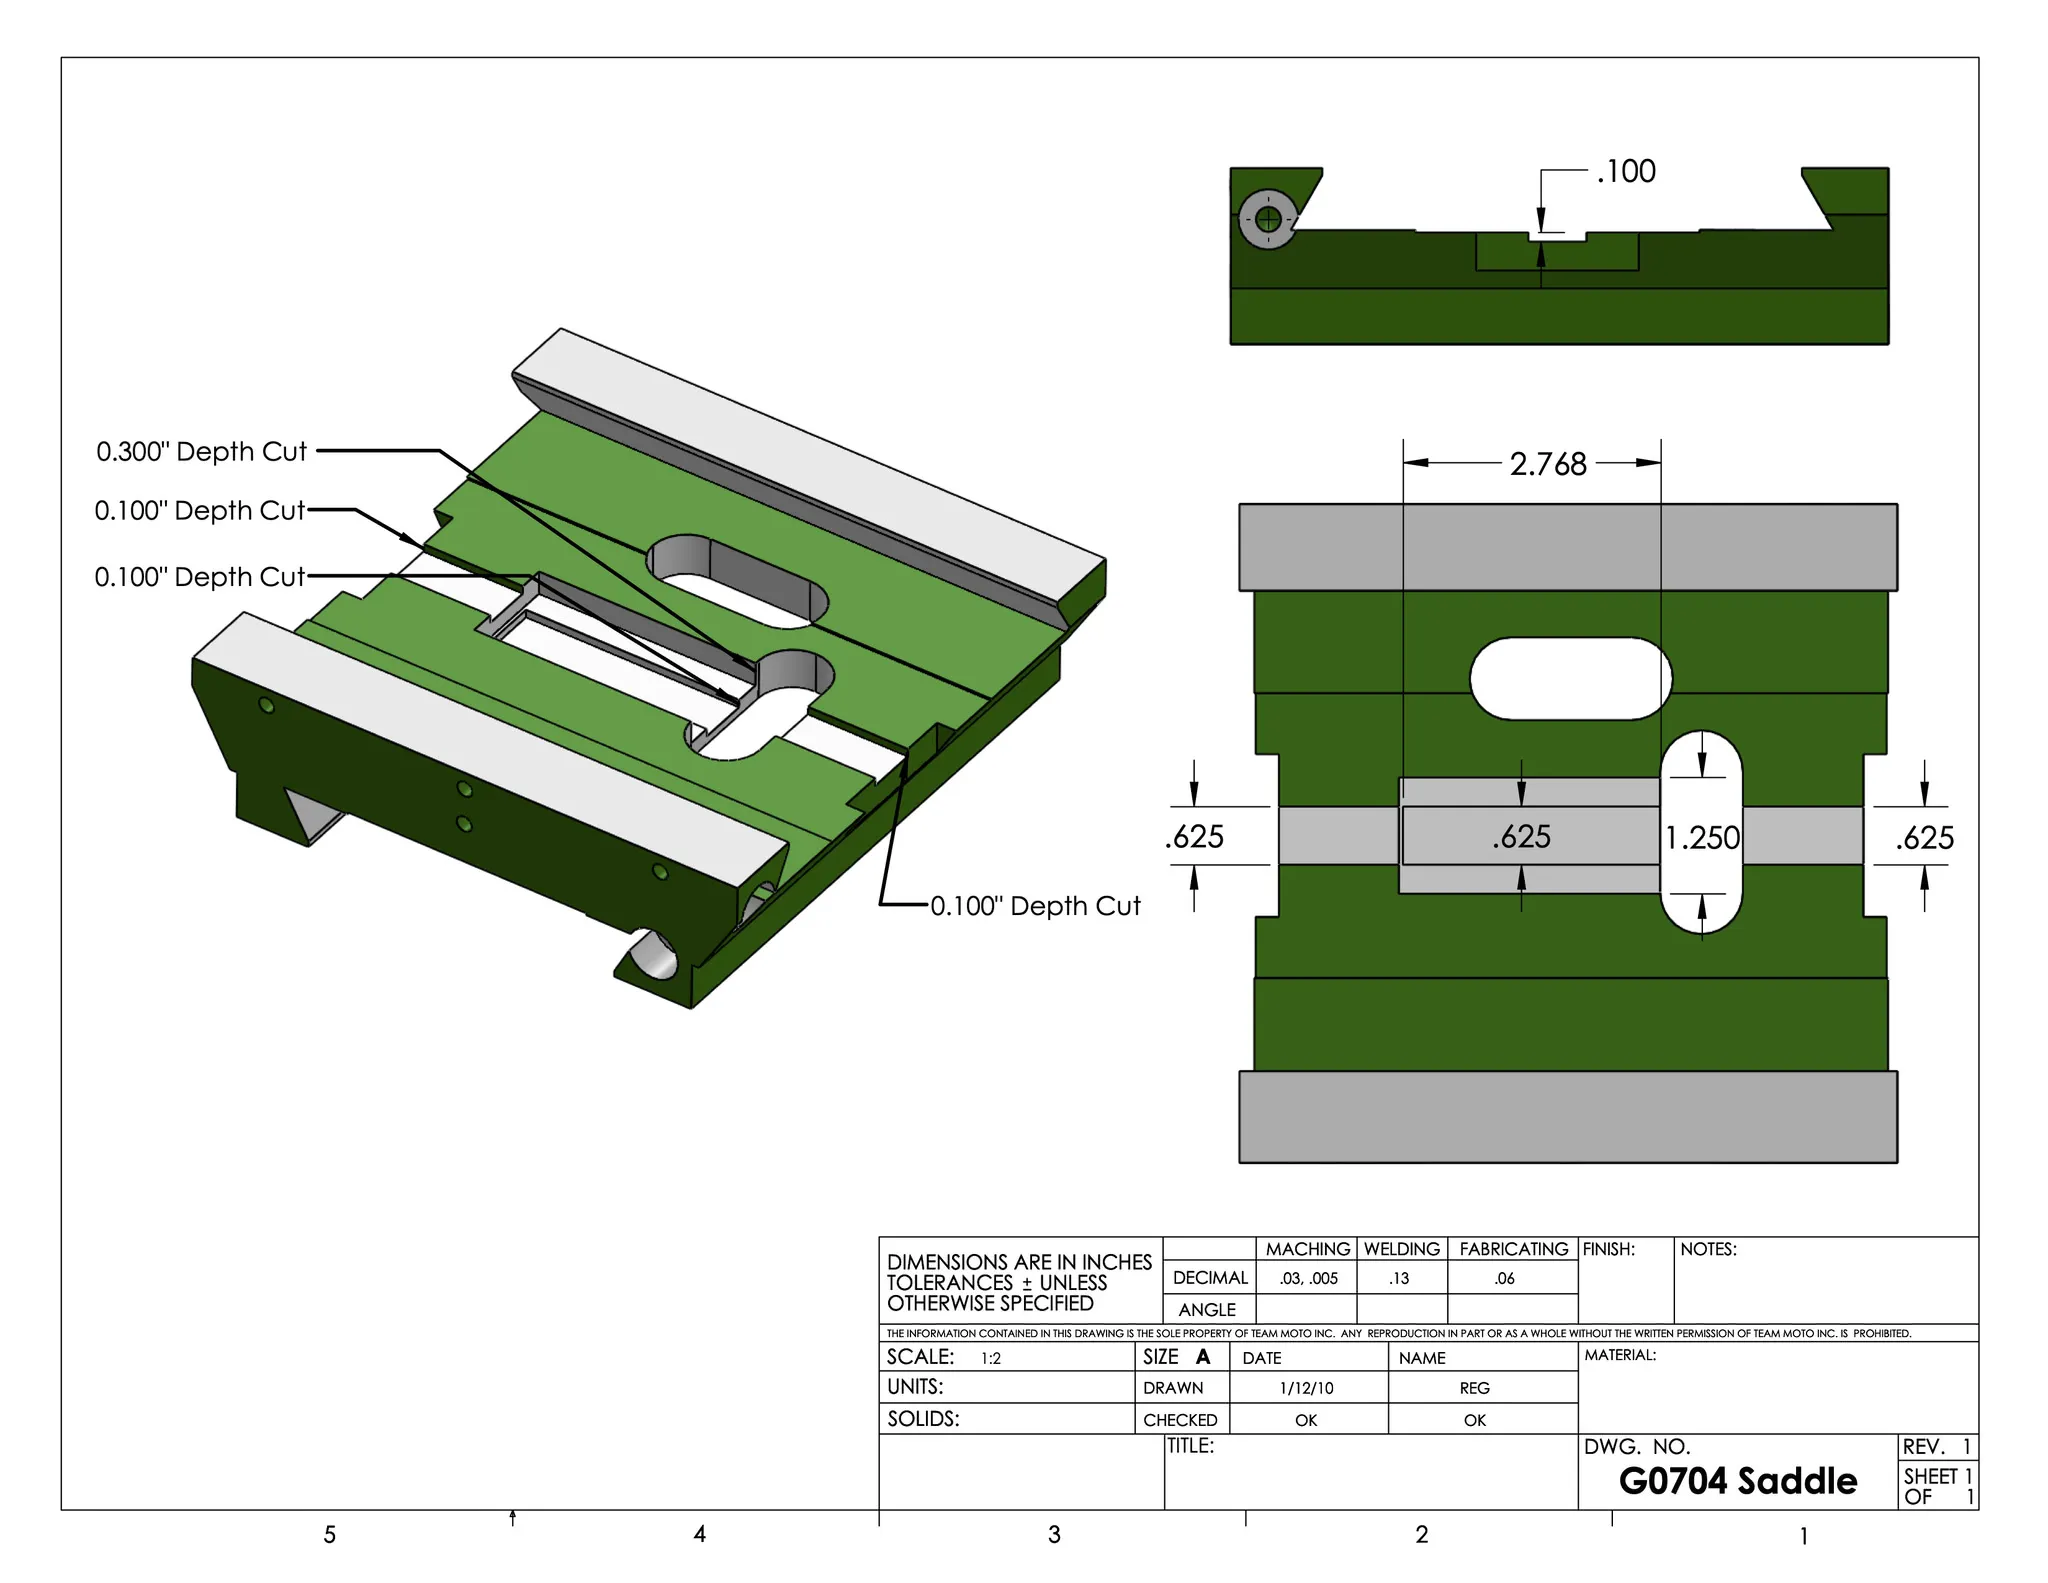
The G0704 Saddle will also need to be machined as described in this PDF by automationtechnologiesinc.com:
Spindle Pulley Conversion Upgrade
The main limitation of the G0704 is the spindle. It runs far too slowly for CNC operations and is quite loud.
There are several options to convert the gear-drive to a pulley-drive system, but these options often remove the ability to use the quill or require expensive retrofit parts. In particular, a new part that interfaces with the splines on the quill would require a difficult broaching operation.
I’ve come up with a solution that allows conversion to a much quieter pulley drive while keeping the quill intact. It does not require machining a new part that interfaces with the spline, but rather reuses the existing hardware.
Using this design and the stock motor, my machine can hit 3,000 RPM on the higher pulley ratio and 2,000 RPM on the lower ratio. Even running faster, it is significantly quieter than using the original plastic gears.
You’ll need:
- A 3L190 V-Belt
- 2x long M3 bolts
- 7x set screws
- Aluminum stock
Pulley Conversion Design Files
The DXF files for waterjet cutting and the 3D printed pulley covers are available on Thingiverse: /downloads/https-www-thingiverse-com-thin.
The drawings for final machining are here: g0704-pully-conversion.pdf.
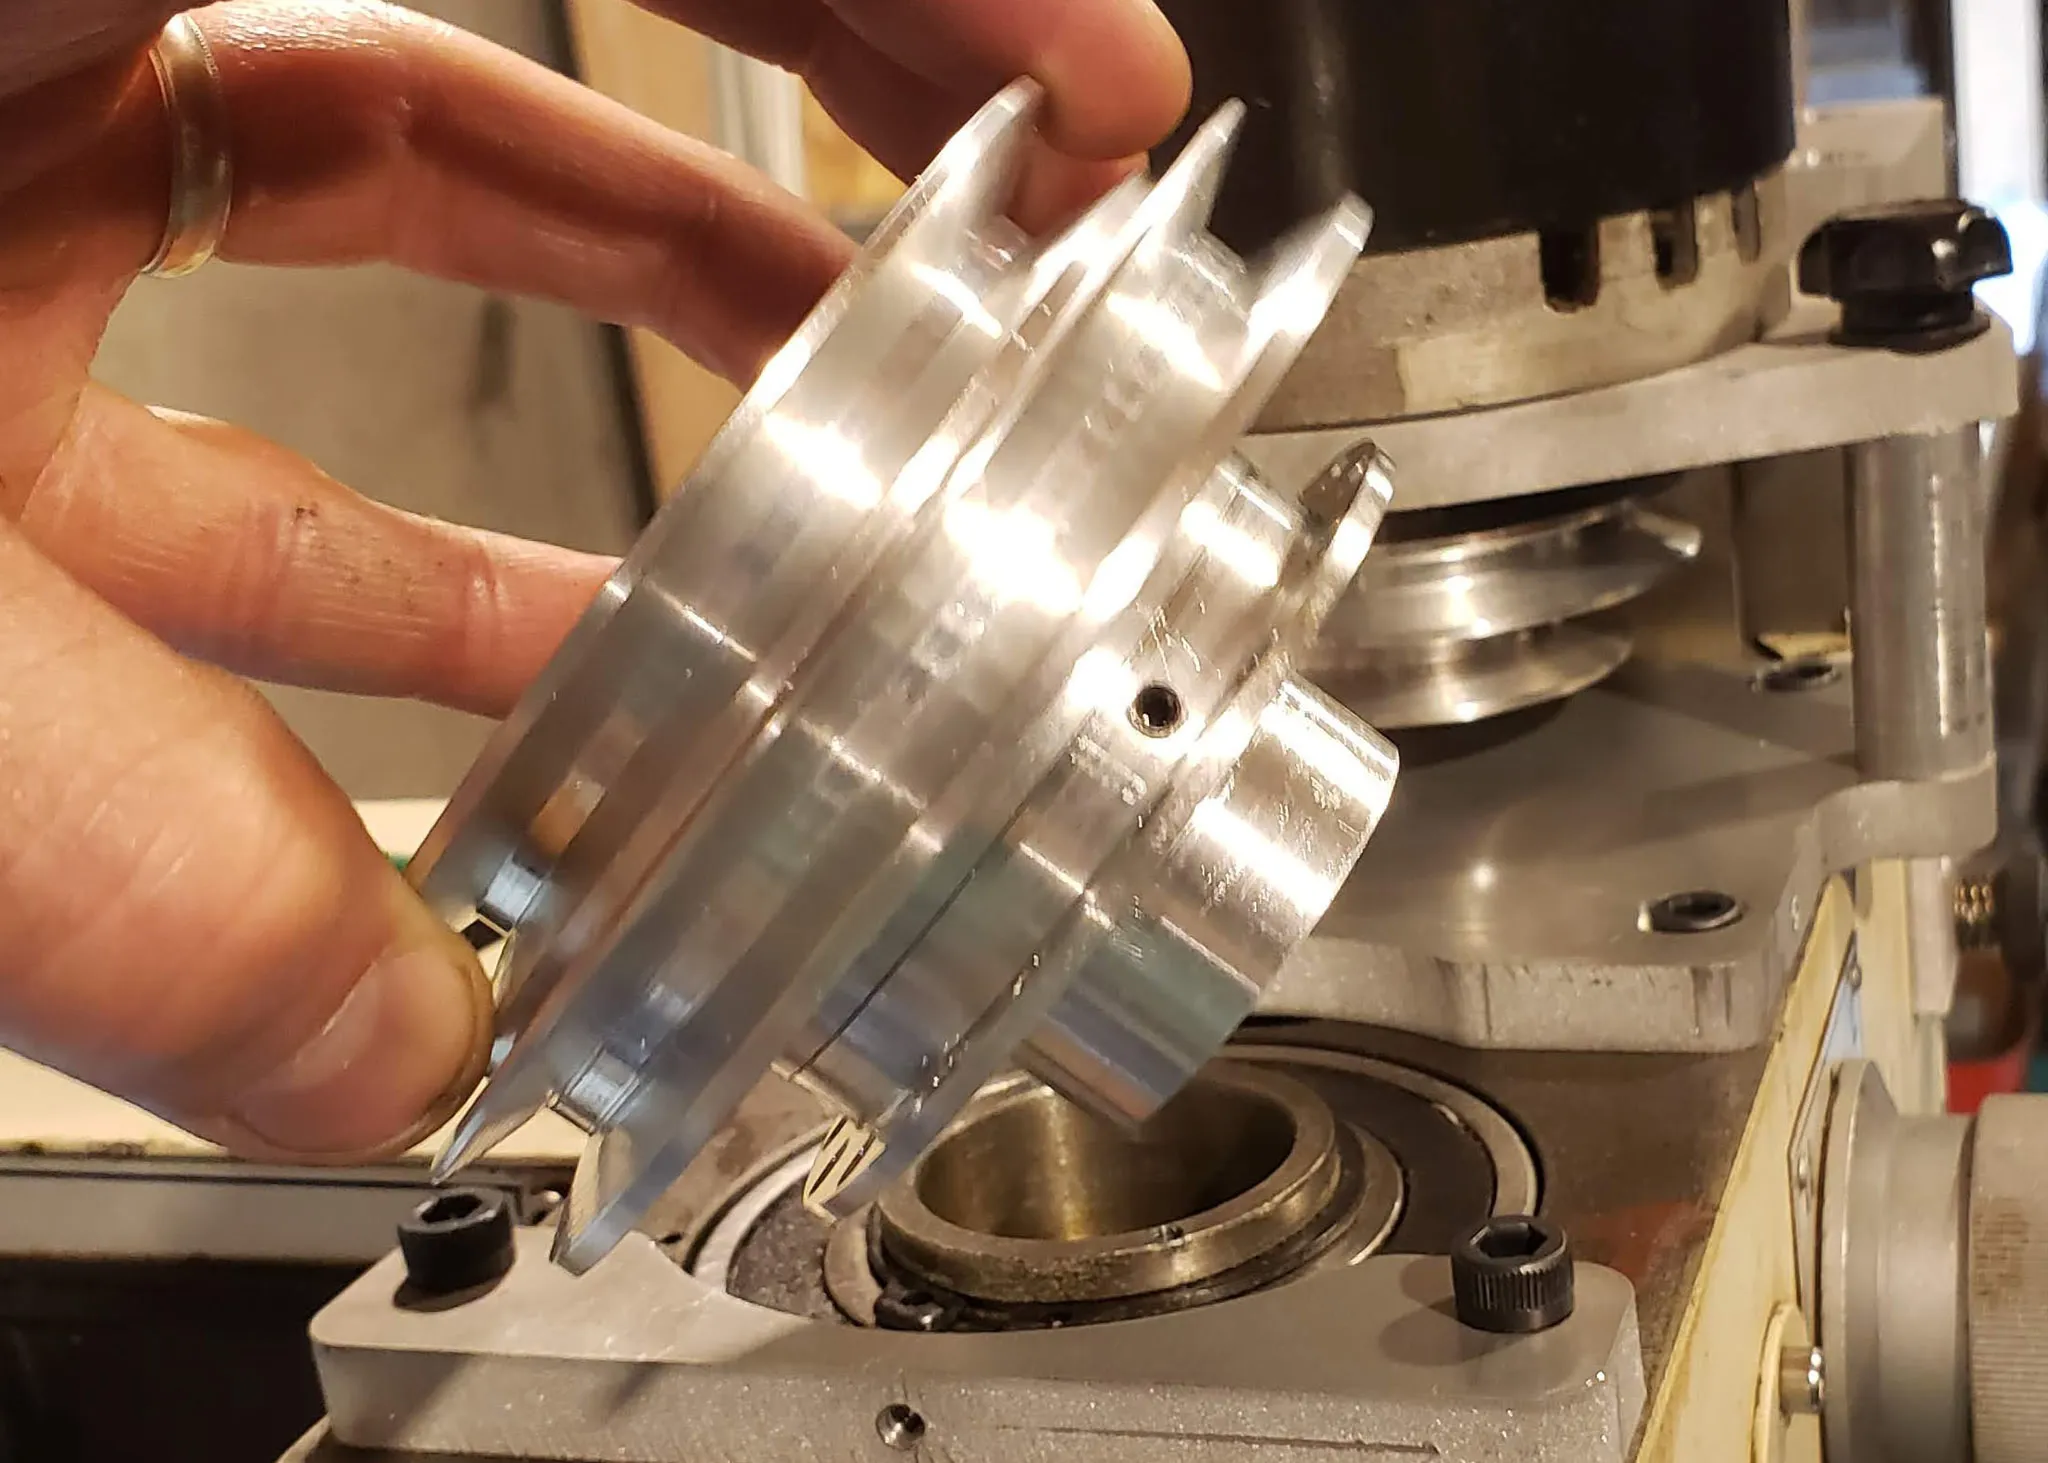
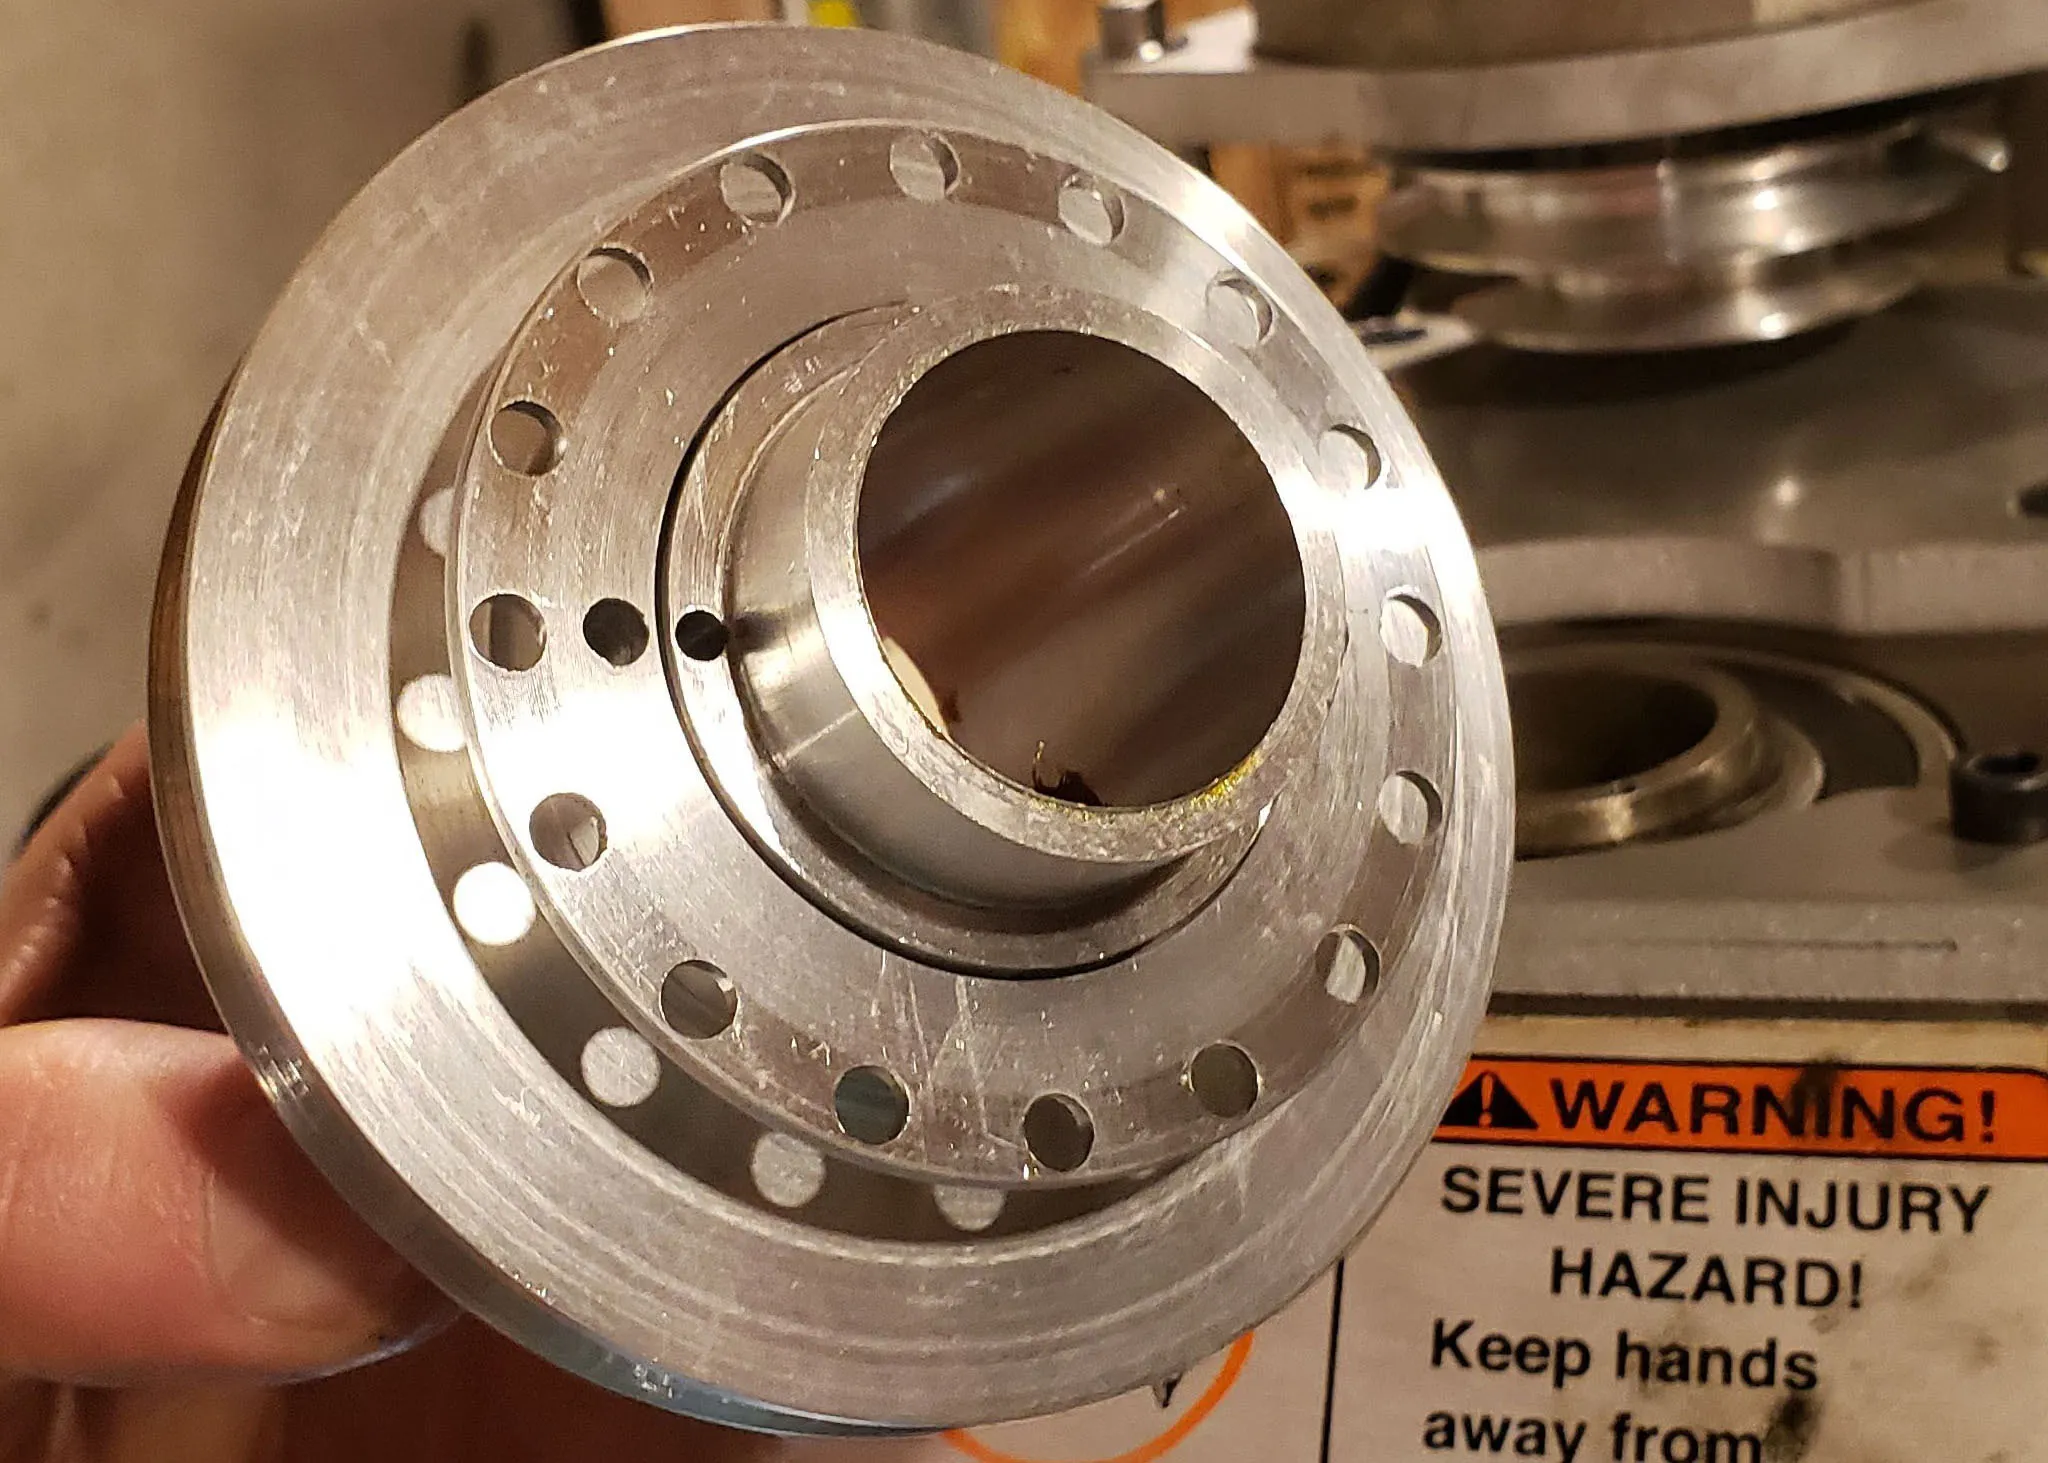
The two pulleys were machined on a lathe from 1.5” and 2” stock, cut round-ish on the bandsaw, and then machined to spec. The standoffs were cut from aluminum bar stock, and the other parts were waterjet from 0.35” aluminum plate.
Pulley Conversion Guide
Start by stripping the head as described in this guide by minipro.com.
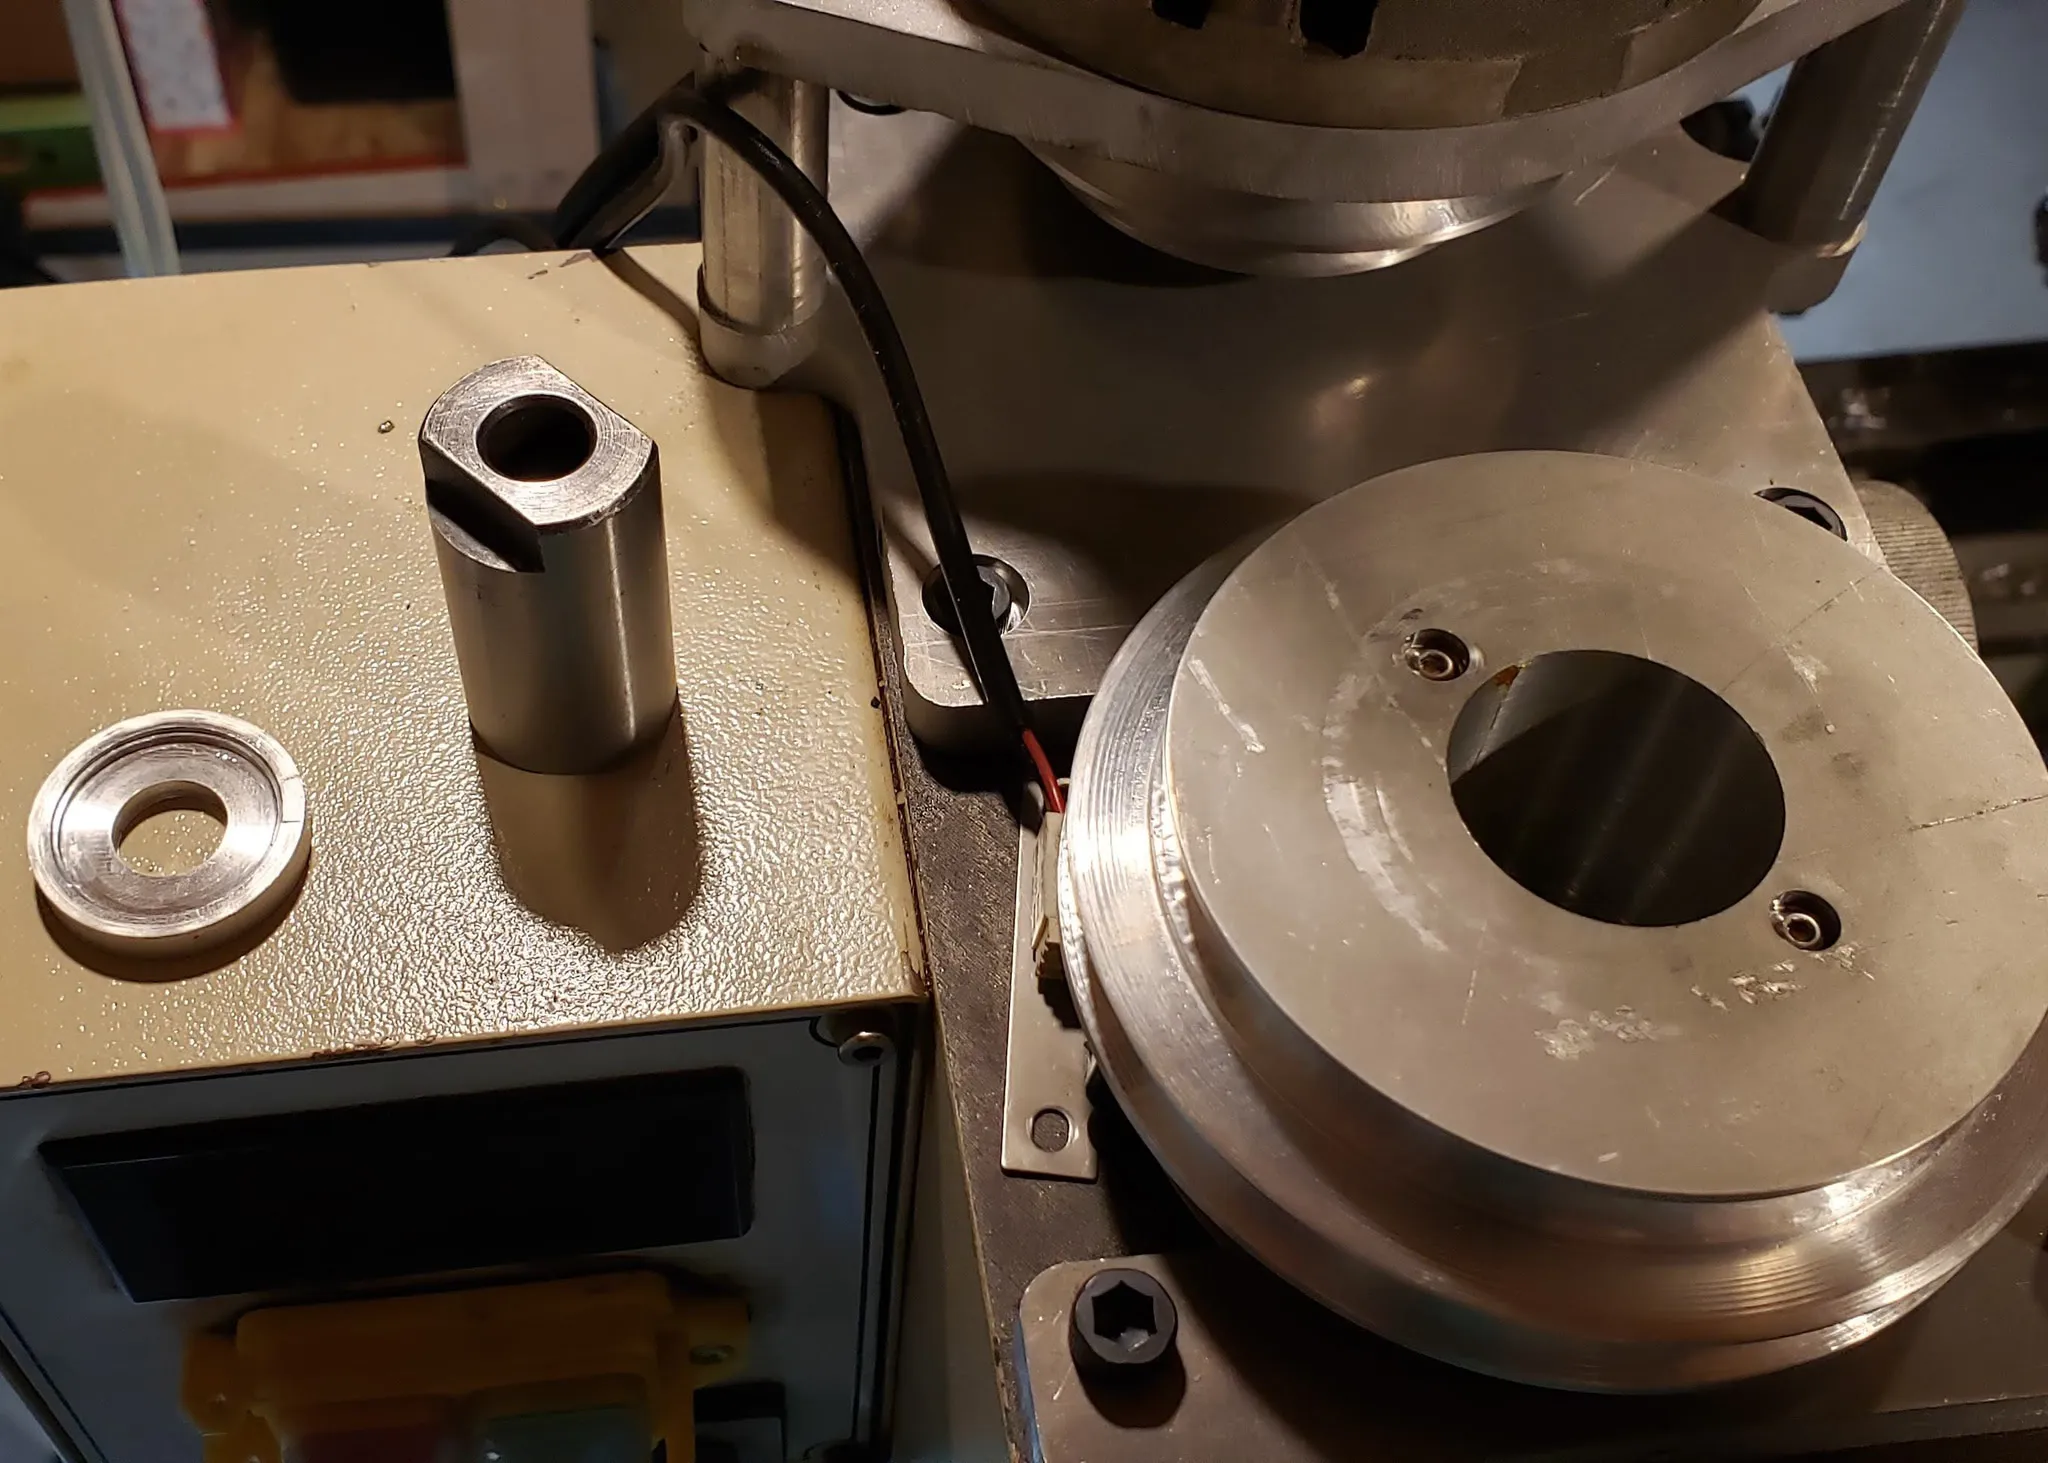
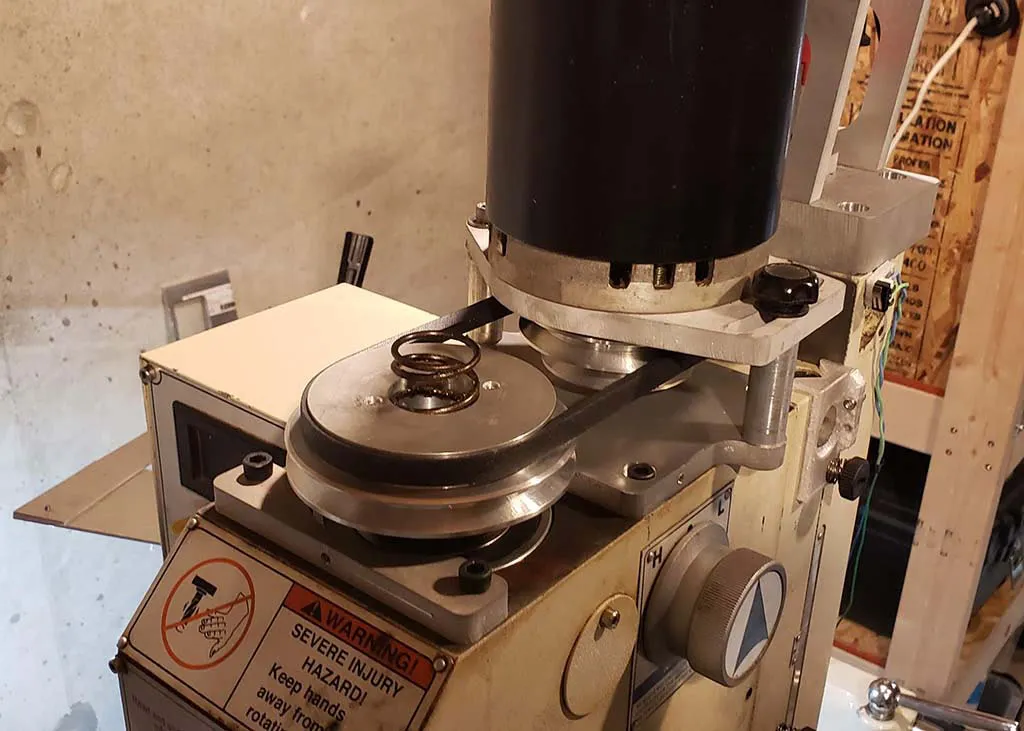
Install the standoffs into the rear lower plate. Then, install the lower plate onto the mill. Install the front lower plate as well. Here is a photo of the rear lower plate installed along with the standoffs:
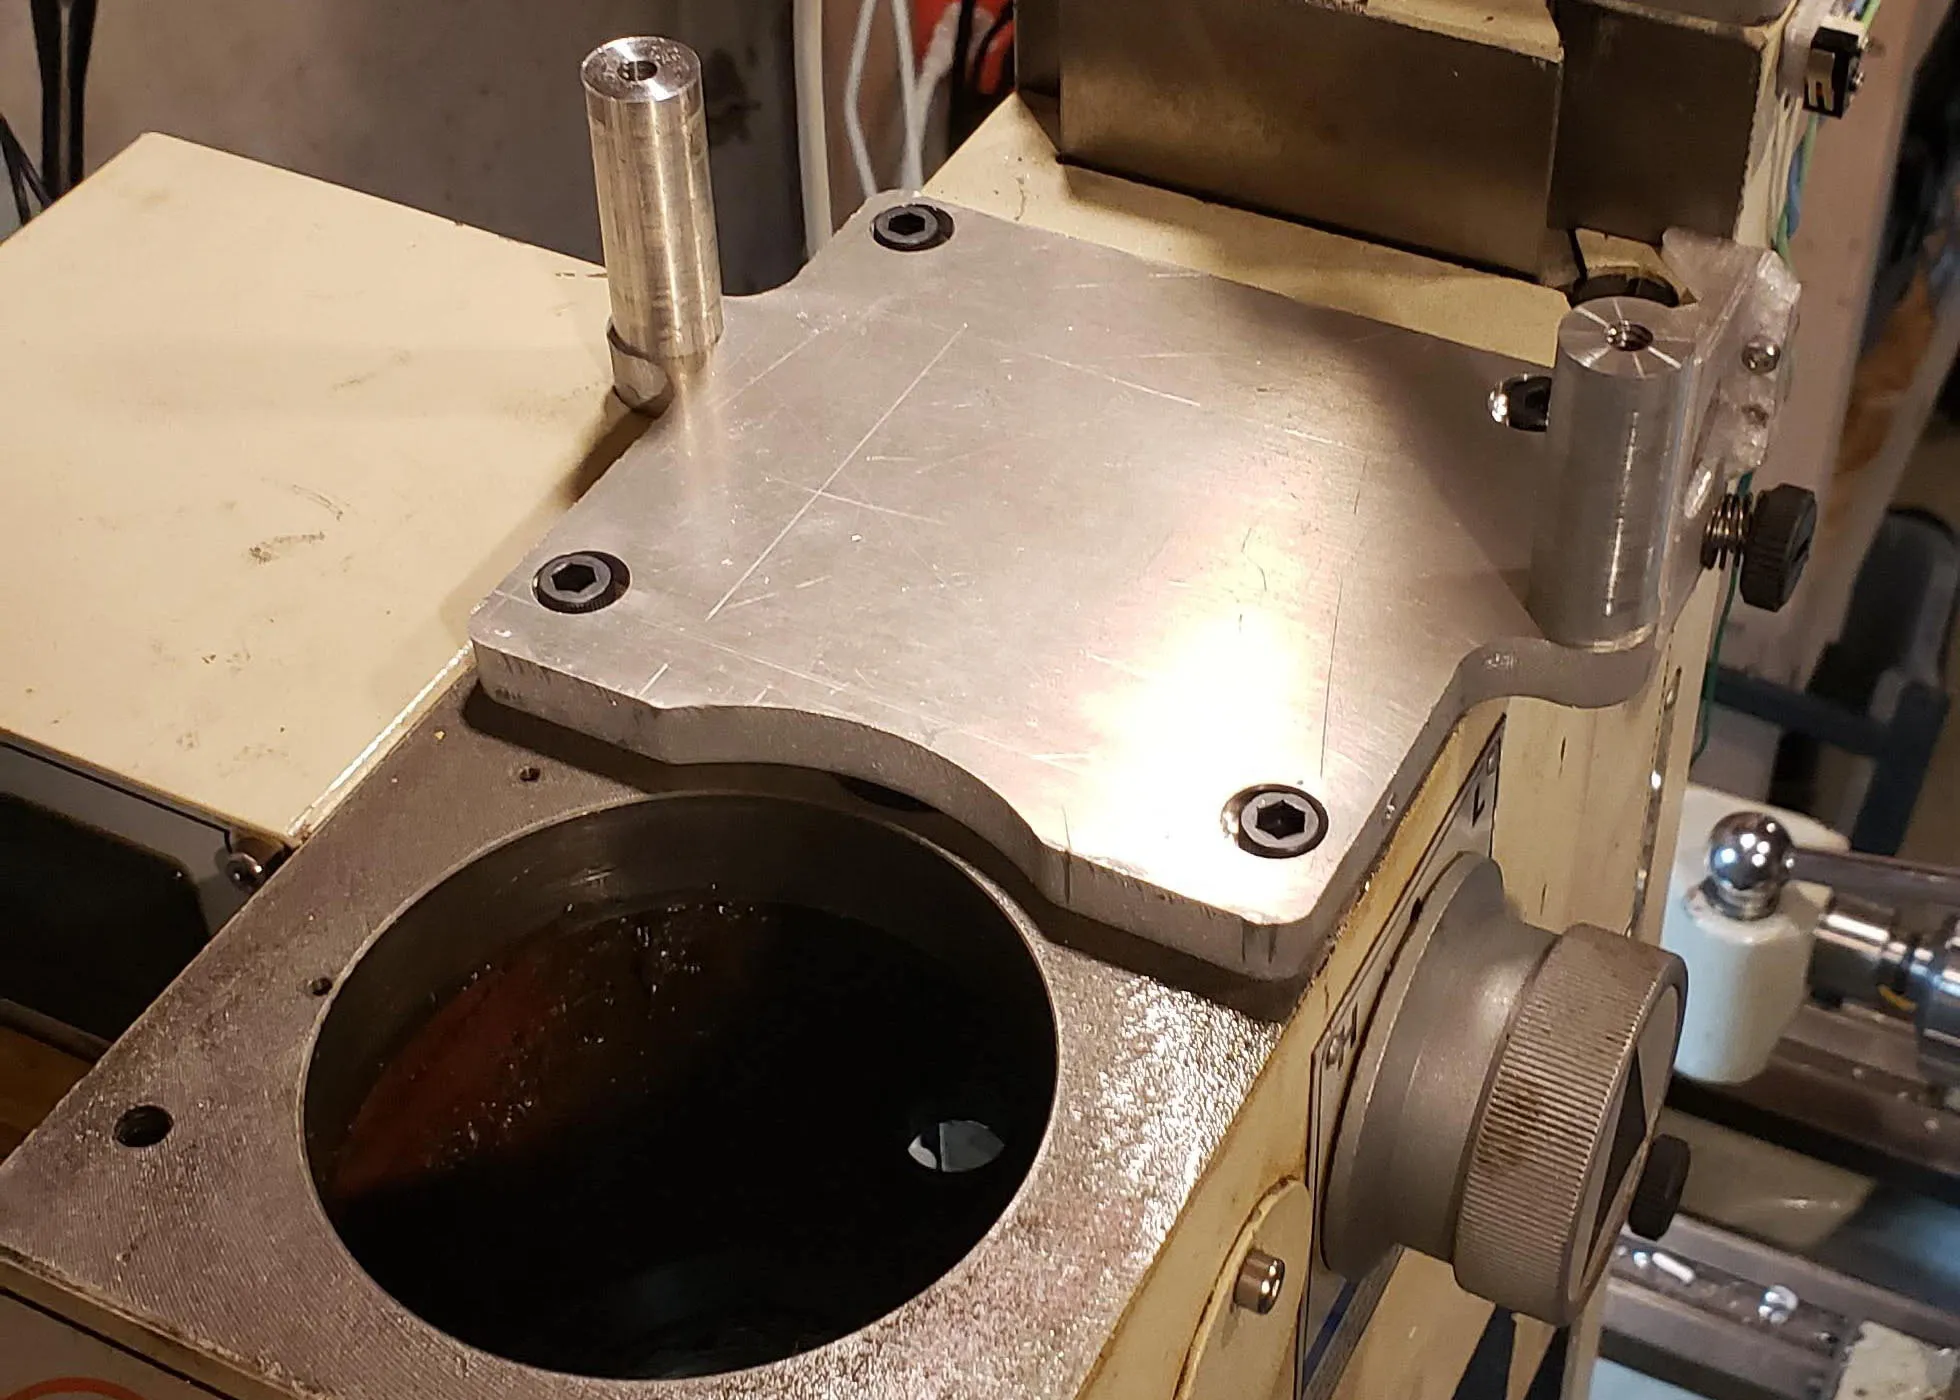
Reinstall the spindle and bearings. Attach the motor to the top plate and install it. Install the machined motor pulley. Note: You must use threadlock on the set screws in this pulley. If you do not use threadlock or use poor quality threadlock, the pulley will fall off!
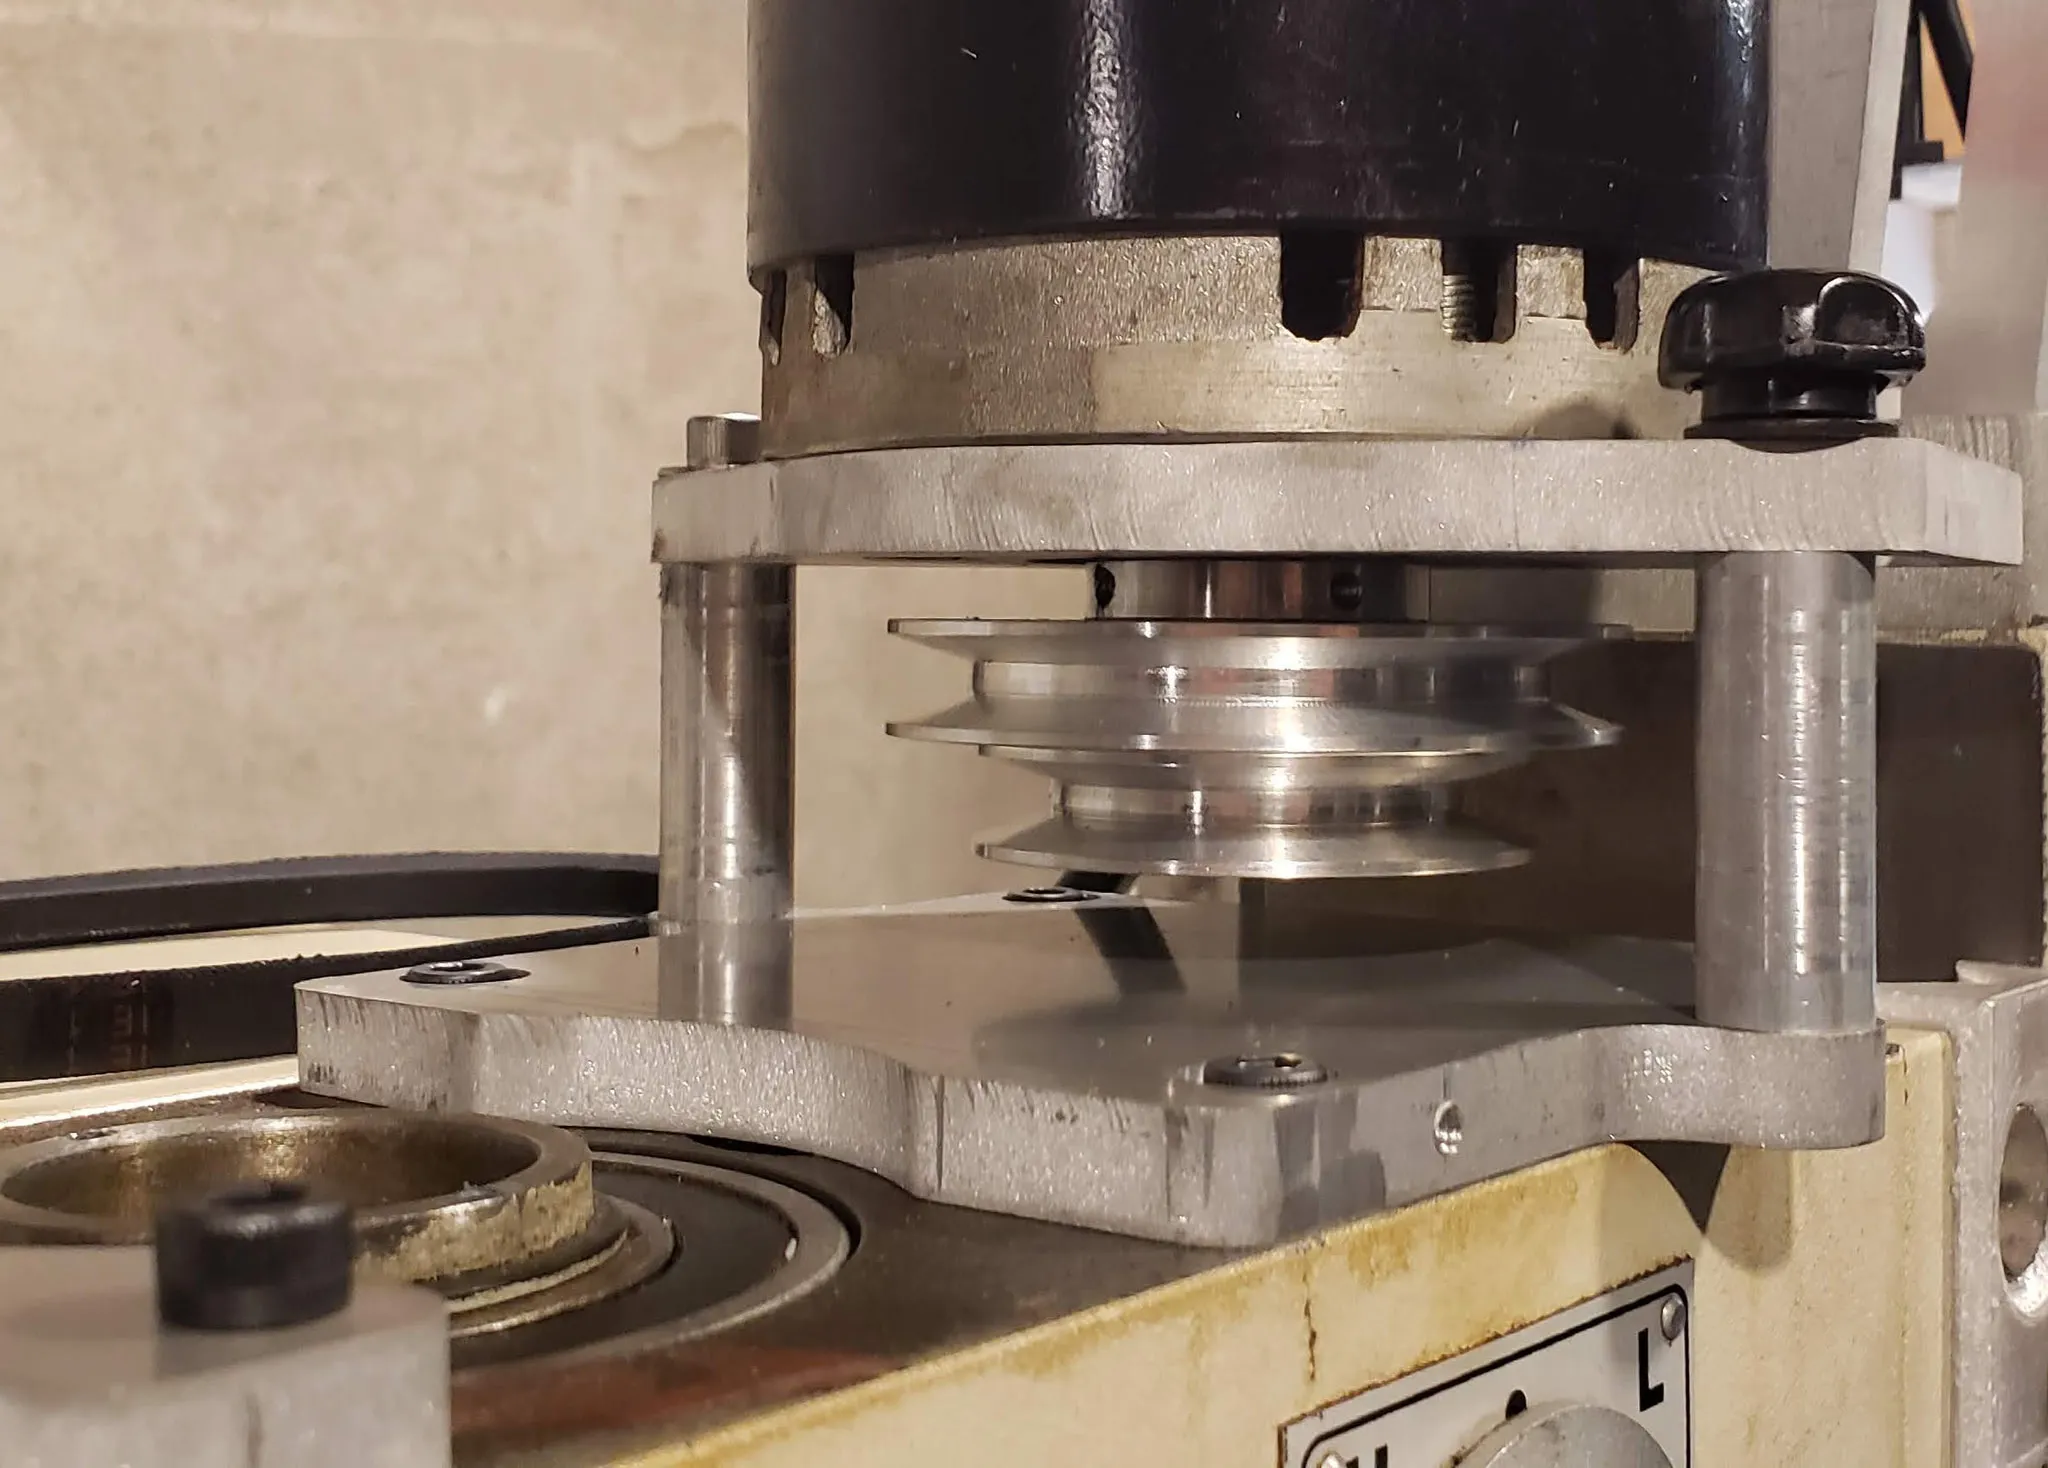
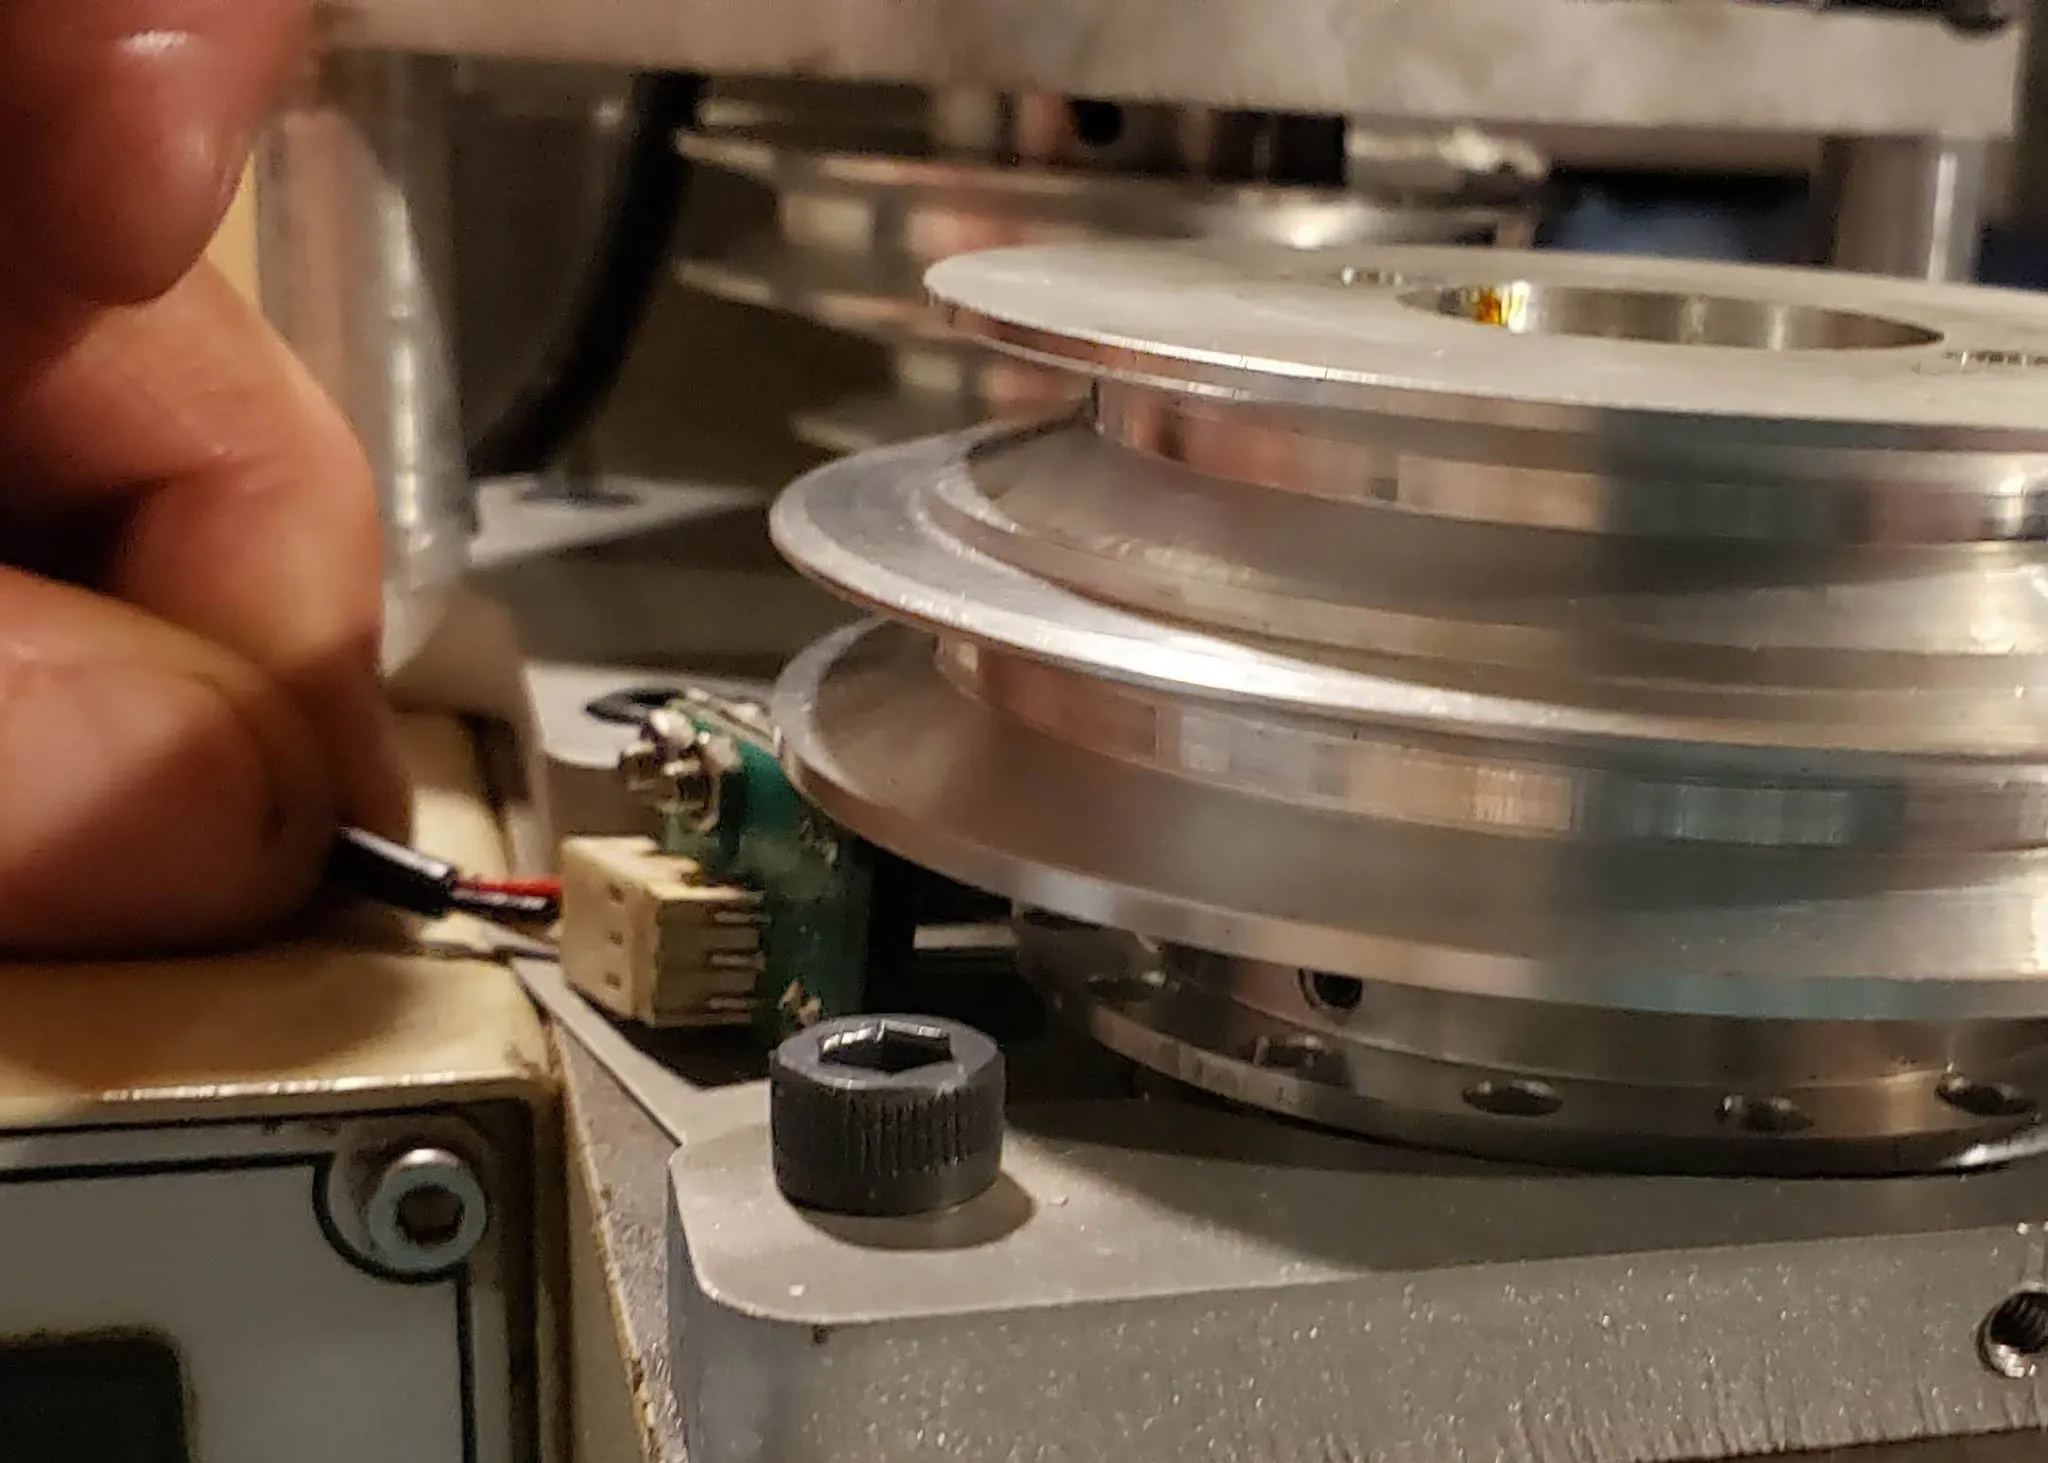
Connect the machined sensor disk to the machined spindle pulley.
Reinstall the RPM sensor.
Install the 3L190 V-Belt and insert the spring.
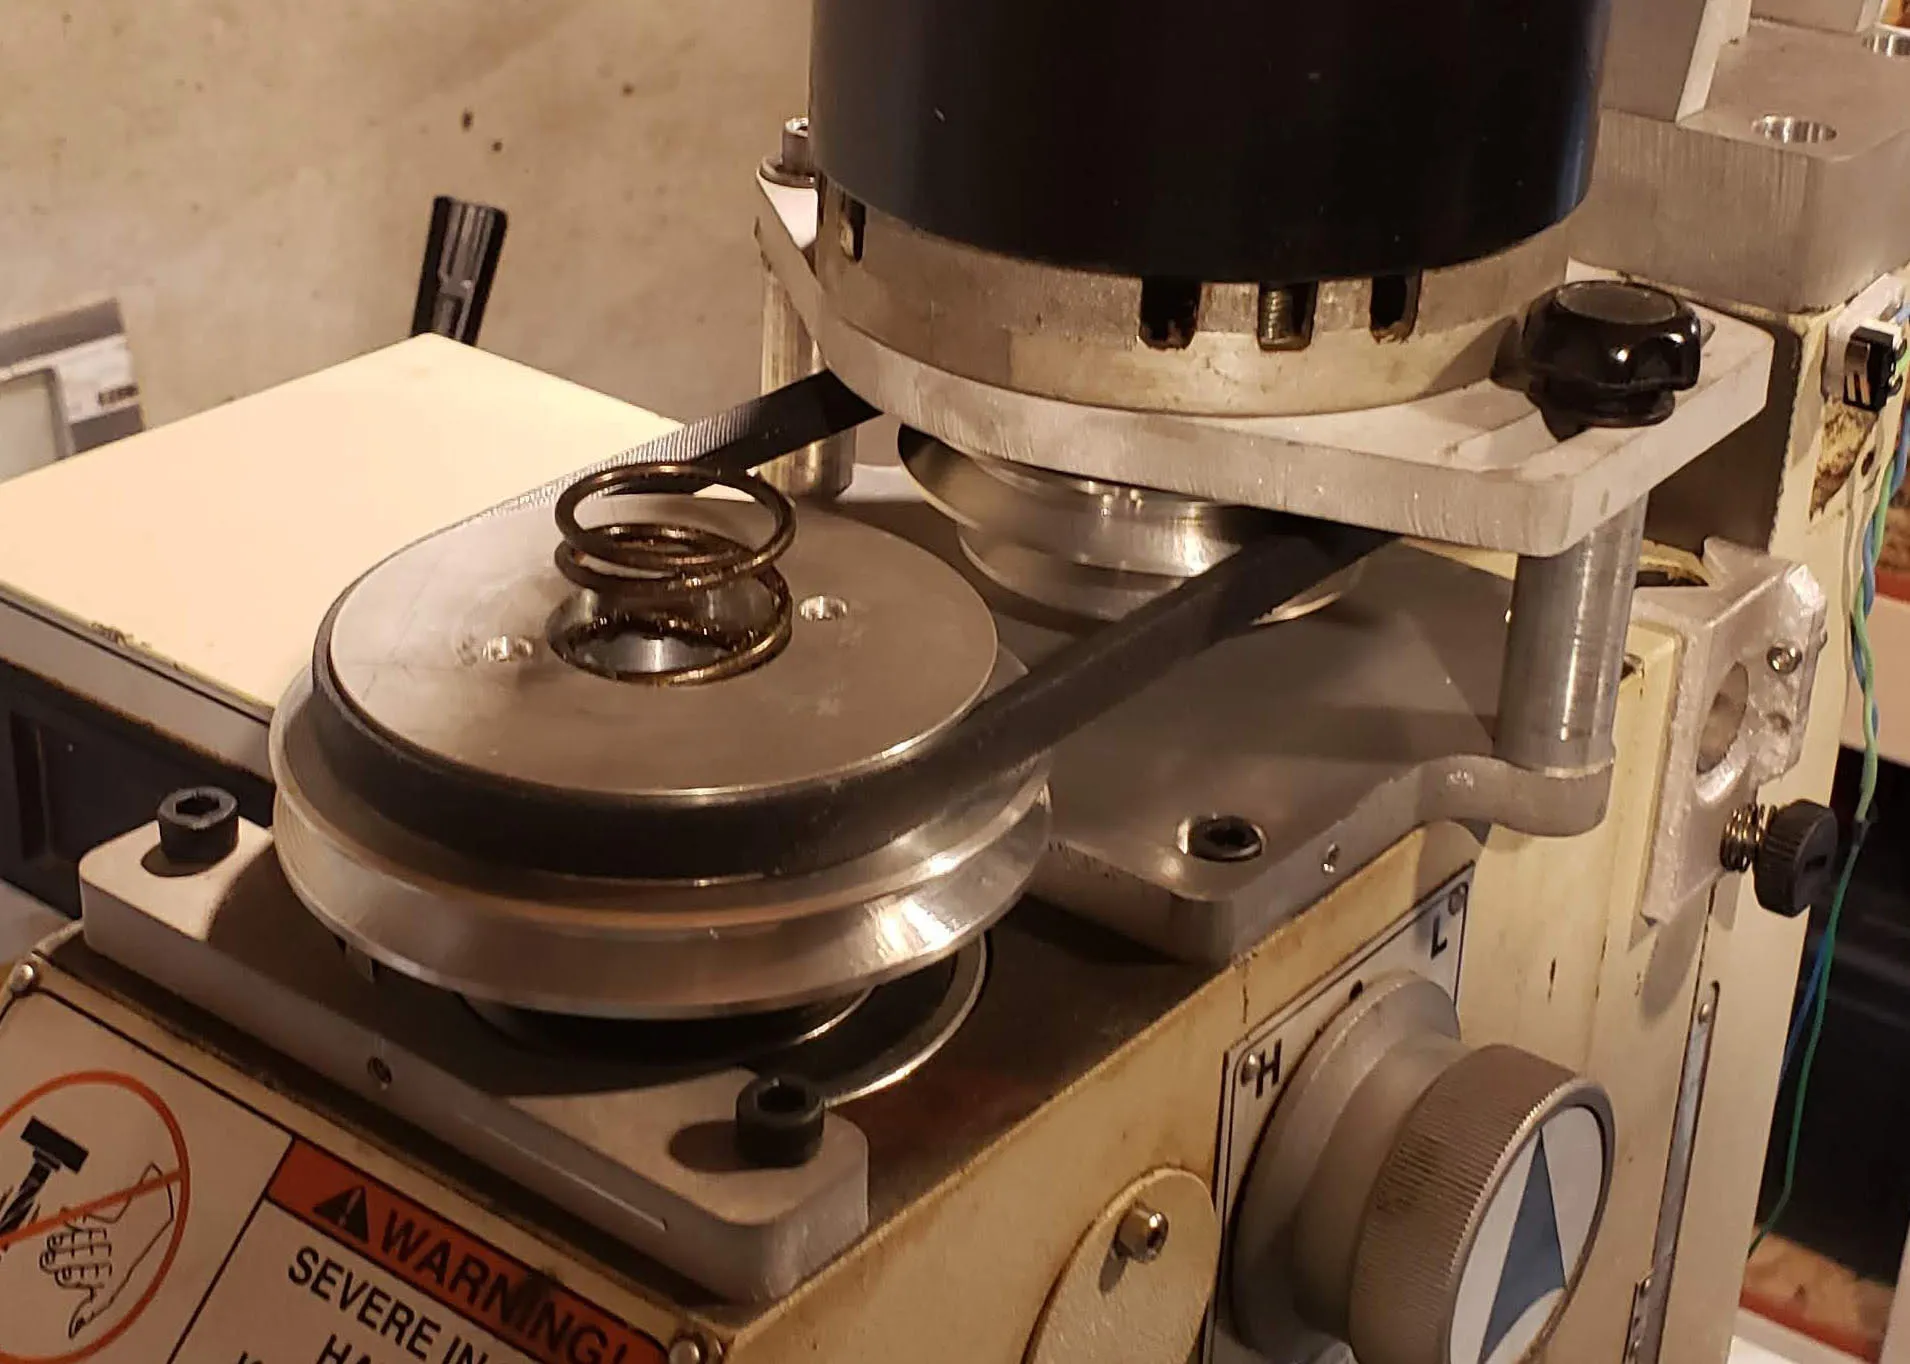
Finally, reinstall the drawbar and spindle cap. Note the small aluminum washer on the left side of the photo. This should be cut to hold down the spring. I did not model this part, but cut it so the cap fits inside the lip of the washer and the drawbar can pass through.