ESP3D WiFi Enable your 3D Printer
Let’s add WiFi to the
Hardware
I’m using the following hardware:
-
A 3A, 5V Voltage Regulator to power the ESP8266
-
On my
TronXY X5S 3D Printer .
Arduino ESP8266 Setup
- Install Arduino IDE version 1.8.8 from https://www.arduino.cc/en/Main/Software
- Open the Arduino IDE and then open the
Preferencesdialog. - In the “Additional Boards Manager URL” field, paste in:
http://arduino.esp8266.com/stable/package_esp8266com_index.json

- Click OK.
- Click
Tools -> Boards -> Boards Manager. - Search for
esp8266.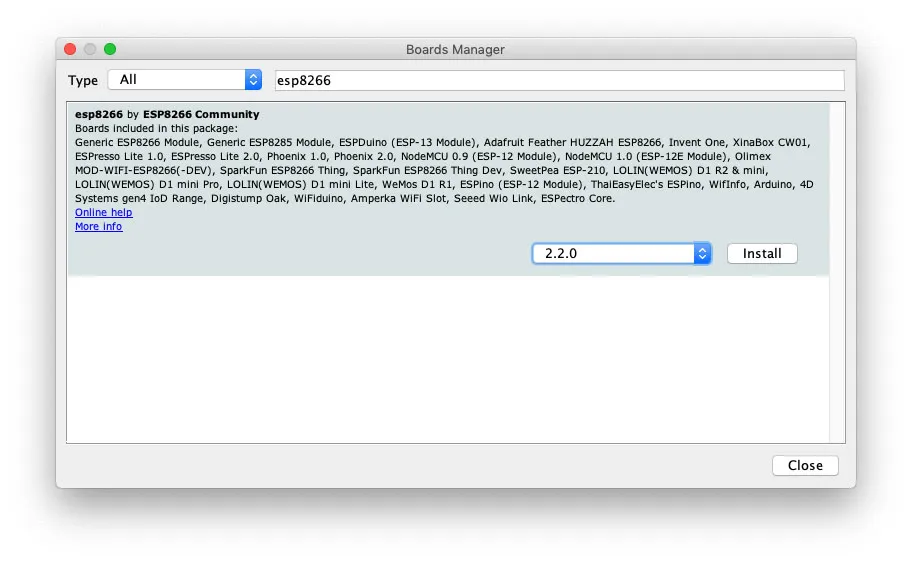
- Select version
2.4.2and click Install. - Click
Closewhen it is done. - Click
Tools -> Boardsand select the board you’re using. If you have the board linked above, you’ll want to selectNodeMCU 1.0 (ESP-12E Module).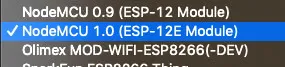
- Click
Tools -> CPU Frequencyand select160MHz.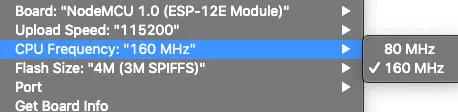
- Ensure the correct flash size is selected. Use
4M (3M SPIFFS)for the NodeMCU 1.0 board. See https://github.com/luc-github/ESP3D/wiki/Flash-Size#figuring-out-the-flash-size for more details. - Select “Erase Flash: All Flash Contents” under
Toolsto ensure the ESP8266 is fully reset when the firmware is uploaded. After the first time you upload the firmware, this can be changed toOnly Sketch.
Compiling
Get the code using Git or by downloading the zip:
Via Git:
git clone [https://github.com/luc-github/ESP3D.git](https://github.com/luc-github/ESP3D.git)
git checkout 1.0 -b release-1.0
Or via download:
wget [https://github.com/luc-github/ESP3D/archive/1.0.zip](https://github.com/luc-github/ESP3D/archive/1.0.zip)
unzip 1.0.zip
Open esp3d/esp3d.ino in the Arduino IDE and click the check mark to compile.
ch340g driver
Most Chinese ESP development boards use the ch340g chip for USB to serial conversion.
You’ll need a driver if you don’t already have it installed.
Windows may automatically detect and install the driver. If not, you’ll want to use CH341SER.ZIP, available on the manufacturer’s website:
Uploading
Plug the NodeMCU 1.0 board into your computer while holding the Flash button on the board.
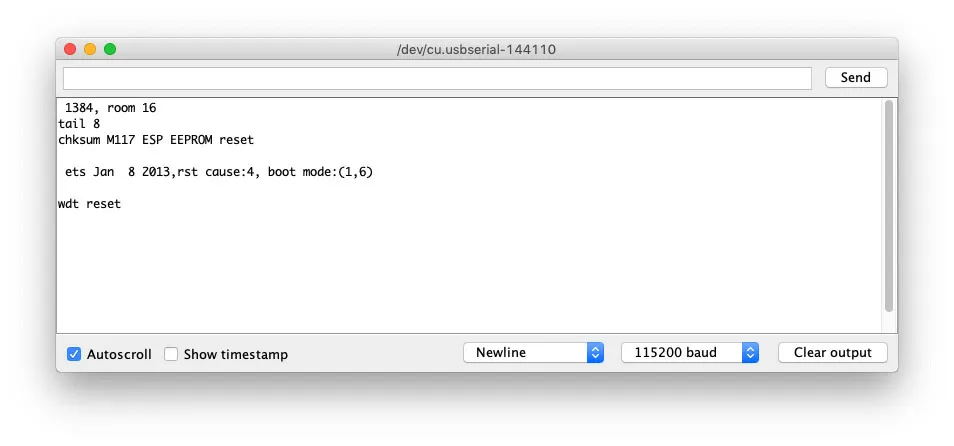
Select the correct port; on my computer, this is /dev/tty.usbserial-144110.

Click the -> arrow to upload.
The blue light on the module will flash rapidly while uploading. Wait until this stops, then wait another 60 seconds or so for the EEPROM to configure.
Now is a good time to change the Erase Flash option to Only Sketch.
Hit the RST button on the NodeMCU 1.0 board.
You should see the ESP3D network appear if you check your WiFi settings on your computer now.
Configuration
Connect to the ESP3D network from your computer. The password is 12345678.
You should automatically get a captive portal, but if not, browse to http://192.168.0.1.
If prompted, upload the 4 files in the esp3d/data/ folder.
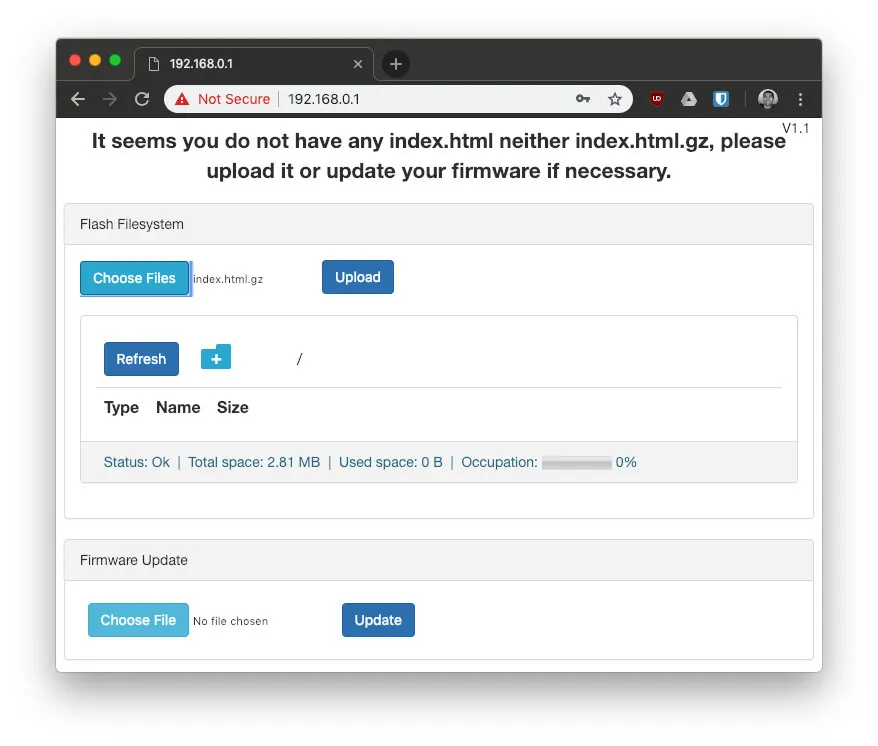
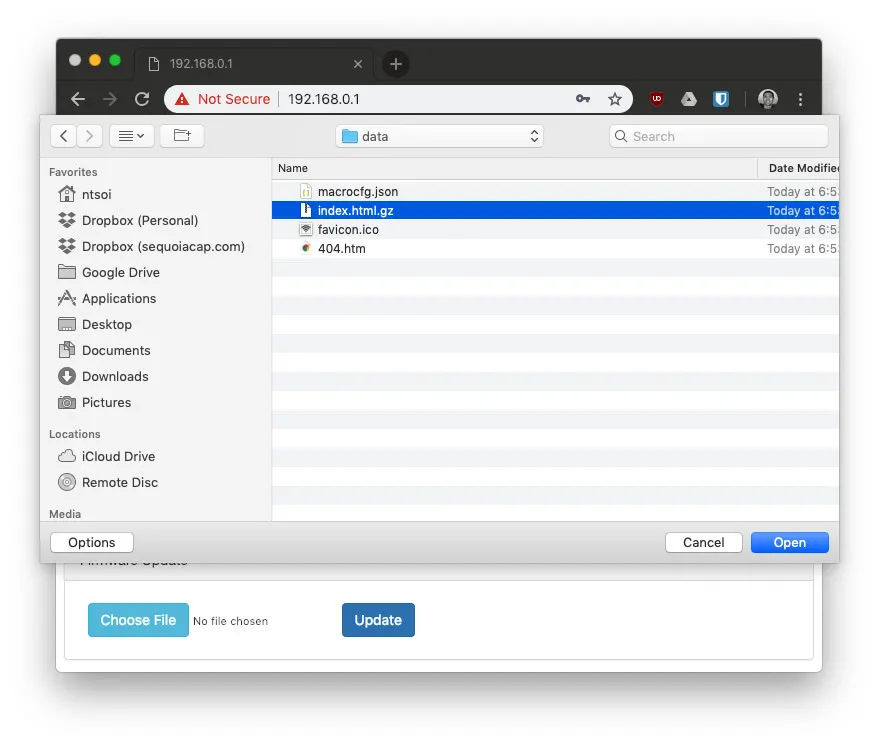
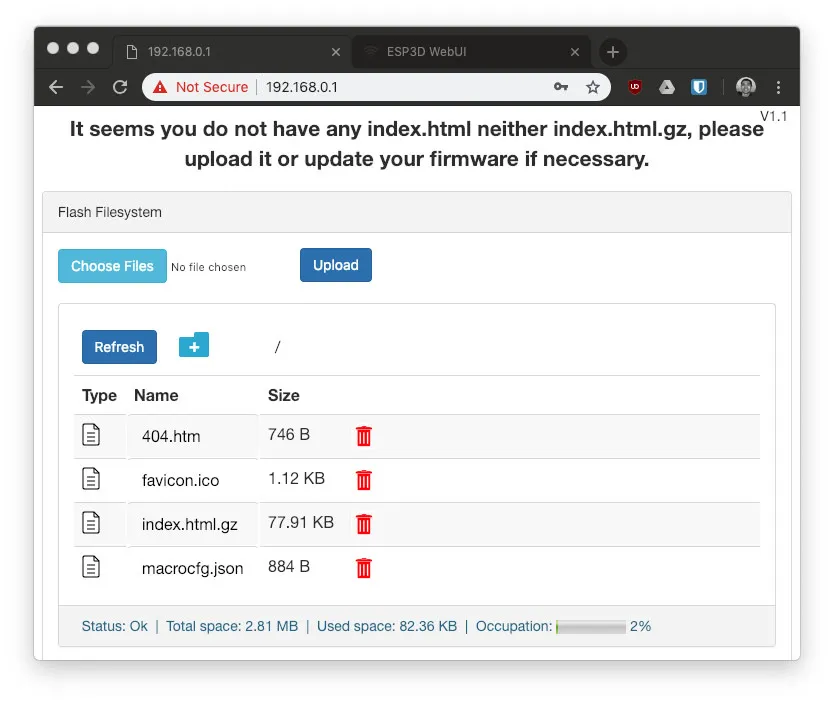
Open a new tab or refresh: http://192.168.0.1.
You should get the following configuration wizard:
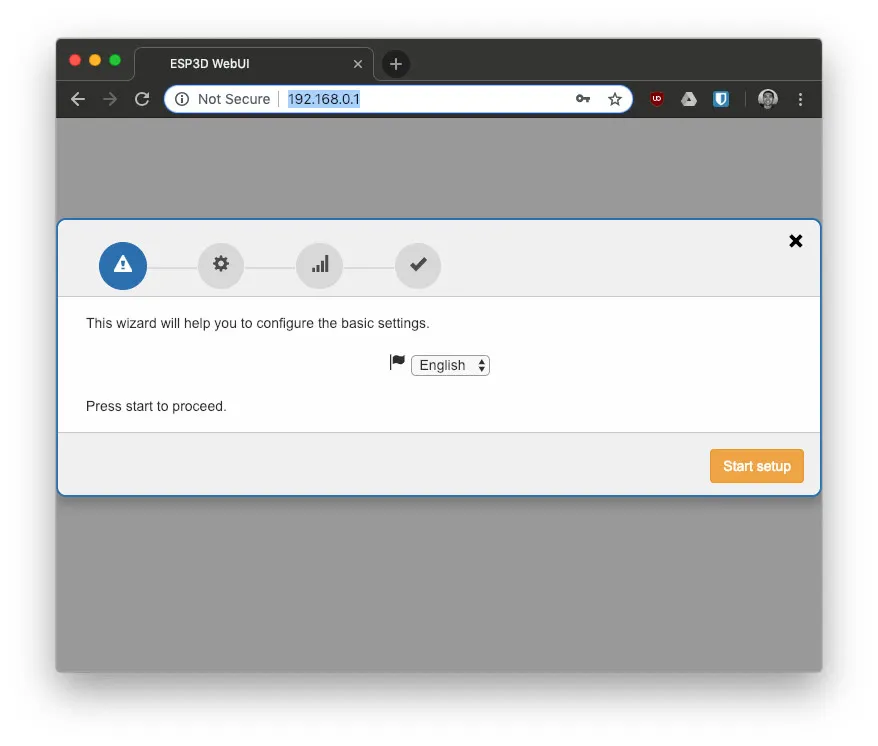
Hit continue, then set the BAUD to 115200 to match our Marlin configuration and configure your WiFi settings (I used it as a client on the WiFi network).
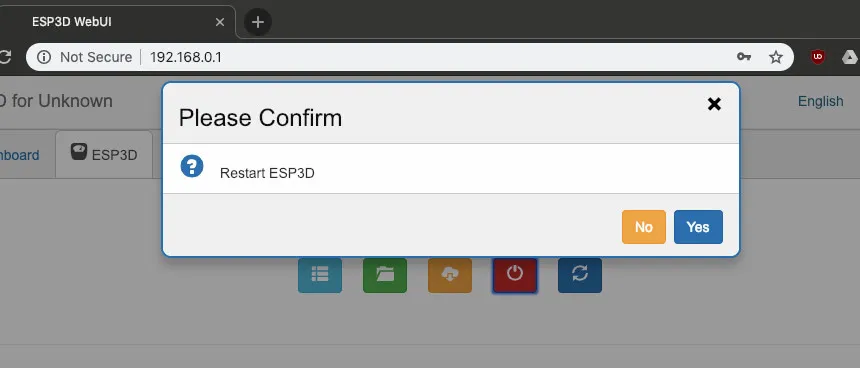
Refresh the page, close the configuration wizard, and hit restart or just press the RST button on your NodeMCU 1.0.
You can see the status of your ESP8266 by bringing up the Arduino serial monitor (Tools -> Serial Monitor) and setting the BAUD to 115200 (or whatever you’ve changed it to). You can see the IP of the device in the serial monitor or on the printer’s display (once it’s connected).
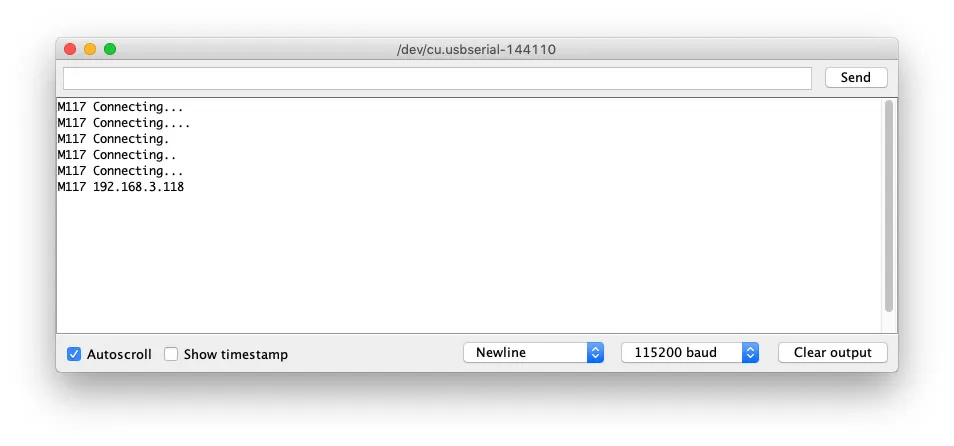
Browse to the IP displayed on the serial monitor.
Once that is working, it’s time to wire up the ESP8266.
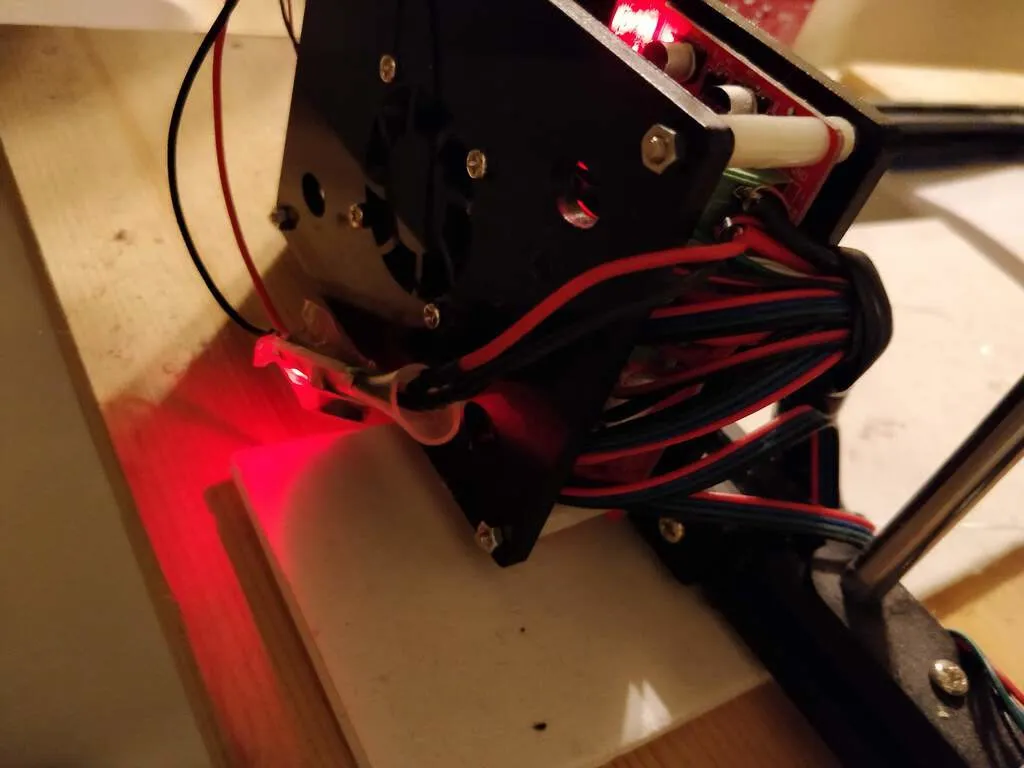
Wiring
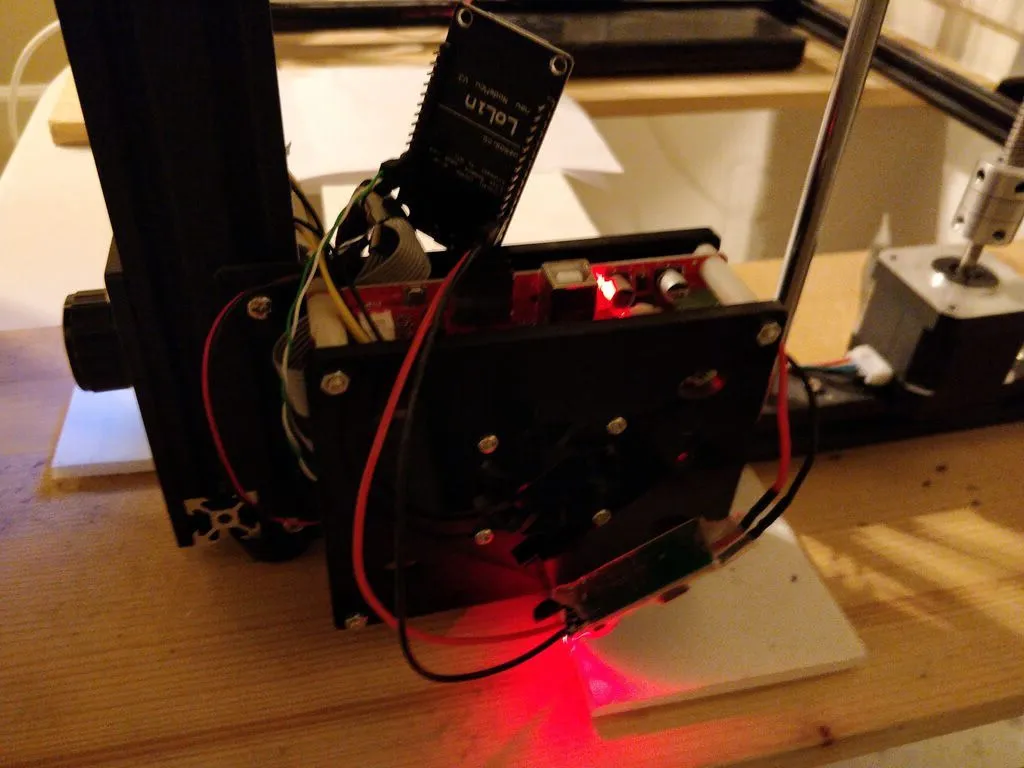
You’ll want to wire the TX / RX lines on the NodeMCU 1.0 to the TX / RX lines on the CH340G serial adapter on the TronXY. See how the white and green wires are connected here to TX/RX on the ESP8266.
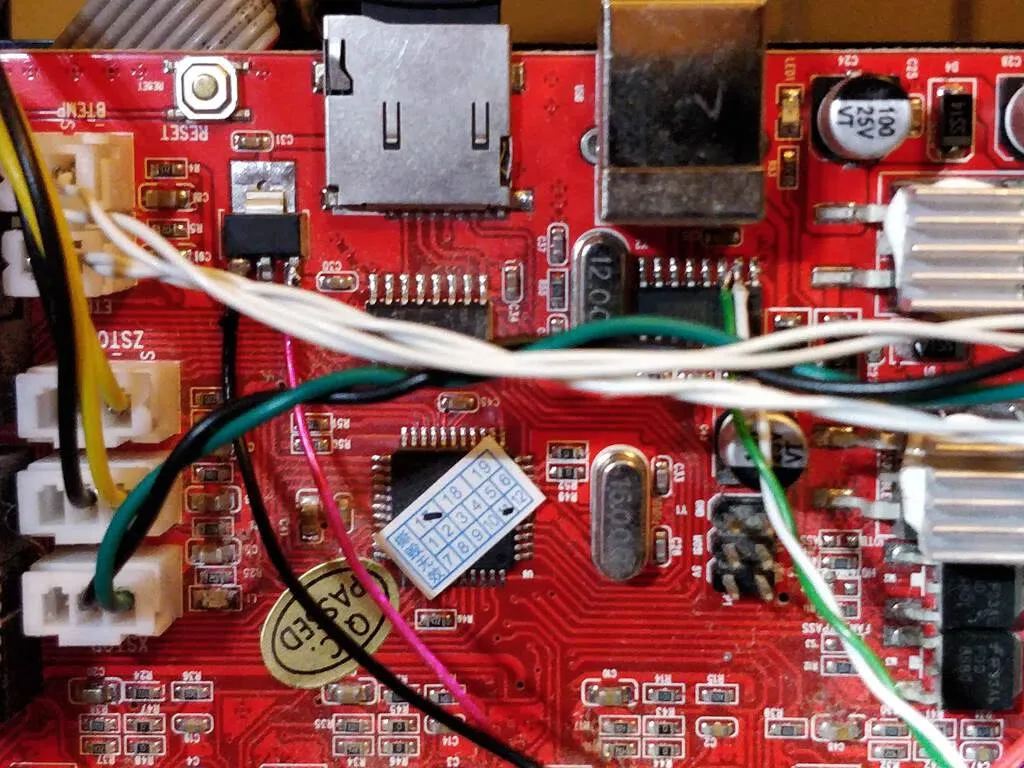
I also tried pulling 5V from the TronXY, but the ESP8266 was drawing too much current, so I had to switch to the voltage regulator. Wire the voltage regulator input to the 12V line and the output to the ESP8266.
Debugging
Enable debug mode with this change to config.h for more verbose logging.
//DEBUG Flag do not do this when connected to printer !!!
//be noted all upload may failed if enabled
#define DEBUG_ESP3D
//#define DEBUG_OUTPUT_SPIFFS
#define DEBUG_OUTPUT_SERIAL
//#define DEBUG_OUTPUT_TCP