Ebay HC-05 Bluetooth Setup Guide
-
First, we’ll change the baud rate as described by Oscar. Use this link if you’re using an Arduino to change the baud.
-
Using my cool CP102 USB to UART adapter, I tried following the directions from painless360, summarized below, but I couldn’t change my com port. Turns out you need to run Arduino as an administrator to change the COM port. Also those commands are for the new HC-06.
-
Here is another great guide I used, specific to the HC-05 I ordered.
-
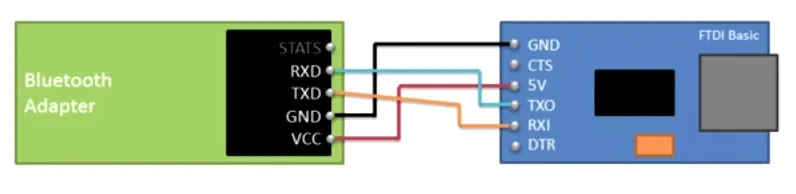
The HC-05 is different from the HC-06 in 2 respects, it requires the button be depressed when powering on to go into AT mode and it wants both NL and CR sent with the command. Also, my UART to USB adapter has the option of 3 or 5v. 3v didn’t work, so I had to use 5v.
-
Plug it in
-
Open the Arduino Studio
-
Open the serial Monitor
-
Pick “Both NL & CR”
-
Set serial monitor BAUD to 9600
- NOTE: Not sure why this is, but my board wouldnt work unless I set the BAUD to 38400. If the following doesnt work, try the
ATcommand with every BAUD until you find the right one. - Also note, the
AT+UARTcommand, which returns the BAUD, showed that it was running 9600,0,0. Edit: This is for non-AT mode.
- NOTE: Not sure why this is, but my board wouldnt work unless I set the BAUD to 38400. If the following doesnt work, try the
-
Type
AT- It should say “OK”
-
Change BAUD enter
AT+UART=115200,1,0where 1 is the stop bit and 0 is the parity. On the HC-06 the command is justAT+BAUD8More documentation for the HC-05 is available at iteadsstudio.com-
It should say
OKon the HC-05,OK115200on the HC-06 -
This will change the BAUD in bluetooth mode, not the baud in AT mode, so your connection should remain open
-
-
Change the name, on the HC-05
AT+NAME?doesnt seem to work- For the HC-06:
AT+NAMEputhtenamehere, e.g.AT+NAMESuperCopter
- For the HC-06:
-
Check the pin with
AT+ PSWD?and set it withAT+ PSWD=0000where 0000 is your pin- Use
AT+PIN1234for the HC-06
- Use
-
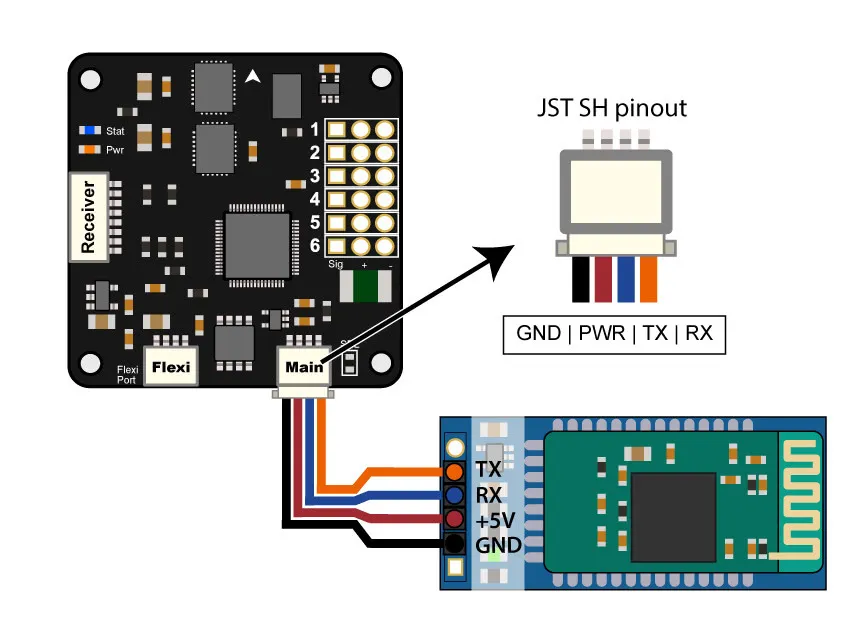
If you’re using a cc3d like me, here’s how you wire it onto your copter
-